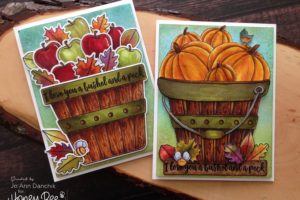
Creative Sundays With Jo Ann: Celebration Bunny
I save bits and pieces of wrapping paper. I am just sure that I will be able to use them for something! Well, I finally found a use for them. I was looking through my pictures and found this card. It was created to celebrate Melissa Hewitt’s birthday last New Year’s Eve. I realized that I hadn’t had an opportunity to show how it all came together so I thought that I would share it here today. As I was making this card I was also thinking about my mother’s birthday, which is on the 31st as well. We used to tease her and tell her that she should celebrate like it was a national holiday! Full transparency, I was also singing Killer Queen:
She keeps Moet et Chandon
In her pretty cabinet.
“Let them eat cake” she says,
Just like Marie Antoinette
Be honest…you are singing it now too! LOL
____________________
(Compensated affiliate links are used with NO cost to you. Products highlighted in teal are active links. All the supplies used are also linked to multiple shops at the end of the post. Thank you for your support!)
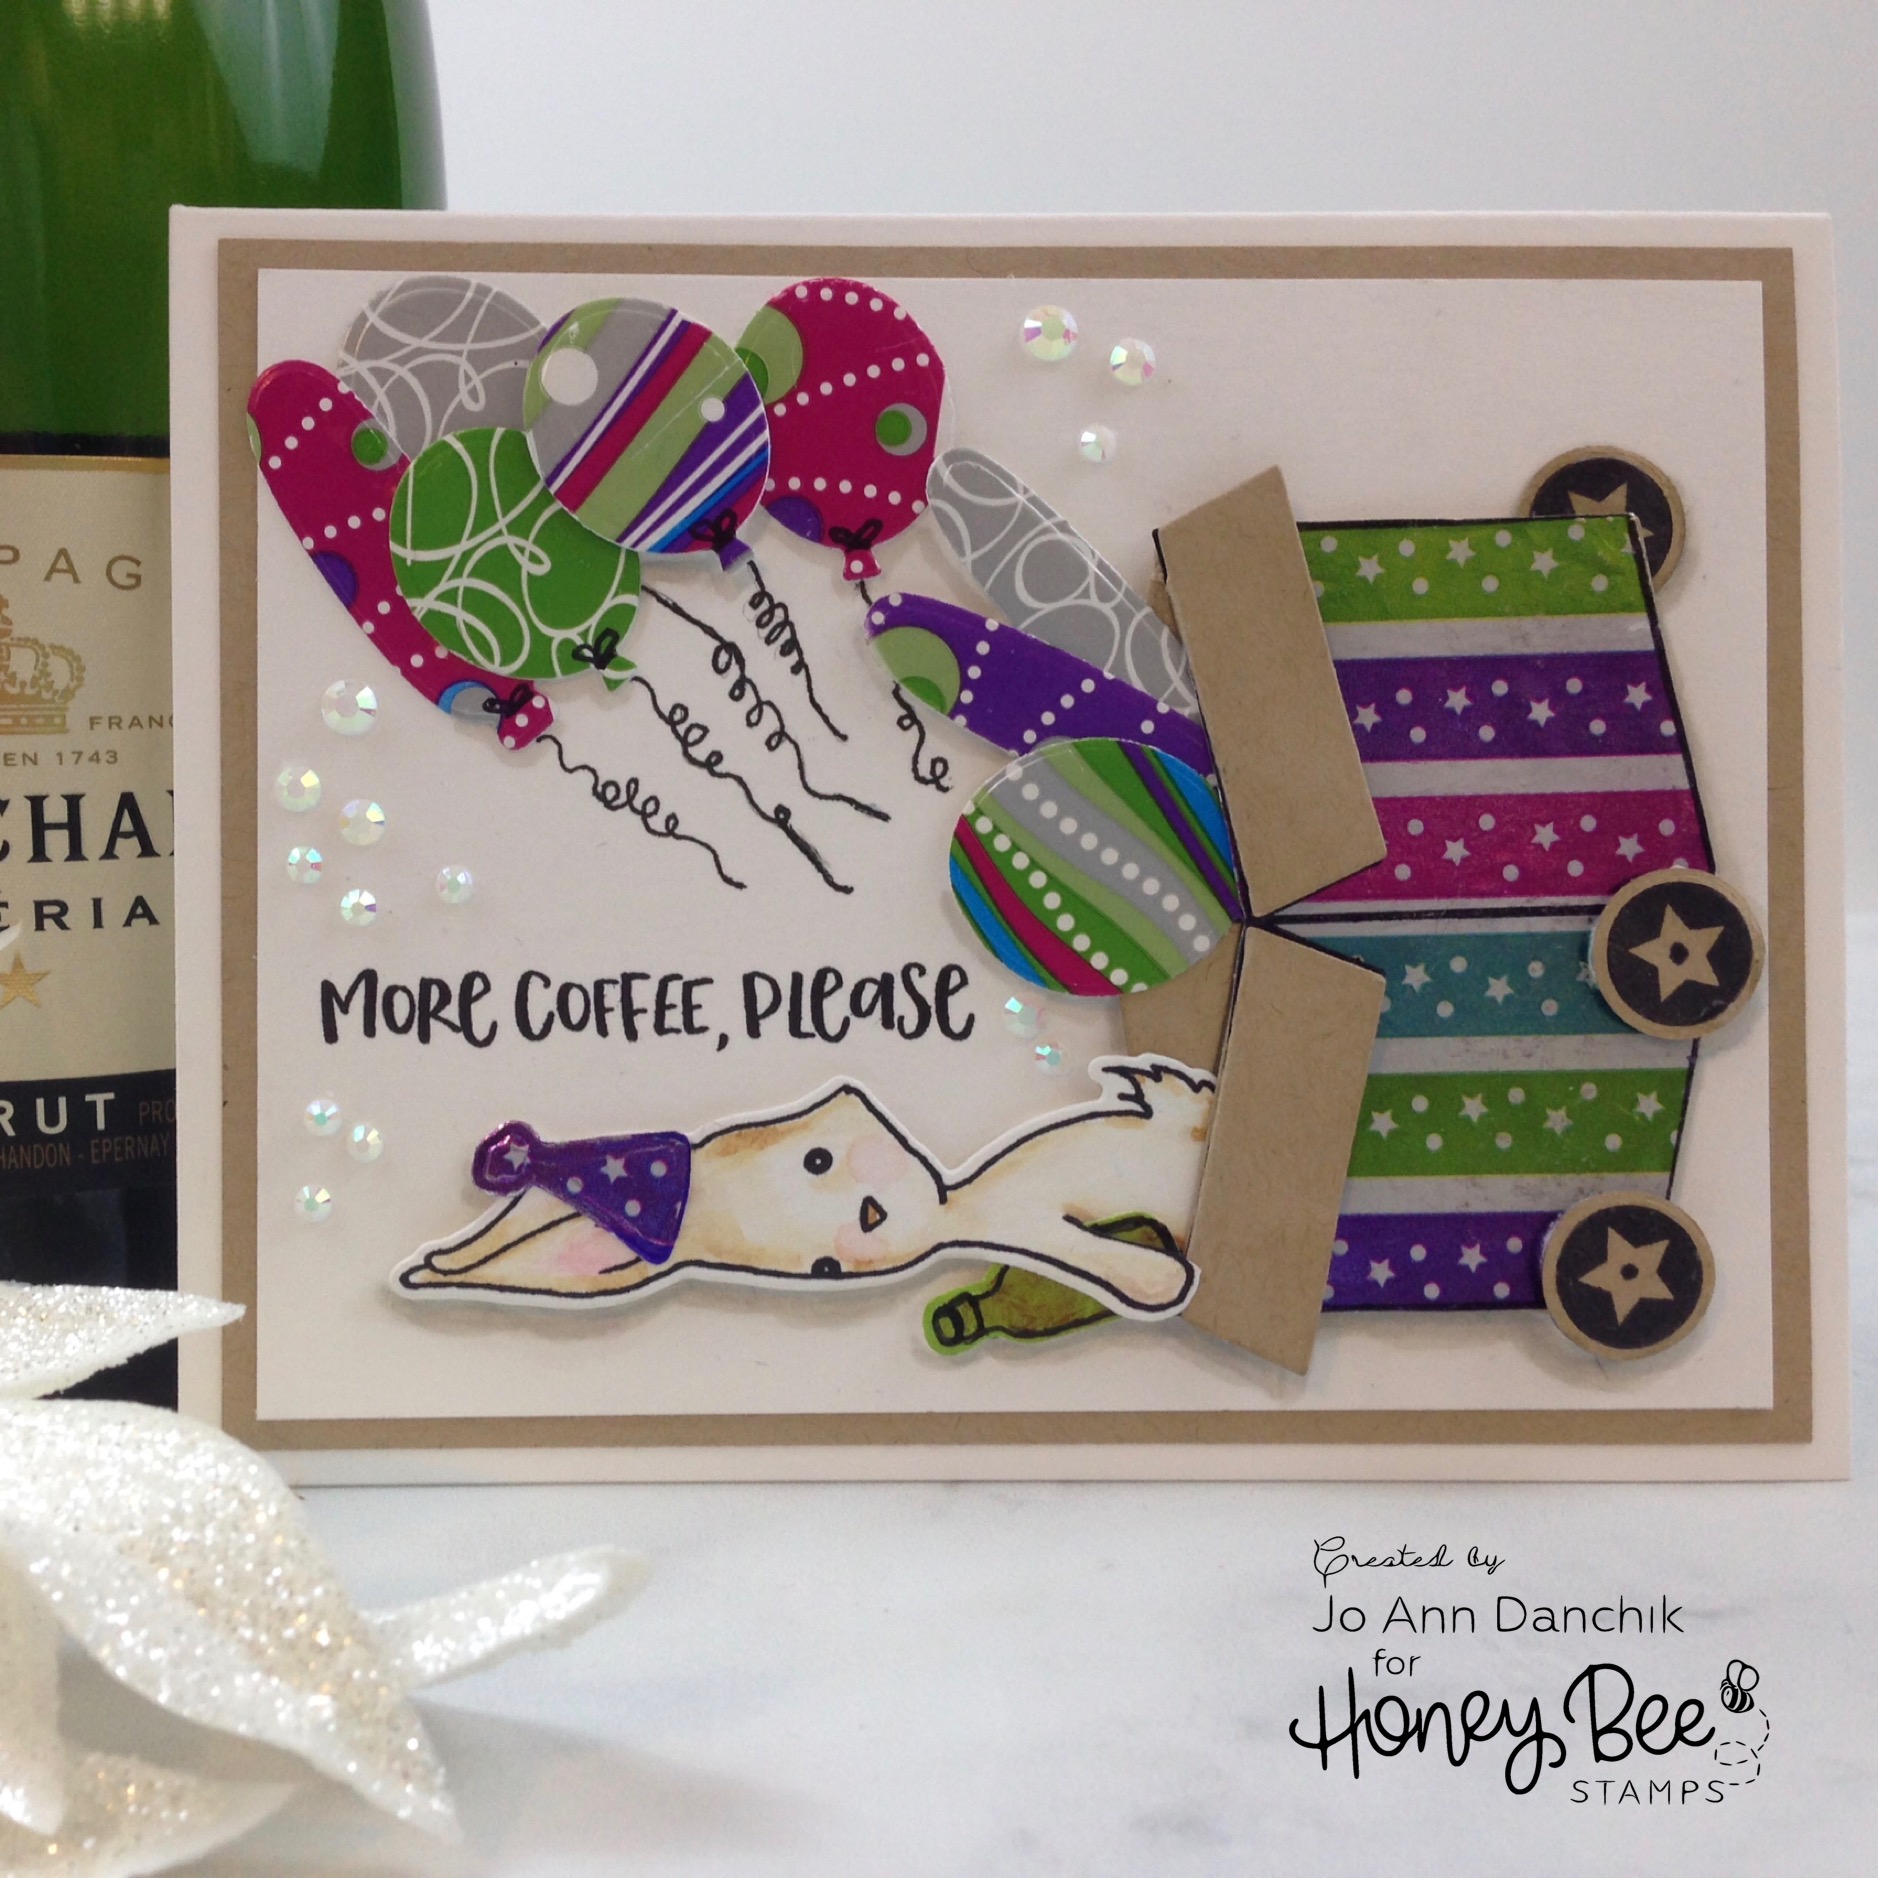
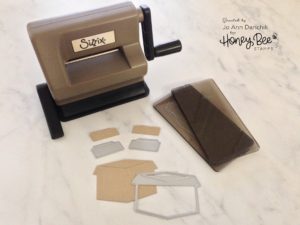
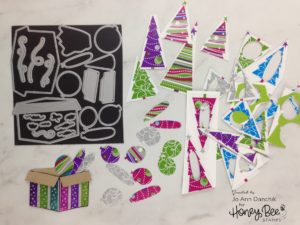
I started this card by die cutting the box, from the Celebration Box Die Set, from some Kraft cardstock. It was actually the first time that I had used my Tim Holtz Sizzix Sidekick. Still sitting on my desk…still use it all the time!
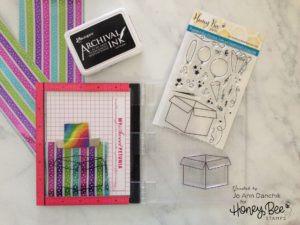
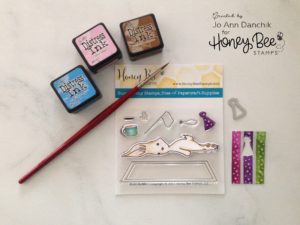
I stamped the box, from the Celebration Box Stamp Set, onto some shiny wrapping paper. I used Archival Ink because of the slick surface. I fussy cut it with my EK Success Cutter Bee Scissors and glued it to the kraft paper with Ranger’s Multi Medium Matte.
I thought that the circle with a star center, from the Coffee Break Stamp Set, would make perfect wheels for the box. The coordinating Die cuts the shape with a thin outer circle. I flipped it over to the Kraft side and added it back to the circle to make it look like a wheel rim.
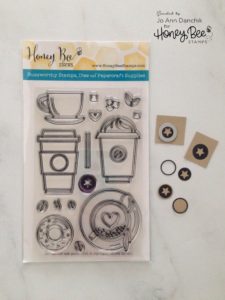
I stamped the bunny and coffee mug, from the Blah Bunny Stamp Set, onto Tim Holtz Watercolor Cardstock. (I just love Blah Bunny…he cracks me up!) I painted them using Distress Inks. The hat was stamped onto wrapping paper. They were all cut out using the coordinating Die Set. I actually didn’t end up using the coffee mug. I thought that it would be funnier to use the small bottle from the Swimming By Stamp Set.
To make the wrapping paper sturdier I glued it to a piece of #80 Neenah cardstock, using Collage Medium and a Collage Medium Brush. I then cut multiple balloons using the coordinating Celebration Box Die Set. The kraft flaps were attached to the box, with small pieces of Scotch Foam Tape under each to prop them up and give them dimension.
I assembled the card by gluing the wheels to the box. The bottle and hat were glued to the bunny and then slid inside the box. Scotch Foam Tape was added to the back for dimension. The balloons were added to the card front, spilling out of the box and floating upwards. Some are fla
t and some have foam tape behind them. The sentiment is from the Blah Blah Blah Stamp Set. There are strings included in the stamp set but I opted to draw them in because I forgot to stamp them before I had already attached the balloons with dimensional tape. I scattered a few Moonlight Rhinestones around the card for added sparkle and shine. The panel was added to a piece of Kraft cardstock and then to a #110 Neenah Classic Crest landscape folded cardstock base, using a Kokuyo Dot Tape Liner. For a finishing touch I added cast shadows underneath the balloons, the bunny, and the box using Copic W0, W1, and W2 markers.
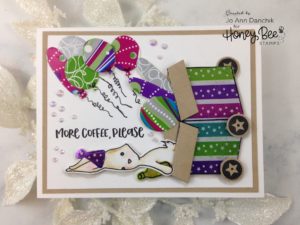
This really could be used for any Celebration or Birthday card, especially for someone who is “advanced” in age. It would be funny for a special 50, 60, or 70th year celebration. The “Hang In There Friend” and “That Just Happened,” sentiments would work perfectly! It also works for a “Sorry I Forgot Your Birthday” card.
So…when your significant other asks why you have a box of scrap wrapping paper you can answer confidently that you need it to make a card. One down…!
As always, thanks for joining me today.
Joyfully, Jo Ann
Supplies used:
The products that I used are listed below in compensated affiliate links. You can click the icon of your choice, below the product picture, to go directly to your favorite shop. There is NO additional cost to you when using these links. Thank you for your support!