Creative Sundays With Jo Ann: For The Record
This past week has been a flurry of activity here in my studio and at Honey Bee Stamps. It has been fun seeing the creative designs that the rest of the Design Team shared. If you haven’t had a chance to see or shop the new Spring Release, you can find it here.
____________________
Mother’s Day is next Sunday and it is that special time of year where we pause to honor our mothers. Remember the days of our youth? We lovingly cut, glued, and heavily glittered a card out of construction paper. Our moms still love our homemade creations. It’s not too late to create something special to let them know how much they mean to us. Most of us are a little better at making cards now so get out your supplies and let’s get started. LOL
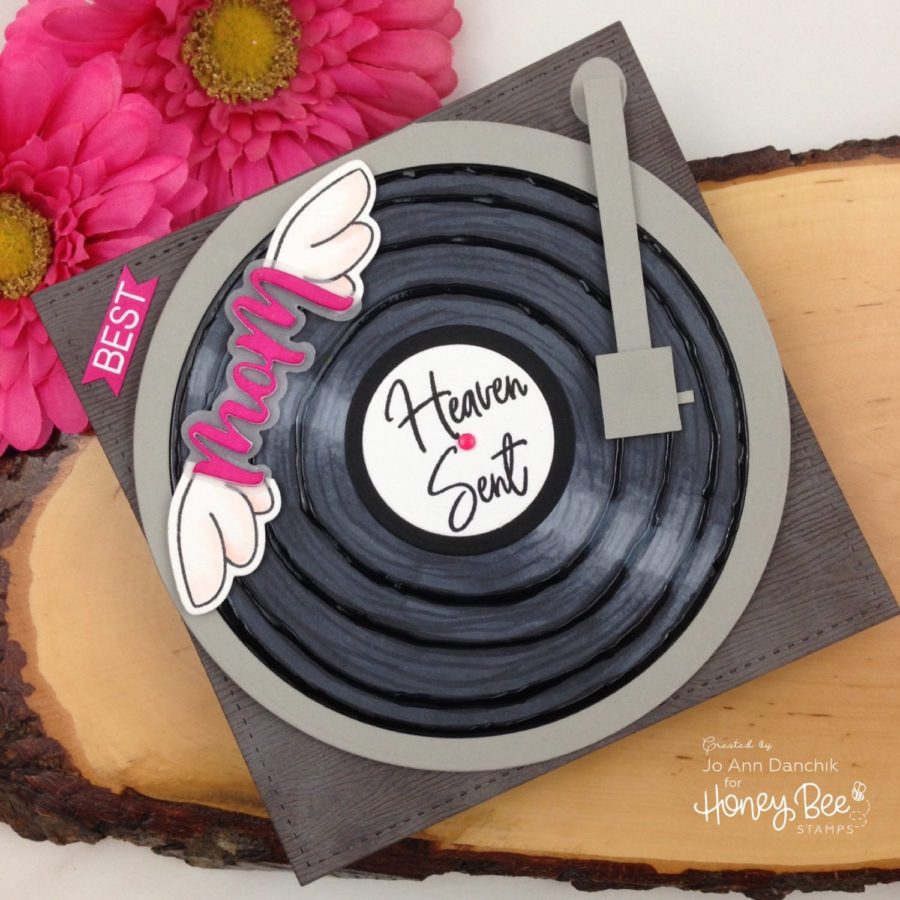
When the new donut dies came out last week, one of my sisters was brainstorming with me for some other uses for a round card. This was one of many fun ways that we came up with to use this Donut Card Die. Thanks sis!
____________________
(Compensated affiliate links are used with NO cost to you. Products highlighted in teal are active links. All the supplies used are also linked to multiple shops at the end of the post. Thank you for your support!)
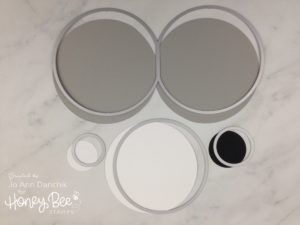
I cut the card base out of gray cardstock, using the Donut Card Die Set. I cut two of the large white circles, and one of the smallest circles, from #80 cardstock. The second smallest circle was cut from black cardstock.
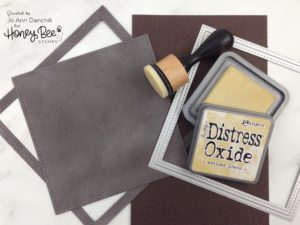
I cut a stitched frame panel, using the largest of the dies from the Double Stitched Square Die Set, from woodgrain paper. I wanted the woodgrain to show a little more so I went over the top lightly with Antique Linen Distress Oxide Ink. The paper that I used is from Altenew. I don’t have a link to that paper but I have listed two other companies that offer a white woodgrain which you can color with various shades of Distress Inks.
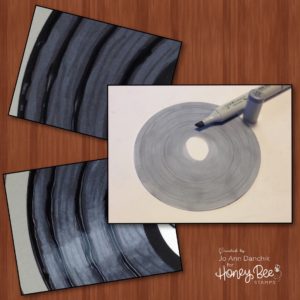
I started with one of the large round white pieces to make the record. I penciled in some circles, by tracing around various round dies, as a reference for where I wanted to denote different soundtracks. I saturated the background with a C4 Copic marker. I left two lighter streaks to give the record the look of being shiny. (Colors used: C4, C6, C8, C10, C100.)
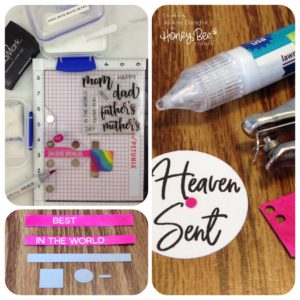
I colored some cardstock using a RV09 marker and stamped the sentiments, from the Best Parent Stamp Set, onto it. I have been using the Misti Creative Corners a lot to help me line up the sentiments. It works beautifully. I stamped it with Versamark Ink and embossed it with Hero Arts White Detail Powder. Be sure that the Copics have dried and use an Embossing Powder Tool to avoid stray powder.
I also cut out a couple of basic shapes to make the needle and arm mechanism for the record player. For the record label I stamped a sentiment from the Heaven Sent Stamp Set. I punched two tiny pink circles for the spindle, using a hole punch.
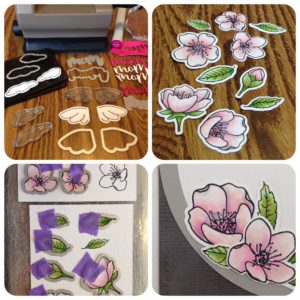
I stamped the angel wings, from the Pinky The Pig Stamp Set, using Simon Says Stamp, Copic friendly, Intense Black Ink. They were colored with a R000 Copic marker around the edges, faded out with a Colorless Blender, and cut with the Coordinating Die Set. I cut four sets of the Mom sentiment from the pink colored scrap and white cardstock, and one shadow die from vellum paper, using the dies from the Perfect Parent Die Set.
The flowers are from the new Spring Blossoms Stamp and Coordinating Die Sets. They mix and match perfectly with the smaller blossoms from the Sweet As Honey Stamp and Coordinating Die Sets. I used both sets.
They were stamped with Ranger Archival Ink, on Tim Holtz Watercolor Cardstock, and colored with Zig Clean Color Real Brush Markers and a Pentel water brush. (Colors used: Pale Pink 028, Light Pink 026, Pale Gray 097, Pale Green 045, Mid Green 046, May Green 047) I also cut some clouds, but didn’t end up using them.
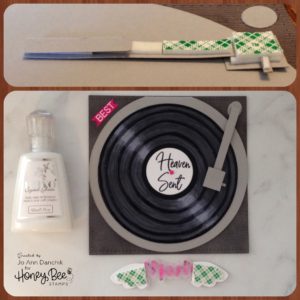
The folded gray card base was glued to the woodgrain base using a tape runner. The record and label were taped on as well. To assemble the needle arm, I added Scotch Foam Tape behind the square, added the small handle and the long strip, then added another layer of tape. A small gray strip of cardstock was added on the other end as you can see the back of the mechanism when the card is open. The oval shape was glued to the woodgrain base. Do NOT glue the arm to the oval shape or you will not be able to open the card.
The Mom die cuts were stacked, glued, and added to the vellum shadow. The wings were then glued on, hiding the adhesive behind the lettering. Dimensional tape was added behind the wings. Nuvo Crystal Glaze was added to the record grooves and the spindle.
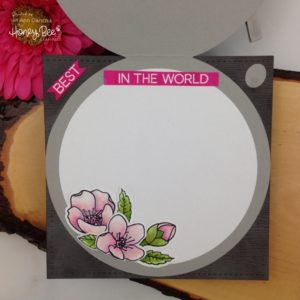
The rest of the sentiment, and a few flowers and leaves, were glued to the inside of the card. The flowers help to keep this card feminine. I kept the inside pieces flat so that the card would close properly.
Here’s an important part…I added the needle arm and the wings pieces to the record while the Nuvo Crystal Glaze was still wet. It smooshed the ridges down and acted as an additional glue. Because the wings are dimensional, the velum shadow does not touch the wet glaze.
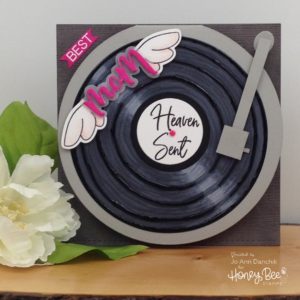
This card would work beautifully for a masculine card as well. Dig through your stash to find fun sentiments for the record labels. You could match the song title to the appropriate era of the birth year for a fun, personalized birthday card.
Thanks for joining me today on another creative journey.
Joyfully, Jo Ann
Supplies used:
The products that I used are listed below in compensated affiliate links. You can click the icon of your choice, below the product picture, to go directly to your favorite shop. There is NO additional cost to you when using these links. Thank you for your support!

