Creative Sundays With Jo Ann: Tickled Pink
I’m not much of a frilly kind of gal. I have had my nails beautifully manicured in the past, when I worked as management at a popular specialty cookware store and was in the public eye. I found them hard to maintain as I am a messy crafter and always seem to be up to my elbows in dyes, inks, paints, and clay. Gardening takes a toll on my nails as well. The manicures became a thing of the past when I stopped working. I admire the artists that I see with fingernails that are beautifully shaped and colored. If I ever figure out how to do videos I may have to reconsider. For the present, the closest that I get to a bottle of nail polish is with this fun and popular Shine On Stamp and Die Set from Honey Bee Stamps!
____________________
(Compensated affiliate links are used with NO cost to you. Products highlighted in teal are active. All the supplies used are also linked to multiple shops at the end of the post. Thank you for your support!)
Today’s card starts with the Shine On Stamp and Die Set. I stamped several bottles using Simon Says Stamp’s Intense Ink on #80 Neenah Classic cardstock. They were cut using the coordinating dies. I am still embracing the Therm O Web purple tape when I die cut. It really works well and I can use it multiple times.
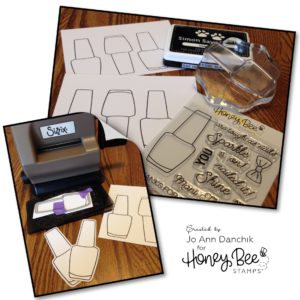
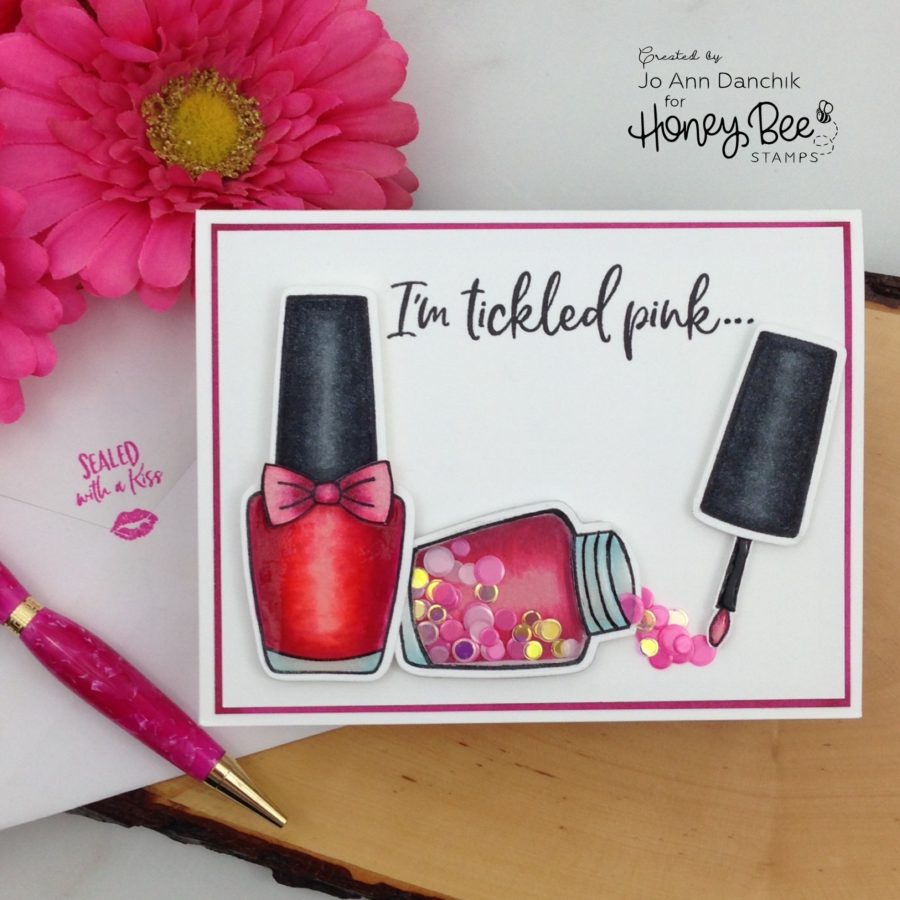
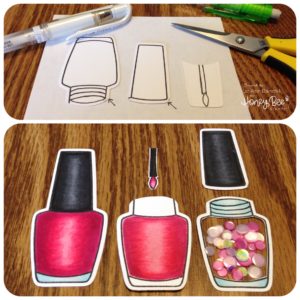
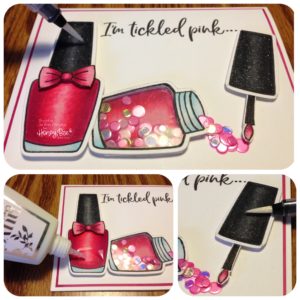
There is a larger die set that is intended to be a shaker card (Nail Polish Bottle Dies), but I wanted to convert the smaller image to an open bottle and a shaker so I pulled out my pencil, eraser, and EK Success Cutter Bee Scissors and got to work. I cut down three of the extra stamped images to form an open bottle, a backing to the bottle, and a separate top. I drew lines to form the top of the bottle and drew a brush applicator. I used a Copic 0.3 Black Multiliner to outline my pencil marks. I found it much easier to use a Uni Ball Signo White pen, to cover the extra stamped lines, than to try to mask them out before stamping. (see arrows in upper pic)
I cut out the inside of one of the bottle images to form a shaker card. The images were colored with Copic Markers. (Bottle: RV11, RV14, RV17, RV19) (Glass: B0000, B00, B01, N0) (Cap: N4, N6, N8, N10, 100)
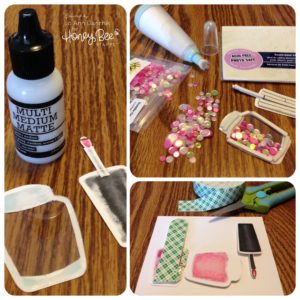
A piece of acetate was cut, using the Shine On Die, and glued to the open piece using Ranger Multi Matte Medium. The brush was glued to the cap.
Because the edges were very narrow, I used Darice Thin Foam Strips to build the shaker base. (When I find these strips in stock, I buy a lot of them!) The inside edges were dusted with an EK Success Powder Tool to help make the sides of the strips less sticky and to keep the sequins from sticking to it. I used the same strips on the cap and brush. The new Bubble Gum Confetti Mix was added.
The backing was added to the shaker. I usually add liquid glue to the foam. This allows me to move it around a smidge to line up the backing properly. Two layers of Scotch Foam Adhesive were added to the back of the full bottle to make it the same height as the other pieces.
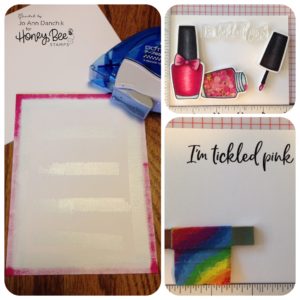
The pieces were laid out in the Misti to figure out the placement of the sentiment. The sentiment is from the Ham It Up Stamp Set.
For a layered look, I colored the edges of another piece of #80 cardstock with the RV19 Copic marker. Everything was layered together, and then added to a #110 Neenah Cardstock card base, using a Kokuyo Tape Runner.
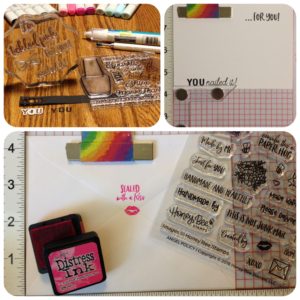
The sentiment inside the card is also from the Ham It Up Stamp Set. The sentiment on the bottom is from the Shine On Stamp Set. The word “you” was cut from black cardstock using the coordinating Die Set. I really find it easiest to line up the sentiments using the Misti Creative Corners. They are straight…everytime!
For the envelope I stamped a sentiment and lips, from the Angel Policy Stamp Set, using Picked Raspberry Distress Ink.
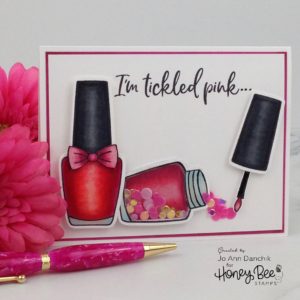
Everything was adhered to the card front. I added additional sequins, using a Jewel Picker and a Lawn Fawn Glue Pen, to give the illusion of the nail polish spilling from the bottle. A bow, from the Shine On Stamp Set, was stamped, cut, colored and added to the bottle using foam adhesive.
I added Nuvo Aqua Shimmer Glitter Gloss to the bottle caps and the bow. Nuvo Crystal Glaze was added to the glass bottle on the left and to the top and bottom of the shaker bottle. The glaze made the full bottle look much darker, almost red. It’s difficult to see in the pics, but the card sparkles and shines in real life.
This is such a fun set. There are so many things that you can do with it. I hope that this gives you some ideas on how you can make small, easy changes, to make it unique.
Thanks for joining me today on this creative journey!
Joyfully, Jo Ann
Supplies used:
The products that I used are listed below in compensated affiliate links. There is NO additional cost to you when using these links. Thank you for your support!
SaveSave

