Creative Sundays With Jo Ann: Holiday Country Wreath
Today’s card is showcasing an older stamp set from Honey Bee Stamps, but I have also included two sneak peaks from the new DEERLY LOVED Release…which will go live tomorrow!
There are 44 different images in the Country Wreath Stamp Set. With this varied selection of blooms and foliage you can make a wreath for any season or occasion.
____________________
(Products highlighted in teal are active links to the shop.)
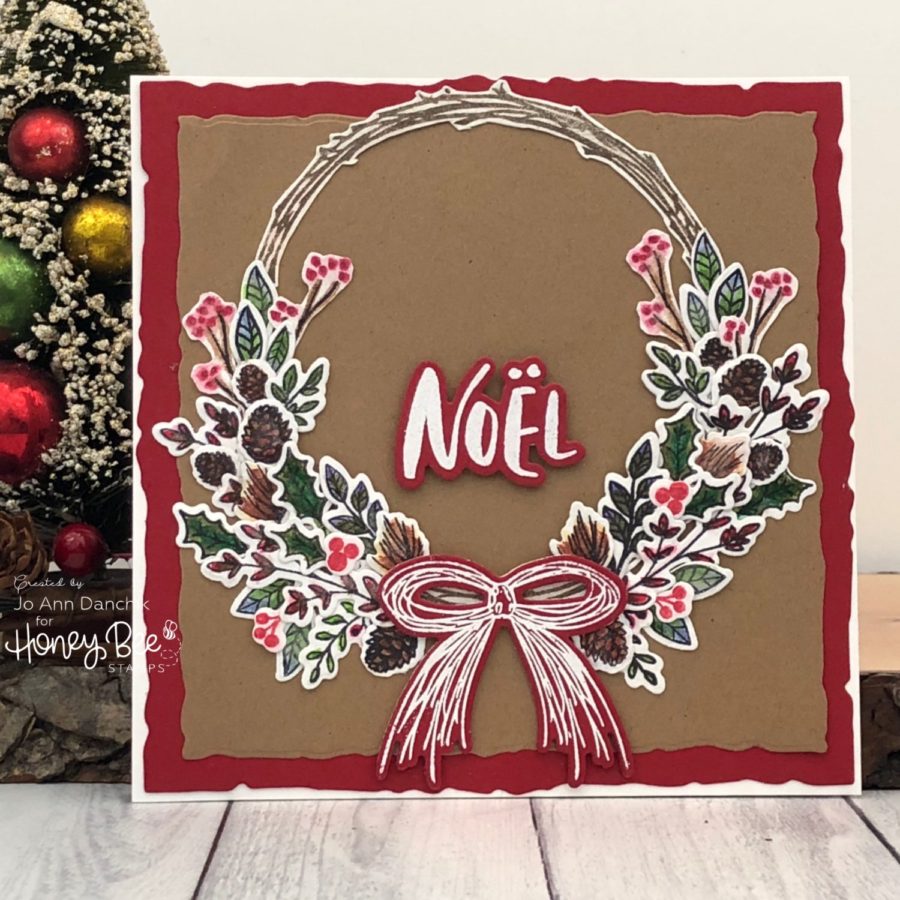
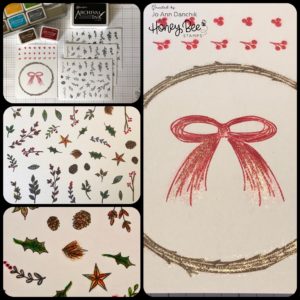
I didn’t know how many pieces I would need so I stamped three full sheets of images onto Distress Watercolor cardstock, using Ranger Black Archival Ink, to give me plenty of pieces to play around with. The wreath and bow were stamped using Wendi Vecchi Potting Soil and Red Geranium ink.
I used Arteza Real Brush Pen markers to color the images. (As of this posting there is a fantastic price on the 48 and 96 set of markers on Amazon. I have them linked at the end of the post.)
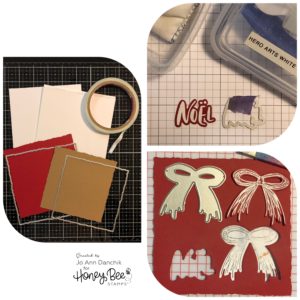
When the pages were dry I went over the images with several coats of Clear Wink of Stella. It was hard to photograph but you can see some of the sparkle in the bottom left picture and on the wreath and bow.
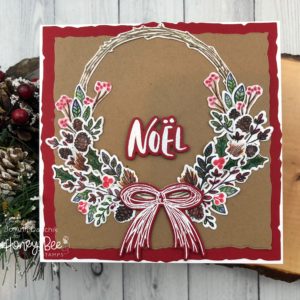
All the images were cut using the coordinating Country Wreath Die Set and Purple Tape. To assemble the wreath, I started by adding a small amount of ink to the center of the bow. I only put small dots of Gina K. glue on the bottom of each piece as they were added. This allowed me to slide the next piece underneath. Using wet glue also allows extra time to move things around. It had been my intention to fill the entire wreath but I liked the results so I put the tweezers down and stepped away! It’s hard to stop when you have more pieces to play with. I still have one full sheet that I haven’t cut yet but I will use the leftover images to build another wreath.
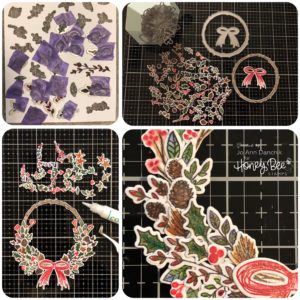
Because I extended the wreath out to the sides, I was going to need a wider card. I cut a piece of Simon Says Stamp Red Schoolhouse Cardstock, using the largest of the NEW Deckle Edge Square Die Set. I also cut some Desert Storm Khaki cardstock, using the next size down. The deckle edge dies will also be available in other shapes. You are going to love these sets!
To form the base, I cut two 5” x 5” pieces of #110 Neenah cardstock. The back piece was scored 1/4” from the top and folded. They were attached together with 1/4” Scor-Tape above the fold. The panels were added to the base using Kokuyo Tape. The wreath was glued on using a liberal amount of Gina K glue to all the small pieces and wreath base.
The sentiment is also NEW. It is from the Rejoice Stamp Set and coordinating Rejoice Die Set. It was stamped on the red cardstock, using Versamark Ink, and heat embossed using Hero Arts White Detail Powder. Be sure to use a Powder Tool before stamping. Stray white speckles really show up on dark cardstock. It was added to the card with a small piece of Scotch Foam Tape for dimension.
As I looked at the finished results I felt that the bow would look better if it matched the sentiment, so I stamped it on red cardstock and heat embossed it with white powder. I cut an additional red bow and glued them all together. The final bow was three layers thick and closely matched the height of the sentiment.
The card is fairly flat and should mail easily. You will need to make or buy a 5.5” or 6” square envelope. I found a few and have linked them below. The Khaki envelopes would match the card and be beautiful for the holidays.
As always, thank you for sharing a bit of your time with me today on another creative journey.
Joyfully, Jo Ann
Supplies used:
The products that I used are listed below in compensated affiliate links. You can click the icon of your choice, below the product picture, to go directly to your favorite shop. There is NO additional cost to you when using these links. Thank you for your support!

