Bee Inspired New Release Week: Winter Florals and Christmas Plaid
The Honey Bee Stamps Design Team has had an exciting week of projects to share with you featuring the new DEERLY LOVED Release. Today is the last day before we go back to our regular schedules. I hope that we have given you lots of ideas to help you start your holiday cards, tags, and gift bags. You can find all the new stamp sets, dies, stencils, and sequins HERE.
____________________
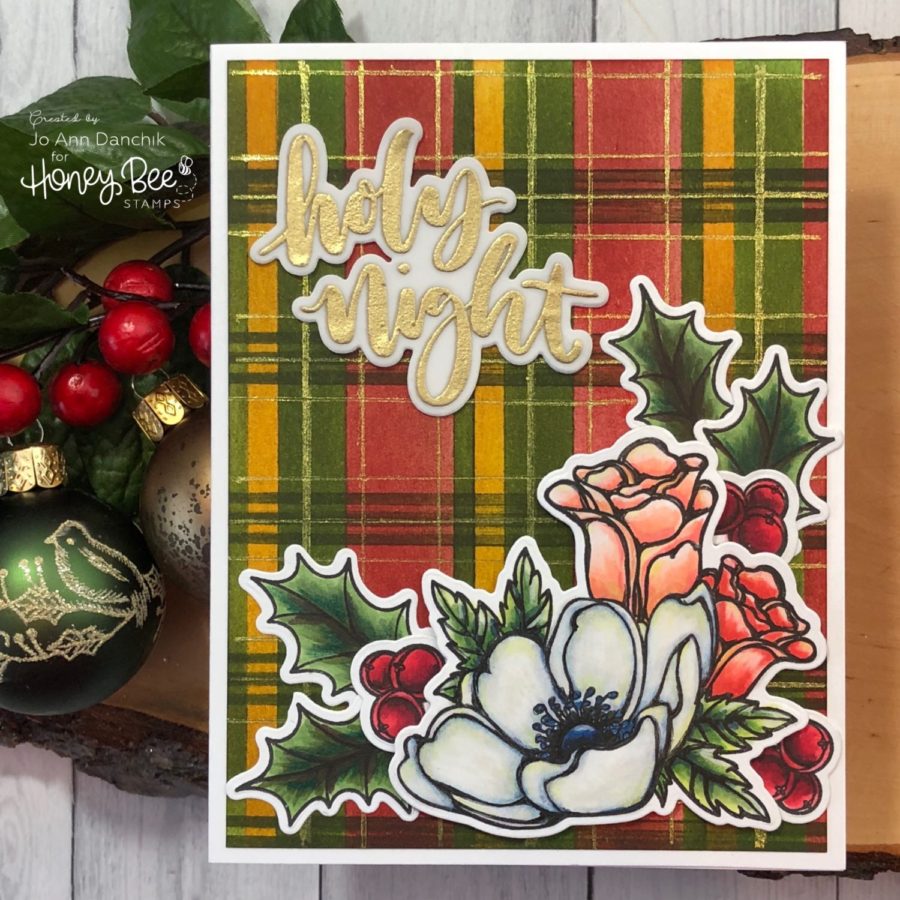
Christmas plaids and winter flower arrangements just seem to go together. Many of the arrangements are festooned with a plaid floral pick and bright shiny ornaments. Just looking at this card is putting me in the Holiday Spirit to decorate, but I will wait until after Thanksgiving. The fall season here in Texas is short…it is back to 82 degrees today…and I don’t want to rush into the next season.
____________________
(All the products used are listed below in compensated affiliate links. Thank you for your support!)
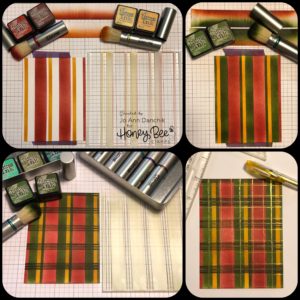
To start the plaid background I used the new Plaid Background Builder Stencil Set and #80 Neenah cardstock. There are four different stencils to choose from to make a simple striped card or to create a variety of plaids. You are only limited by your imagination!
Add purple tape to the back of the card and lay the stencil on top. Post-It tape was used to block off the openings that were not being colored. Tim Holtz Blending Brushes and Distress Inks are perfect for this. I laid a foundation of the lighter color and added shading with the darker color. Be sure to wipe off your stencil between color families.
First layer:
-Fired Brick, Aged Mahogany / Fossilized Amber, Wild Honey
-Remove the stencil.
-Block off open spaces with more Post-It Tape. The grid lines on my work surface help to get them straight.
-Brush on Mowed Lawn and Forest Moss to complete the layer.
Second Layer:
-Turn card 45 degrees an add another stencil.
-Brush on Mowed Lawn and Forest Moss, again masking off openings to avoid getting color in the wrong places.
Third Layer:
-I used a Uni-Ball Signo Sparkling Glitter Gold Gel Pen and a T-Ruler to add more lines in both directions.
I got my glitter pens overseas but I have added a link for a set of multiple colors. They are fabulous for adding a little sparkle and shine to a project.
Hint:
Tim Holtz shared this nifty tip with me. I have a dedicated set of brushes for ink blending…one for each color family. I used colored Sharpies to color the ring around each brush. They are stored in a Mini Ink Storage Tin with the liner removed. I also have a set dedicated to Oxide Inks only. I don’t bother washing the brushes anymore unless I need a light color and the brush is saturated with dark ink.
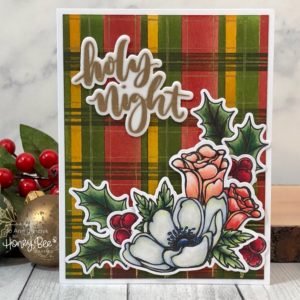
The flowers, leaves, and berries are from the Winter Anemone Stamp Set. They were stamped with Copic friendly Simon Says Stamp Intense Ink, onto #80 Neenah cardstock, and colored with Copic markers. They were die cut using the coordinating Winter Anemone Die Set.
The sentiment is from the Rejoice Stamp Set. It was stamped on #40 Vellum, using Versamark ink, and embossed with Simon Says Stamp Ultra Fine Gold Powder.
The vellum alone was too light (left) and white cardstock was too stark (right) so I added the vellum on top of the white cardstock for a more subtle look. They were cut using the coordinating Rejoice Die Set. They were layered and glued with a Gina K Design Glue Pen.
Hint:
Use heavyweight vellum to heat emboss. ALWAYS use an anti static powder pouch before stamping. Heat the gun up before taking it to the vellum to avoid warping. I have yet to find an adhesive that you can’t see through vellum so hide your adhesive behind images and words.
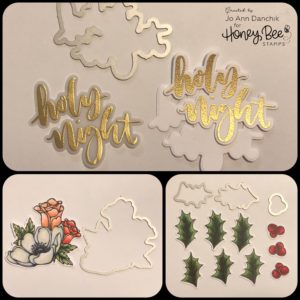
The leaves were glued to the plaid panel using the glue pen. Wet glue gives you plenty of time to move them around. The flowers were added with Scotch Foam Tape for dimension and the berries were tucked in.
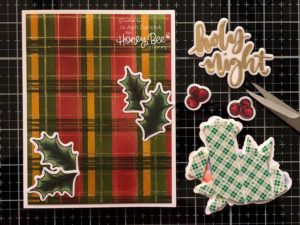
The panel was added to a #110 Neenah Cardstock cardbase using a Kokuyo Tape Runner.
I will be back Sunday for my regular Creative Sunday post featuring the Gift Bag Card from the new release.
As always, thank you for sharing a bit of your time with me today on another creative journey.
Joyfully, Jo Ann
Supplies used: The products that I used are listed below in compensated affiliate links. You can click the icon of your choice, below the product picture, to go directly to your favorite shop. There is NO additional cost to you when using these links. Thank you for your support!

