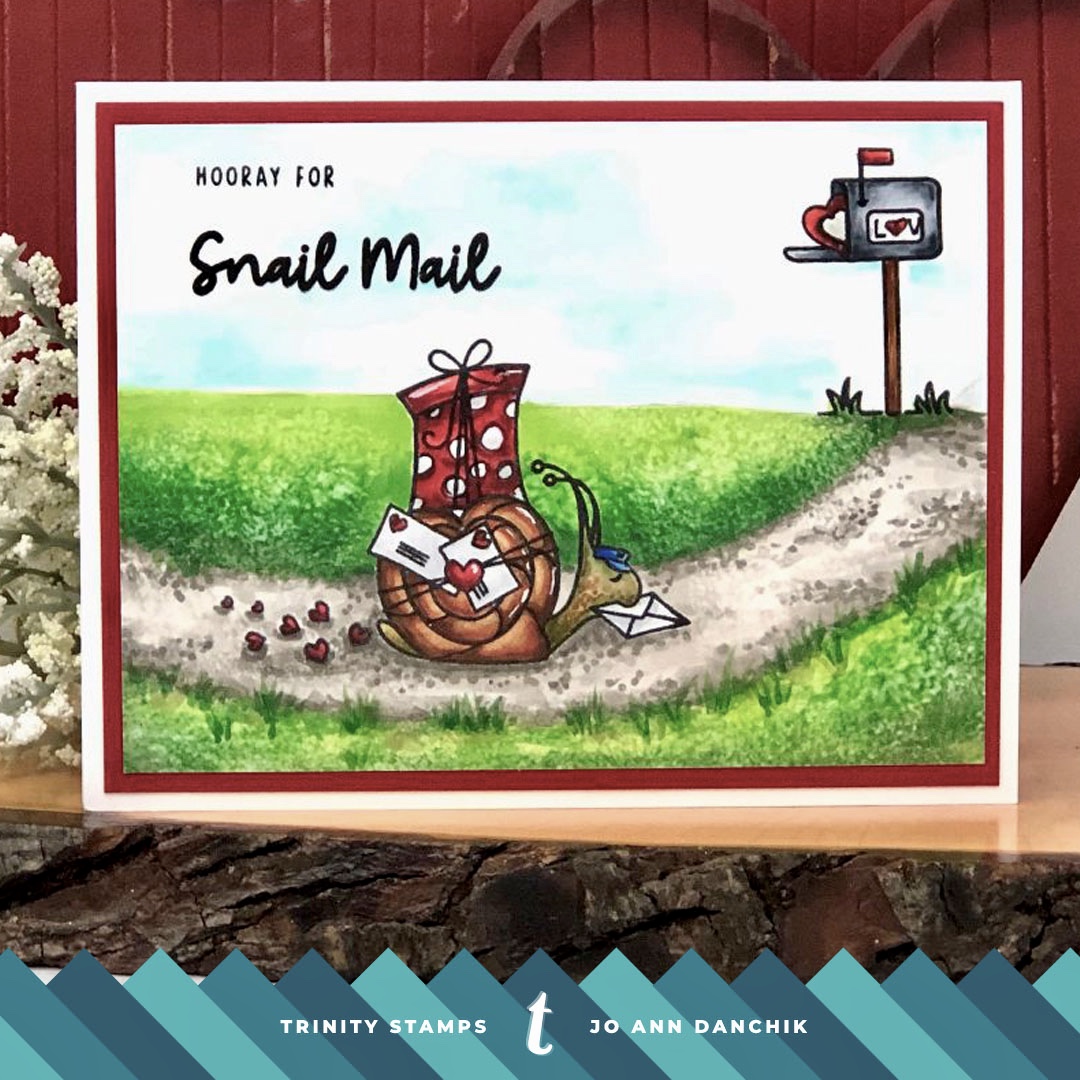
Midweek Creations With Jo Ann: Hooray For Snailmail
I fell in love with the adorable Mr. Snailman Stamp Set the moment that I saw it at Creativation! It is beyond cute and I couldn’t wait to get it home to stamp and color it. While it would be a perfect image to stamp on an envelope, I immediately imagined it used on a card.
(Products highlighted in teal are active links to the shop.)
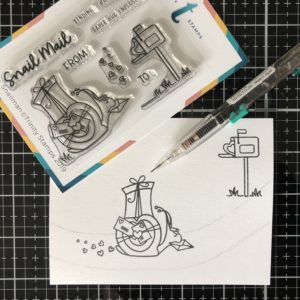
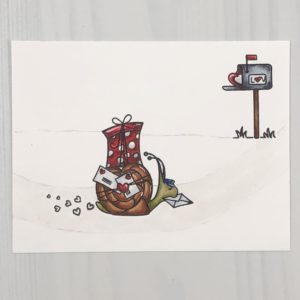
I started building the scene by stamping the snail and the mailbox with Copic friendly Gina K Amalgam Black Ink onto #80 Neenah Solar Crest Cardstock. I was careful to NOT ink the tuft of grass following the snail or the third tuft of grass on the left of the mailbox.
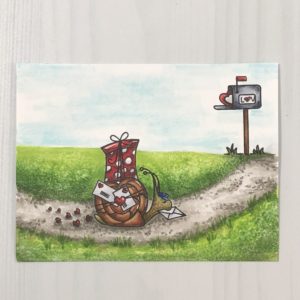
The small cluster of hearts was stamped along the path. I love that the snail is leaving a trail of hearts behind him! I lightly penciled in a curved path and a horizon.
I added some dots to the package and some segments to the shell. Many artists like to know the colors that were used so I have included them.
Snailman:
E31, E33, E35, E57, E08
YG91, YG93, YG95, YG63
B24, B26
Package and Hearts:
R24, R29, R89
Envelopes:
CO, C1
Mailbox
CO, C1, C3, C5
The path and grass were colored next. I used a dotting method along the path. I added Colorless Blending Solution to a knubby rag and pressed it briefly to blend the grass and give it texture. It is best to hit it with a heat gun to set it. The sky was done in long streaky strokes.
Path:
W00, W1, W3, W5
Grass:
YG03, YG17, YG67
Colorless Blending Solution + knubby rag
Sky:
BG0000, B000, B00
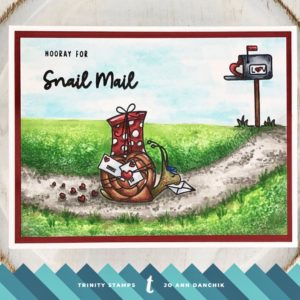
This simple one layer card was really quick and easy to make and used very few supplies. Because it is one layer, it will be easy to mail and will not require any extra postage. And seriously…isn’t this stamp set the cutest??
As always, thanks for joining me today. I look forward to creating with you again here at Trinity! You can also find me on Instagram at jadanchik or on my blog at jadanchik.com for more product detail.
Joyfully, Jo Ann
Supplies used:
The products that I used are listed below in compensated affiliate links. You can click the icon of your choice, below the product picture, to go directly to your favorite shop. There is NO additional cost to you when using these links. Thank you for your support!