Creative Sundays With Jo Ann: Ocean Border Thanks
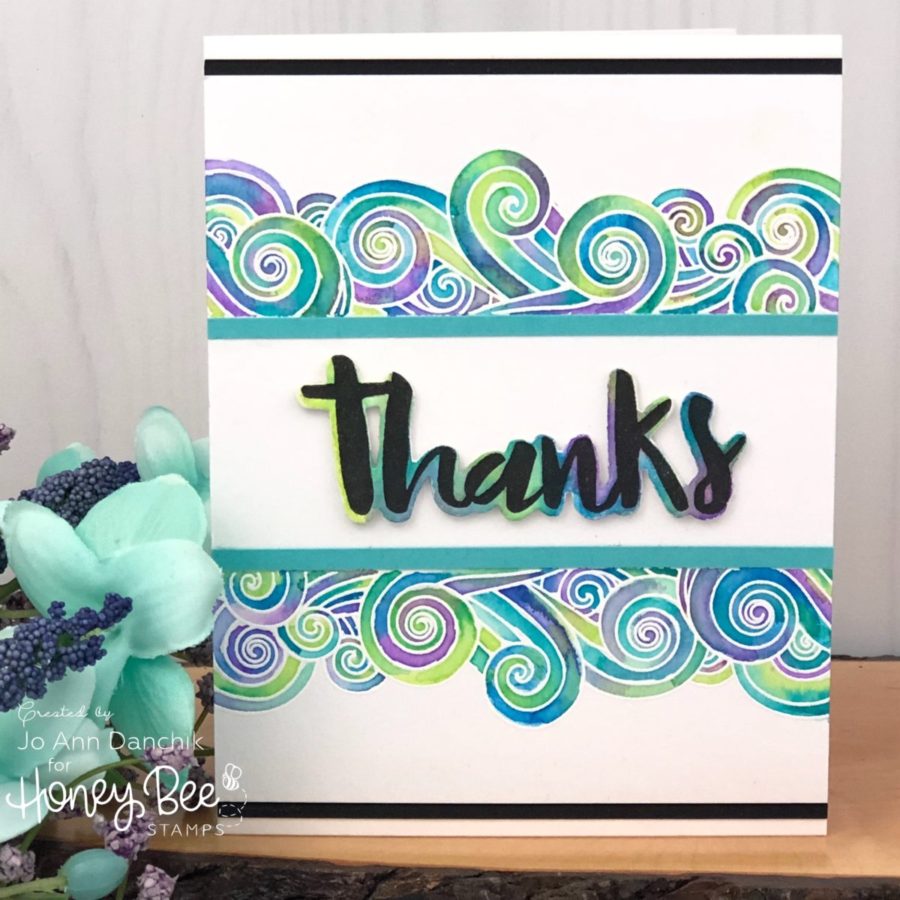
One of my favorite places in the world is the beach. Besides basking in the warmth of the sun, and feeling the warm sand against my skin, I love the curl of the waves as they build and swell before crashing upon the shore. Yep…I am still dreaming of the summer that can’t get here too soon for me. At this point, I am ready to bypass spring and jump right into summer. LOL Which brings me to this week’s card. I love Honey Bee’s Ocean Borders Stamp Set and wanted to find a way to incorporate the wave border onto a card. Today’s card is truly fast…and easy…so let’s get started!
____________________
(Products highlighted in teal are active links to the shop.)
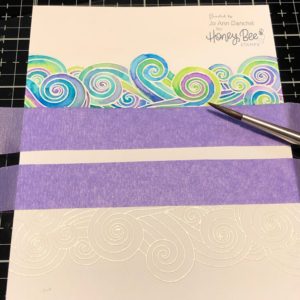
I started with a piece of Tim Holtz Watercolor cardstock. The border was stamped using Versamark Ink and heat embossed with Hero Arts White Embossing Powder. As always, I prepped the paper with an anti powder pouch first to avoid stray powder.
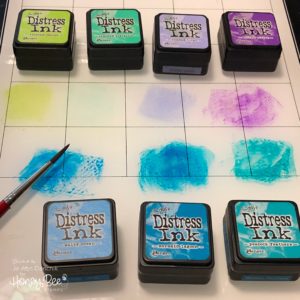
I smooshed a variety of Tim Holtz Distress Inks onto my Tim Holtz / Tonic Glass Media Mat. If you have been thinking about getting one to use as your work surface I highly recommend it. I have been using mine since it came out and can’t imagine using anything else. The colors I used are: Twisted Citron, Cracked Pistachio, Shaded Lilac, Wilted Violet, Salty Ocean, Mermaid Lagoon, and Peacock Feathers. You can also use a drop of reinkers, if you prefer, and water them down a bit.
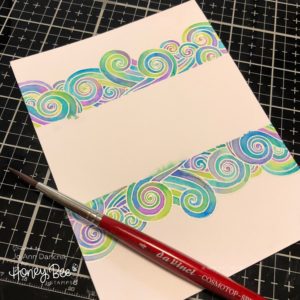
I laid down a strip of Purple Tape along the edges to keep the border crisp. Using a #4 Da Vinci Cosmotop Spin Brush, I laid down some water and dropped the color in. The embossed channels help to keep the segments separated. Set it aside to dry. If you are impatient you can zap it with a heat gun, but be careful not to overheat the embossing powder.
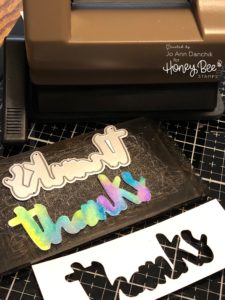
I cut the word thanks, from the Hello Gorgeous Die Set, from a scrap of watercolor paper. I added the left over Distress Ink to the cutout piece. You will see later where I went back and stamped it with Gina K Black Amalgam Ink. Because of the bumpy nature of watercolor paper I knew that it would most likely need to be stamped twice for a solid image. I put the piece back into the cutout opening and put it into my MISTI.
I went over the word with clear Wink of Stella to give it a little sparkle. I cut three more pieces and stacked and glued them together using the new Hero Arts Glue pen. This glue works very well. It is very similar to the Lawn Fawn and Gina K Designs glue pens.
When the piece is dry, carefully pull the tape off at an angle, away from the edge. As you can see, I had some seepage under the tape. Rather than worry about it I decided to just add a strip of Hero Arts Mist Cardstock to cover it. You can buy this cardstock in a sample pack or buy each color individually.
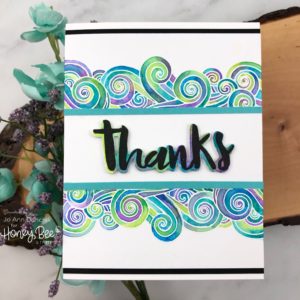
To add a little balance to the card, and to incorporate the black used on the sentiment, I added small strips of black cardstock to the outside edges. Everything was glued to a #110 Neenah Cardstock cardbase using a Kokuyo Tape runner.
This card is incredibly fast and easy to make and could easily be a one layer card if you don’t stack the sentiment. Does it have you dreaming of the summer as well? I think most everybody is ready for the snow to end and could use a day at the beach.
As always, thank you for sharing a bit of your time with me today on another creative journey.
Joyfully, Jo Ann
Supplies used:
The products that I used are listed below in compensated affiliate links. You can click the icon of your choice, below the product picture, to go directly to your favorite shop. There is NO additional cost to you when using these links. Thank you for your support!

