National Tea Day Collaboration Blog Hop: Tea For Two
Honey Bee Stamps is doing a collaboration hop with Coffee Loving Cardmakers to celebrate National Tea Day. This day is celebrated every year in the UK and the US on April 21st. Join us as we celebrate our love of tea!

(Products highlighted in teal are active links to the shop.)
Before we get started, I thought that I would share some fun tea related information.
1. Tea is the second most consumed drink in the world…after water. Well, tea IS hot water with leaves in it…but still.
2. Some people drink tea to start their day and some drink teas to help them sleep.
3. Like Captain John Luc Picard, I also like Earl Gray…hot. But I add milk.
4. According to my British relatives, proper tea should only be consumed in a china cup…never a mug. A mug is for coffee.
5. Milk is poured into the teacup before adding the hot brewed tea.
6. You either drink your tea with milk or with lemon…never both!
____________________
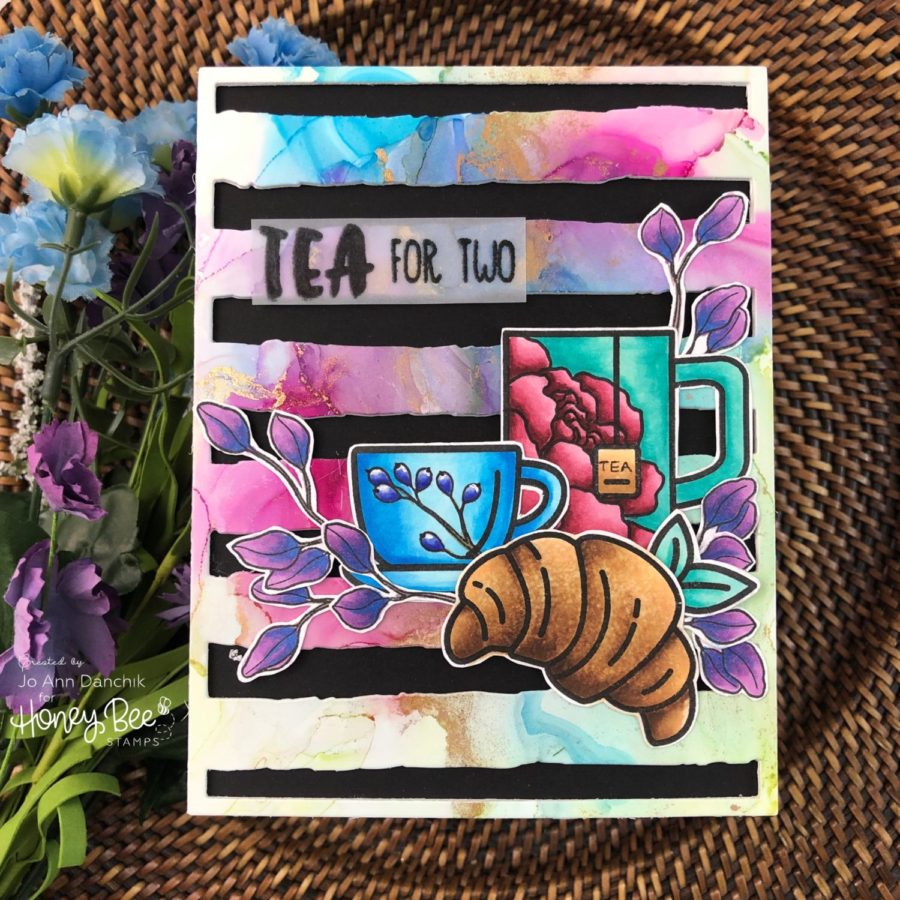
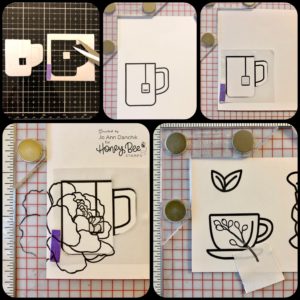
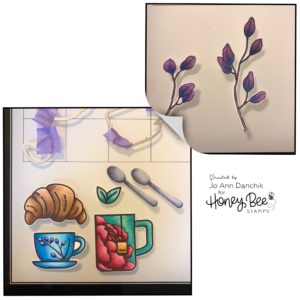
Okay, moving on to the card. Today’s card features the Tea Time Stamp Set. I stamped the mug, mint leaf, and croissant onto #80 Neenah cardstock, using copic friendly Gina K Black Amalgam Ink. I also stamped the mug onto Inkadinkado Masking Paper. The inside was cut out. I placed the outside of the mask around the mug. I also masked off the tea bag. (top row pics)
I used one of the blooms, from the new Spring Peony Stamp Set, to stamp inside the mug. I also stamped the cup from the Coffee Break Stamp Set. I only needed a small piece of Post-It tape to mask off the china cup to stamp a berry stem from the Spring Peony Stamp Set. (bottom row pics)
All the images were colored using Copic Markers. I have included the colors that I used for those who like to know.
Mug
R81, R83, R85, R89
BG10, BG11, BG13, BG15
E51, E53, E55 “TEA” was added with a 0.2 Copic Multiliner
China Cup
B60, B63, B66, B69
B000, B00, B02. B05 Highlight added with White Gelly Roll Pen
Leaves
V12, V15, V17, B05, E74
Mint Leaves
BG10, BG11, BG13, BG15
Spoons (I ended up not using these)
C1, C3, C5
Croissant
E51, E53, E55, E57, E59
To give the croissant a more realistic look, I wet a piece of knubby rag with colorless 0 blending solution and touched it briefly to the image. Heat it quickly with a heat gun to keep the texture intact. Repeat the process until you have the look that you like.

The china cup was cut with the coordinating Coffee Break Die Set. The mug, spoons, and croissant were cut with the coordinating Tea Time Die Set. The leaves were fussy cut. There is a coordinating Spring Peony Die Set, but I didn’t have it at the time.
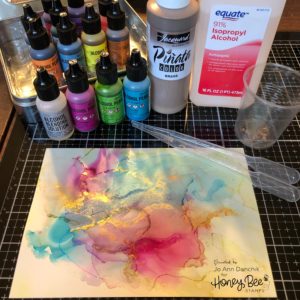
For the background, I started with a piece of white Yupo paper. It comes in a variety of sizes and thicknesses. I have listed several choices below for your convenience. I used the Tim Holtz heavyweight brand.
I played around with the new Tim Holtz Intrigue, Sublime, and Tranquil Pearl Alcohol Inks. As I added them I thinned them down with Alcohol Blending Solution and blew them around the paper. I used a pipette to add 91% Isopropyl Alcohol around the hard edges to thin it out even more.
I put some Jacquard Brass Piñata Alcohol Ink into a small cup. I buy these disposable cups in bulk and use them a lot in the studio. They are great for dyeing glitter, mixing colors, and paint pouring. I added drops of the Brass and thinned it out with more of the Isopropyl Alcohol. When I was happy with the results I used a heat gun to set it all, being careful not to melt the Yupo paper. I love the way the background sparkles and shimmers!
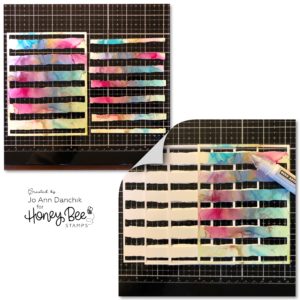
I cut the background with the new Watercolor Lines Die. I will save the inside lines for another project. I really love this die. I used it yesterday as well for another blog hop. I cut three additional pieces and glued them together, with a Hero Arts Glue Pen, for a dimensional look. This is so much easier than cutting strips of foam tape!!!
I used the Perfect Blend Stamp Set for the sentiment. It was stamped on Vellum using Versafine Clair Nocturne Pigment Ink and heat embossed with Hero Arts Clear Embossing Powder. Be sure to use an anti static tool before stamping. (oops…I forgot to take a pic)
The background was added to a piece of Hero Arts Black cardstock. The whole panel was added to a #110 Neenah cardstock folded card base, using a Kokuyo Tape Runner, and the images were glued on. Small drops of glue were carefully added behind the words to adhere the sentiment.
I really love the elegant look of this background. The table is set and ready to share a cup of tea and croissant with a loved one or special friend!

Prizes!!
Of course there are prizes! Honey Bee is giving away a $30 Gift Certificate to the shop on both their blog and The Coffee Loving Cardmakers blog. Commenting will be open until Friday, April 26 at 11:59 pm PDT. Be sure to visit each blog along the hop and leave a comment for a chance to win!
I have included the links for the Design Team members from Honey Bee Stamps, as well as Coffee Loving Cardmakers. Grab a cup of tea and visit them all for lots of inspiration.
Honey Bee Stamps
Brenda Noelke
Carol Hintermeier
Carrie Bryant
Amy Rysavy
Galina Filippenko
Carly Minner
Keiko Ichikawa
Jana Millen
Bibiana Cameron
Kelly Latevola
Jo Ann Danchik (you are here)
Alba Castejon
Coffee Loving Cardmaker’s Blog
Lisa Bzibziak
Helen Gullett
Katie Brooks
Dana Warren
Erin Thiem
Kerry Urbatch
Laurel Seabrook
Kathy Schweinfurth
Amy Tsuruta
As always, thank you for sharing a bit of your time with me today! Don’t forget to leave a comment for a chance to win.
Joyfully,
Jo Ann
Supplies used:
The products that I used are listed below in compensated affiliate links. You can click the icon of your choice, below the product picture, to go directly to your favorite shop. There is NO additional cost to you when using these links. Thank you for your support!

