Creative Sundays With Jo Ann: Bee Unique
Something about bees fascinates me. They apparently like me as well, as evidenced by the large colony that set up residence in the eaves of our attic two years ago. Because of the alarming decline in the bee population we were told to call a bee keeper. Yes…a bee keeper! It was rather expensive to get rid of them, and we didn’t even get to keep the honey, but we are now bee free…except for all the Honey Bee Stamps in my studio of course!
____________________
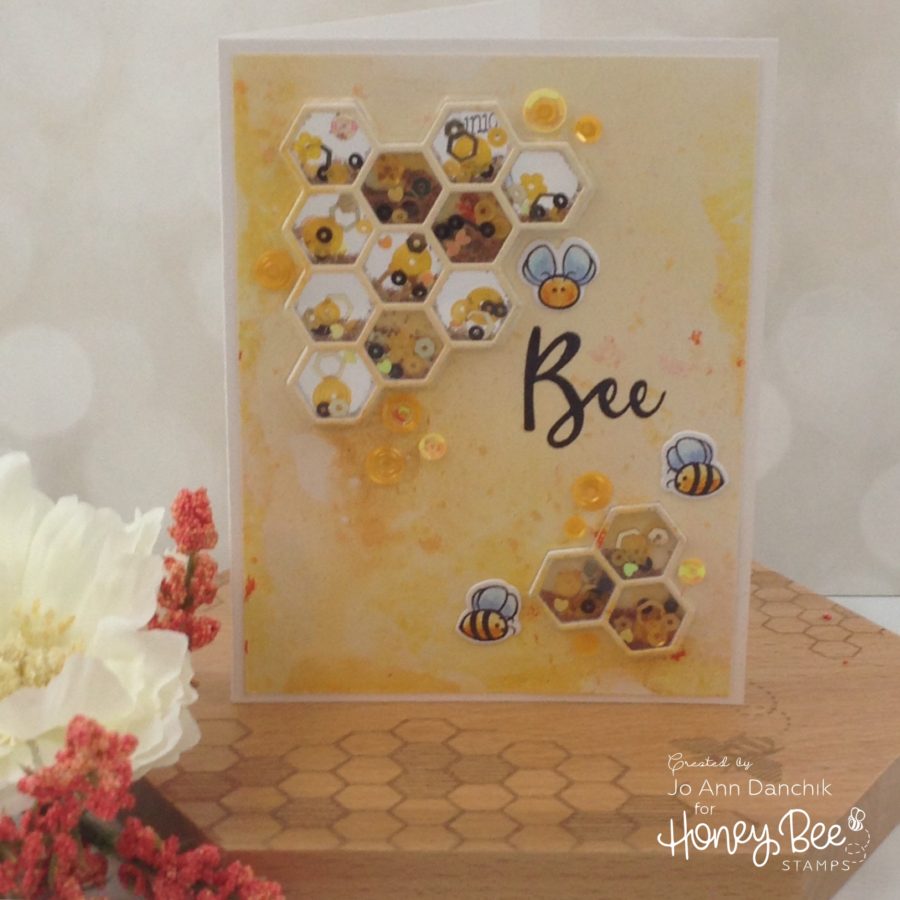
My idea for today was to make a shaker card. And then I had the crazy idea to make it see through. It posed a few challenges as to what order to proceed. I took a few missteps along the way so my hope is that this tutorial will make it easier for you.
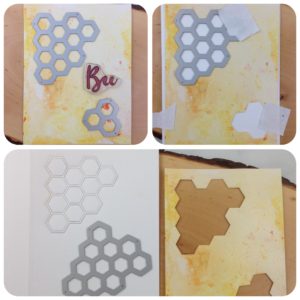
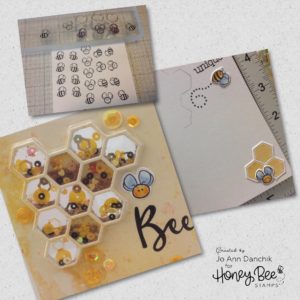
I started with a background that I made using Alcohol Inks and water. You can see the process on my blog here. I laid out two of the dies, from the Hexagon Bunches Die set, and a sentiment, from the Bee-You-Tiful Sentiment stamp set, to check the placement. (top left pic) I ran the dies through my die cutting machine. I lined the panel up with the front of my card base and secured it with some post-it tape. I placed the larger die back into the hole and ran it back through the machine. Don’t forget to leave the card base open! (top right pic) The end results are the bottom left and right pics.
I cut five more sets of both dies out of Neenah Crest #110 cardstock. Stack and glue them together. I found it easiest to use a spray adhesive.
Take the small die stack and line it up in the bottom hole on the card front. Place a small piece of cardstock behind it and glue three colored pieces inside each hexagon. Turn it over and trace the outline of the cardstock. This will help you line it all up after you fill the shaker. You can see that I already have the colored piece on top of the stack, but that is because I had to go back and retake this picture to show you the process.
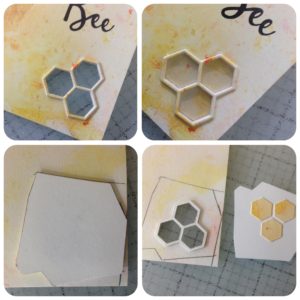
Now you can spray the top of both stacks and carefully lay them on top of pieces of acetate. I placed an acrylic block on top of them, to weigh them down, and let them dry. The spray takes an hour to cure properly. At this point everything felt sticky to me, and I had already pulled several things apart, so I left everything to dry for several hours. I washed my hands, made myself a cup of tea, and sat and thought about the best way to proceed. I also ate a cookie! LOL
When I came back, I sprayed the back of the colored top pieces and laid them carefully on top of the acetate. They were left to dry for an hour as well. In the meantime, I stamped the sentiment on the front. Once everything was set and dry I carefully cut the acetate around the hexagon stacks, using my Tim Holtz non stick Mini Snips.
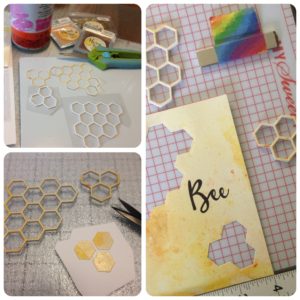
I slipped the stacks into the openings and flipped the panel over. To avoid any residual stickiness I heavily dusted the insides of each hexagon with an EK Success Powder Tool. I cleaned the powder off of the acetate with Q-tips soaked with Windex. Seriously…I don’t even clean my own windows but here I was cleaning out each hexagon with a Q-tip! (top left pic below)
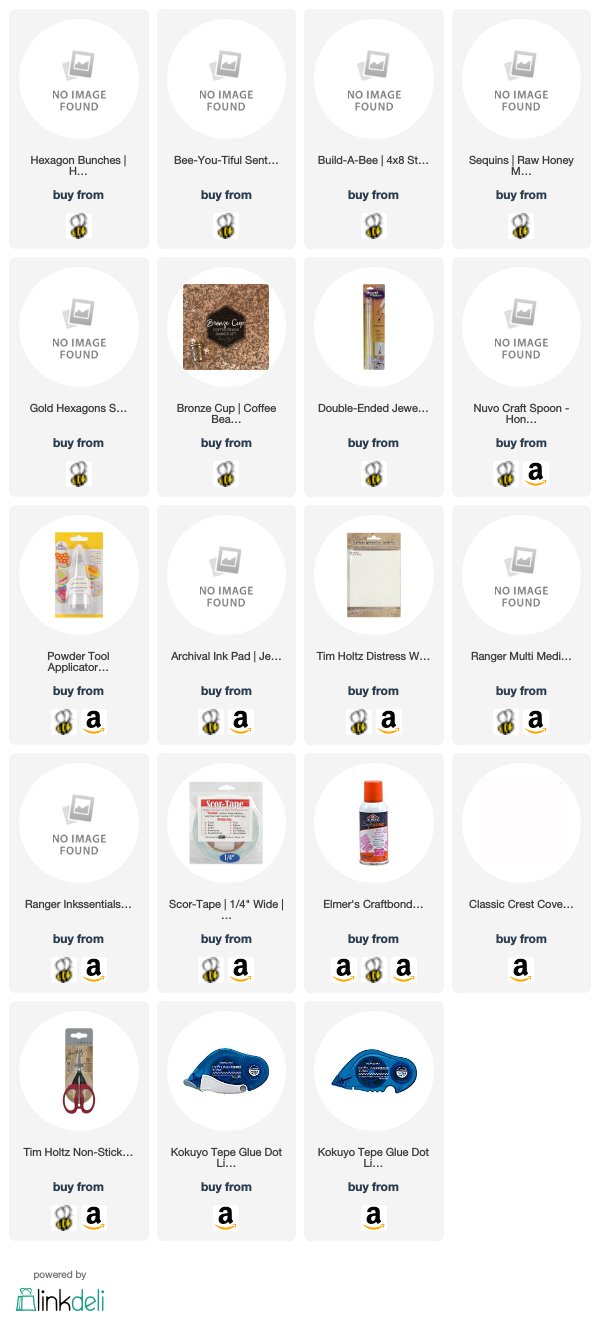
I filled each hexagon with a mixture of Raw Honey Mix Sequins, Gold Hexagons Sequins, and Bronze Cup Coffee Beans Shaker Set. Some of mine were different names but these are the same colors. It is really helpful to use a Double Edged Jewel Picker for the sequins. I have an old mini craft spoon that I used to scoop out the micro beads. Nuvo now makes a similar Craft Spoon. (top right pic below)
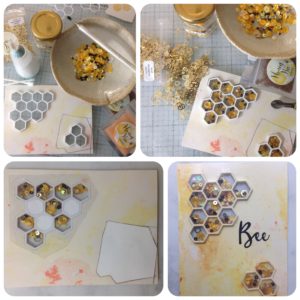
I added three colored pieces inside three random hexagons. I CAREFULLY glued the top edges of the stacks with Glossy Accents. I laid the small piece of cardstock on top of the small stack. If you line up your markings the hexagon backings will line up perfectly. I laid a piece of acetate on top of the large stack. I weighed them down and let them dry for several hours. (bottom left pic above)
THE ACETATE DID NOT STAY GLUED! Fortunately, I only lost one hexagon and was able to easily rebuild it. I tried Ranger’s Matte Multi Medium this time and put a fresh piece of acetate on top. This time is held tight! I taped the acetate to the back of the panel and flipped it over. (bottom right pic above)
I stamped an army of bees, with Ranger’s Archival Black ink on Tim Holtz Watercolor cardstock, using the small freebies that you get from the “Free Bee of the Month.” One is included with every order. If you spend $75 Honey Bee will also include the coordinating Die. Everything was watercolored using various Distress Inks. I love these bees! They are so cute…and they’re free! The Tim Holtz Sidekick is fantastic for cutting out all of these little pieces.
Inside, I stamped a sentiment, from the Bee-You-Tiful Sentiment stamp set, and a bee trail, from the Build-A-Bee stamp set. I glued some bees and an additional set of hexagons inside, and scattered sequins and bees on the front of the card.
I applied ample 1/4” Scor-Tape to the back of the panel and secured it to the cardbase. To finish the inside I added one more white cut out to the back of the see through window to cover the glue. I also added some of the left over colored pieces to cover the white backs of the three that I had filled in.
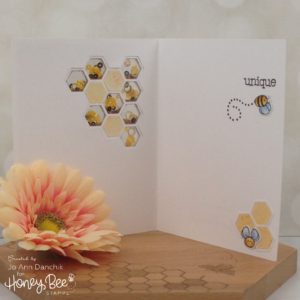
I love that the top shaker in this card is see through. It is Unique…just like the bee that is flying upside down! I left the bottom shaker solid so that there would be plenty of room to leave a message inside. Now that I have worked through all my missteps I look forward to making this card again. It is fairly easy, you just need to leave ample time to let the glue dry between steps.
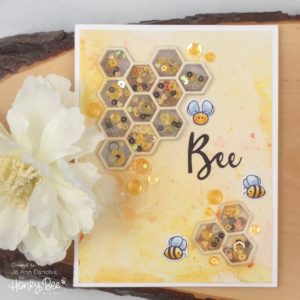
Thanks for joining me today on this creative journey. You can follow my blog at jadanchik.com and my Instagram account at jadanchik.
Joyfully, Jo Ann
Supplies used:
The products used below are affiliate links. When using these links there is NO additional cost to you. Thank you for your support!
