• Home
  • About
  • Disclosure
  • FAQ
  • Contact Me
jadanchik.comjadanchik.com
  • Home
  • About
  • Disclosure
  • FAQ
  • Contact Me

Creative Sundays With Jo Ann: Coffee, Coffee, And More Coffee

Creative Sundays With Jo Ann: Coffee, Coffee, And More Coffee

Creative Sundays With Jo Ann: Coffee, Coffee, And More Coffee

February 18, 2018 Posted by Jo Ann Danchik Backgrounds, Cards, Distress Inks, Embossing Paste, Friend, General, Ink Blending, Love, Stencils, Techniques, Texture Paste, Tools, Watercolor

I love coffee. That is all! LOL

I actually didn’t start drinking coffee until about fifteen years ago. Before that I was an avid tea drinker, still am. But, about fifteen years ago my son introduced me to Sugar Free Vanilla Lattes…from that coffee place that we all know! I was lured in by the sweet stuff and have been hooked on coffee ever since.

____________________

Before I start, I have a winner to announce for the Kindness Stamp and Die Set. Ann Barnes was the random number drawn. If you would please contact me with your name and address I will get the set sent out to you. Thank you all for your kind comments! I plan to have more giveaways in future.

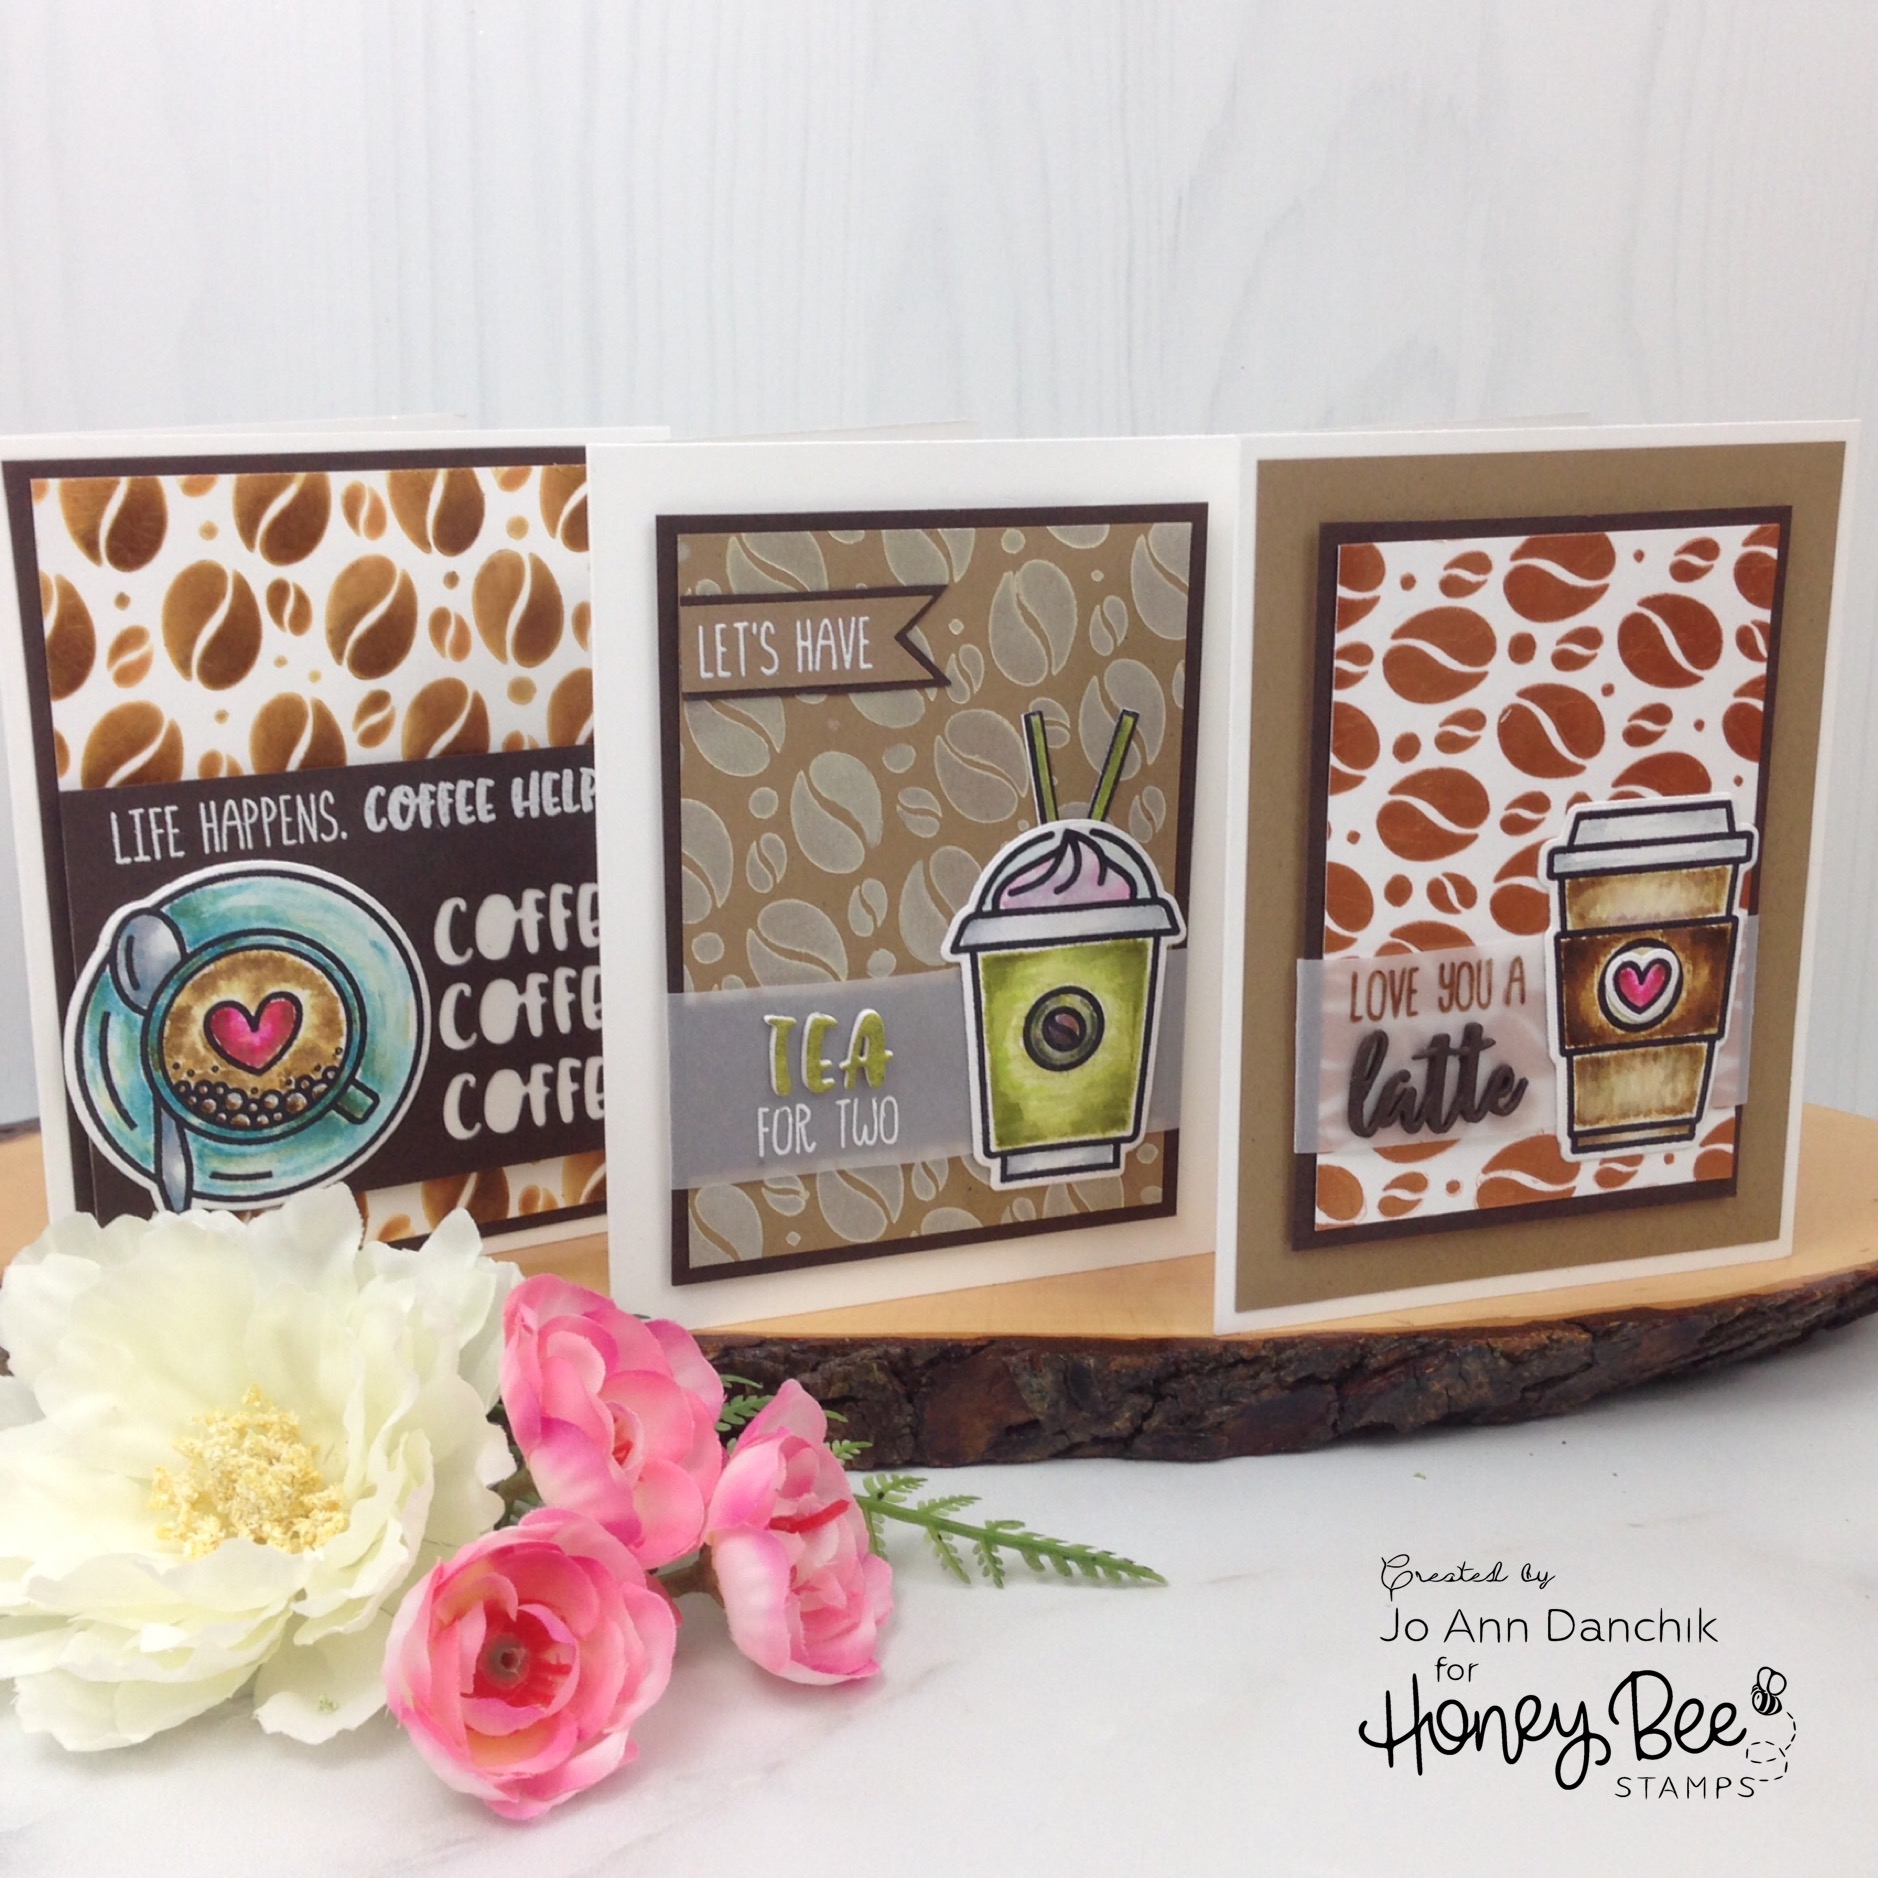
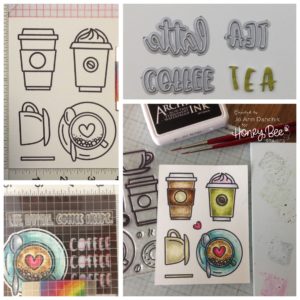
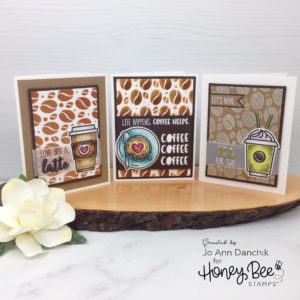
Today I want to share a stencil technique using different Nuvo products and showcase three finished cards. When using all of these different mediums be sure to clean your stencil and palette knife immediately after each use!

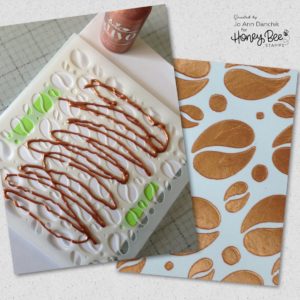
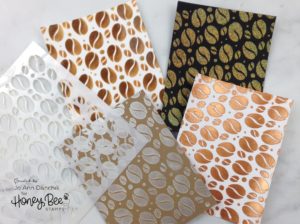
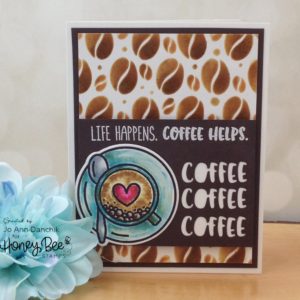
I started with the Coffee Lovers Background Stencil set. I wanted to try something different so I pulled out my stash of Nuvo products. For the first background I blended Vintage Photo, Rusty Hinge, and Ground Espresso Distress Inks through the stencil, using Tsukineko sponge daubers, onto plain white card stock. I squeezed out a generous amount of Nuvo Translucent Limoncello Jewel Drops and spread it evenly across the stencil with a palette knife.

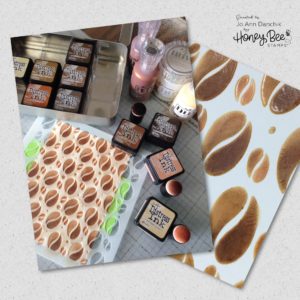
Looking through my Nuvo collection for something coffee colored I tried the Copper Penny Crystal drops next. It leaves a bright shiny finish.

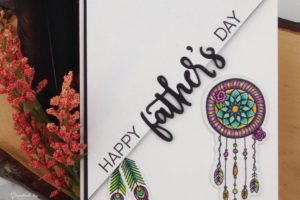
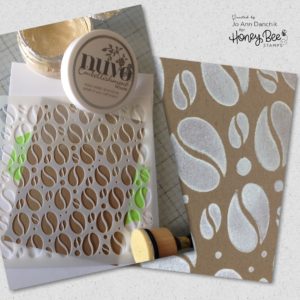
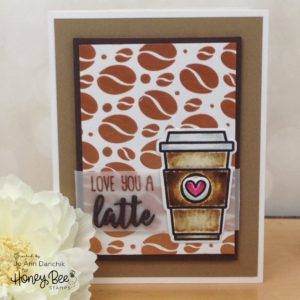
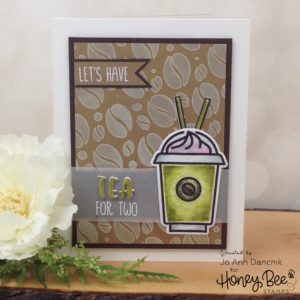
Next, I pulled out some Nuvo Mother of Pearl Mousse and Kraft cardstock. I applied the Mousse through the stencil with a Mini Ink Blending Tool. It glides on like soft butter and leaves a soft satiny shine. Wash the pad immediately and it is as good as new.

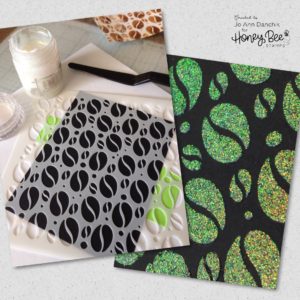
For the last background I applied some Nuvo Moonstone Glimmer paste onto black cardstock. The colors dry with iridescent shades of blue and green against the dark background.

I laid all of the backgrounds aside to dry and started thinking about how I could use them.

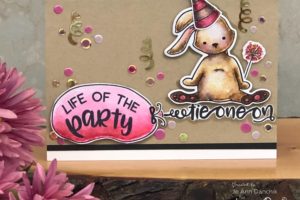
I stamped the four different cup images, from the Coffee Break Stamp set, onto Tim Holtz Watercolor cardstock, using Ranger Black Archival ink. I watercolored all the images using Distress Inks. When they were dry they were cut out using the coordinating Coffee Break Die set. I also cut out four each of various sentiments from the Perfect Blend Die set, using my Sizzix Side Kick. I glued the sentiments together using a Zig 2-Way Glue Pen. It is perfect for such small pieces. All the stamped sentiments are from the Perfect Blend Stamp set.

For the first card I cut the word coffee out of a piece of dark chocolate cardstock three times. I stamped the sentiment using Versamark Ink and white embossing powder. Be sure to use an anti-static embossing tool. White flecks of powder show up easily on dark cardstock.

I cut a piece of heavy vellum cardstock for the second card. I stamped the sentiment using Archival Potting Soil ink. To set it, I stamped it again using Versamark Ink and clear embossing powder. The Misti tool works well for this. It is important to use an anti-static embossing tool here first as well. Also, vellum tends to warp so preheat your heat tool and heat the powder quickly. The vellum was wrapped around to the back of the panel and secured with tape.

For the last card I used vellum again. The sentiment was stamped with Versamark Ink and heat embossed with white embossing powder. The word tea was cut from some watercolor paper, that I first colored with Distress Inks, matching the colors of the cup.

For all of the cards I used a tape runner to add the panels to dark chocolate cardstock. An even layer of Scotch Foam tape was added to the backs for added dimension and then they were adhered to #110 Neenah Classic Crest cardstock bases. I didn’t end up using the fourth background or the coffee cup. I am sure that I will find a use for them at a later date.

Honey Bee has a new release coming! All this week they will be giving Sneek Peeks of the new products. Be sure to check back tomorrow.

Well, I am off to savor another cup of that liquid nectar known as coffee! Thank you for joining me today on this creative journey.

Joyfully, Jo Ann

Supplies used:
The products used below are affiliate links. When using these links there is NO additional cost to you. Thank you for your support!

SaveSave

SaveSave

SaveSave

SaveSave

SaveSave

SaveSave

SaveSave

SaveSave

SaveSave

SaveSave

SaveSave

2
Share

You also might be interested in

Trinity Stamps: Spring Fling Release Blog Hop

Trinity Stamps: Spring Fling Release Blog Hop

May 3, 2019

Today we are celebrating the new Trinity Stamps Spring Fling[...]

Coffee Lovers Blog Hop: Spring & Summer 2018

Coffee Lovers Blog Hop: Spring & Summer 2018

May 25, 2018

I love coffee...I love tea...enough said! Honey Bee Stamps is[...]

Creative Sundays With Jo Ann: Poinsettia Gift Bag

Creative Sundays With Jo Ann: Poinsettia Gift Bag

Nov 4, 2018

The Design Team is back to our normal blogging schedules[...]

Hello......I'm Jo Ann

Christian, wife, and proud mother and grandma. I love to create art, cook, read a good book, take photos, and travel. -Enjoy life now...this is not a rehearsal!

....

While this blog is my personal journey I hope that you find something here that encourages you to unfurl your wings and be creative. Most everybody has a little childlike creativity in them just waiting to be set free. It doesn't have to be perfect... just create.

....

…………………………………………..

Enter your email address below to subscribe to this blog. You will receive notifications of new posts by email.


* indicates required


*Check your email to confirm subscription.

…………………………………………..

Categories

  • Action Card
  • Alcohol Inks
  • Altered Art
  • Backgrounds
  • Banners
  • Birthday
  • Bookmark
  • Cards
  • Chalk
  • Christmas
  • Colored Pencils
  • Congratulations
  • Copics
  • Distress Inks
  • Distress Oxide Inks
  • Easter
  • Embossing
  • Embossing Paste
  • Encouragement Cards
  • Fall
  • Father's Day
  • Foiling
  • Friend
  • General
  • Get Well
  • Gift Card Holder
  • Gift Tags
  • Graduation
  • Halloween
  • Hello
  • Holiday
  • Holiday Decor
  • Home Decor
  • Ink Blending
  • Interactive
  • Love
  • Markers
  • Masking
  • Miss You
  • Mother's Day
  • New Years
  • No Line Coloring
  • One Layer Cards
  • Ornaments
  • Patriotic
  • Placemats
  • Project
  • Scene Building
  • Shadow Box Cards
  • Shaker Cards
  • Shape Cards
  • Shared Thoughts
  • Shrinky Dinks
  • St. Patrick's Day
  • Stencils
  • Sympathy
  • Tags
  • Techniques
  • Texture Paste
  • Thank You
  • Tools
  • Uncategorized
  • Valentines
  • Wall Art
  • Watercolor
  • Wedding / Anniversary
  • Wreath Builder

Archives

  • June 2019
  • May 2019
  • April 2019
  • March 2019
  • February 2019
  • January 2019
  • December 2018
  • November 2018
  • October 2018
  • September 2018
  • August 2018
  • July 2018
  • June 2018
  • May 2018
  • April 2018
  • March 2018
  • February 2018
  • January 2018
  • December 2017

Recent Posts

  • Midweek Creations With Jo Ann: Floral Cross Background
  • Creative Sundays With Jo Ann: Goodbyes Are Not Forever
  • Midweek Creations With Jo Ann: Tropical Rainforest Shaker Card
  • National Honey Bee Day Blog Hop: You’re The Bee’s Knees
  • Creative Sundays With Jo Ann: Mandala Love

Tags

Angel Policy Stamp Set and Dies Backgrounds Bill The Bear Stamp Set and Dies Birthday Cardmaking Cards Christmas Cloud Border Die Set Colored Pencils Copics Design Team Die Cutting Dies Distress Inks Distress Oxide Inks Encouragement Feelin' Foxy Stamp Set and Dies Friend General Hand Drawing Heat Embossing Holiday Honey Bee Stamps Ink Blending Love Mae The Mouse Stamp Set and Dies Markers Masking Misti Tool New Release One Layer Cards Papercrafting Penny The Platypus Stamp Set and Dies Pinky The Pig Stamp and Die Set Projects Scene Building Snow Buddies Stamp Set and Dies Stamping Stamps Techniques Tools Trinity Stamps Tutorial Valentines Watercolor

Instagram Feed

jadanchik

A study in two different mediums… Tim Holtz WC D A study in two different mediums…
Tim Holtz WC Distress Pencils -v- Windsor & Newton Cotman WC Paints. 👩‍🎨🎨
—————
1. On the right is my original painting using W & N paints. I mixed equal parts Intense Blue and Cadmium Red Pale Hue to make black. I added additional water and thinned down washes to the bird to make the blooms and drips. As the paint thins out it creates lovely bluish tints.
2. On the left I used Tim’s WC Pencils. Distress Black Soot Ink has the unique property of maintaining its true black color as it’s thinned with water. The pencils do as well. Hmmm 🤔 To remedy this I quickly made a thin wash with Prize Ribbon while the painting was still wet. I alternated adding thinned blobs of the black and blue wash until I got the desired results.
—————
The more I study it…the more I prefer the raven on the left! Do you have a favorite?
—————
@tim_holtz @ranger_ink #timholtz #distress #distressinks #distresspencils
When you still have your new pencils out…but hav When you still have your new pencils out…but have no idea what to do with yourself. Cleaning your mess is not the answer. 😜 Then out of the corner of your eye you see Tim’s new “Unraveled” stamp set from Stamper’s Anonymous and some leftover scraps of watercolor paper. You just start to paint. Not sure what it will become when I fussy cut it. Mum(my)’s the word! 🤫
—————
(Swipe left for process pics)
1. Stamped with Antique Linen Distress ink for no line painting.
2. Antique Linen says it all. It’s in the name! But it was too dark so I made a wash and added some Picket Fence to lighten it. The brown is a mix of Walnut Stain and Black Soot.
—————
@tim_holtz @stampersanonymous @ranger_ink #timholtz #stampersanonymous #distress #distressinks #distresspencils
Still testing out the new Tim Holtz Distress Penci Still testing out the new Tim Holtz Distress Pencils. And how much fun is Tim’s new “The Scarecrow” stamp set from Stamper’s Anonymous? 🧡
—————
(Swipe right for process pics)
1. I stamped the scene using Antique Linen Distress Ink for no line painting with the watercolor pencils.
2. I realized that I put the sun on the right but the shadows on the scarecrow are also on the right. 🤔 Simple fix. I wet the shadow lines and lifted them with a paper towel. The crow and the plaid shirt are my favorite parts!!
3. I wanted to create some color blends so I made some heavily pigmented washes.
4. I wasn’t sure how to add a background at this point without a lot of masking. I carefully flooded the paper with water, avoiding the painted areas, and floated in several different light color washes.
—————
@tim_holtz @stampersanonymous @ranger_ink #timholtz #stampersanonymous #distressink #distress #distresspencils
I know…I know…no posts for 2+ years and now he I know…I know…no posts for 2+ years and now here I am posting again! 😜 I would have made this a reel, but after an hour of trying to figure it out I gave up. 🫤
—————
After painting the cat, crow, and bats yesterday I immediately thought of Tim Holtz’s new “Gothic Tapestry” skull from Stamper’s Anonymous. And I wanted to play with my new Distress Pencils some more…of course I did!
—————
I stamped a partial picture using Hickory Smoke Oxide ink. The watercolor paper (140lb cold press) was very textured so the impression is sketchy at best, but I didn’t need a lot of details.
—————
I love it! (Hubby thinks that it looks like Chewbacca!! 😂) 

We are going to need open stock on the black pencil!! @ranger_ink @tim_holtz @stampersanonymous #timholtz #stampersanonymous #distress #distresspencils #watercolopencils
Part Two I tested several of my favorite watercolo Part Two
I tested several of my favorite watercolor pencil methods still using the Windsor & Newton professional cold press 140 lb watercolor paper. High quality paper is oftentimes more important than the quality of paint in getting good results.
1. The first swatch is pencil scribbled directly onto the paper and activated with a water brush. The Seedless Preserves is highly pigmented but a little harder to break down and dissolve. Darker reds and purples sometimes behave this way.
2. The second swatch is dipping the tip of the pencil in the water and smoothing with a wet brush. This delivers a large pigment load. You can also run a wet brush over the tip of the pencil  and then paint. These offer very smooth results.
3. The third swatch is a wash. I like to create a controlled wash. Yes…you can do this easily with pencils. Add a few drops of water to a porcelain well. Run your water brush over the tip of the pencil and swirl it into the water. Repeat multiple times until you get the paint to water ratio that you want. With a wash you can add many layers to your painting.
4. The top picture shows how well the colors lift. This is useful info for adding highlights and shading or if you accidentally drop color in an unwanted area. Being Distress Inks, they don’t appear to react quite the same to water droplets as regular Distress Inks. They do lift when dry, but some colors stain more than others.
(continued in comments)
timholtz @ranger_ink #timholtz #distress #distresspencils #watercolorpencils
Part One I have been watching for the UPS driver a Part One
I have been watching for the UPS driver all week. When my package of Distress Pencils arrived yesterday afternoon I nearly snatched it from their hands! 😂
I work a lot with different watercolor paints, pencils, and crayons so I was eager to play with them. I used Windsor & Newton professional cold press 140 lb watercolor paper to test them. It’s bumpy so you get a lot of white space when you scribble on the pigment.
1. As I tend to layer colors I immediately put them into color families. I know that you like to dig for them Tim but I need them in color order and don’t have your patience. You are a “hunter” and I am a “gatherer.” 😜
2. I swatched them out…not only to have a chart but to check on several properties. It shows me how easily the different colors dissolve on the paper but also how they “water down” into a wash near the bottom of the swatch. The black line shows their transparency. Most colors are highly pigmented, yet transparent, and easy to dissolve.
So far I am loving them!!! (More in next post.)
@tim_holtz @ranger_ink  #timholtz #distress #distresspencils #watercolorpencils
I have been doing a lot of watercoloring this summ I have been doing a lot of watercoloring this summer and thought that I might start posting again. (I haven’t shared my art work socially in over 2 years.) I painted these three Halloween Decoration Cards this morning using Windsor & Newton paints. They are from an older Michael’s class (free) taught by Mandy Peltier. They were a hoot to paint!
@mandypeltierartist @michaelsstores @winsorandnewton #winsorandnewton #makeitwithmichaels #michaelsclasses
Sometimes it is hard to step back, reevaluate, and Sometimes it is hard to step back, reevaluate, and admit that you need to see things differently!! These are powerful phrases that I intend to learn and to use gracefully.
—————
Thanks my friend for allowing me to share your wise words! ❤️@turnertr03
I am learning. I am listening. #blackouttuesday #a I am learning. I am listening.
#blackouttuesday #amplifymelanatedvoices
Load More... Follow on Instagram

Copyright Statement:

All content, including text, photos, and projects are the property of  Jo Ann Danchik. I encourage you to use this blog as inspiration for your personal projects. If you use any parts of this blog on another blog, website, or in any other public forum, please link back to this blog at jadanchik.com rather than copy and paste any of the information.


© [2017] · Jo Ann Danchik · All Rights Reserved.

Prev Next