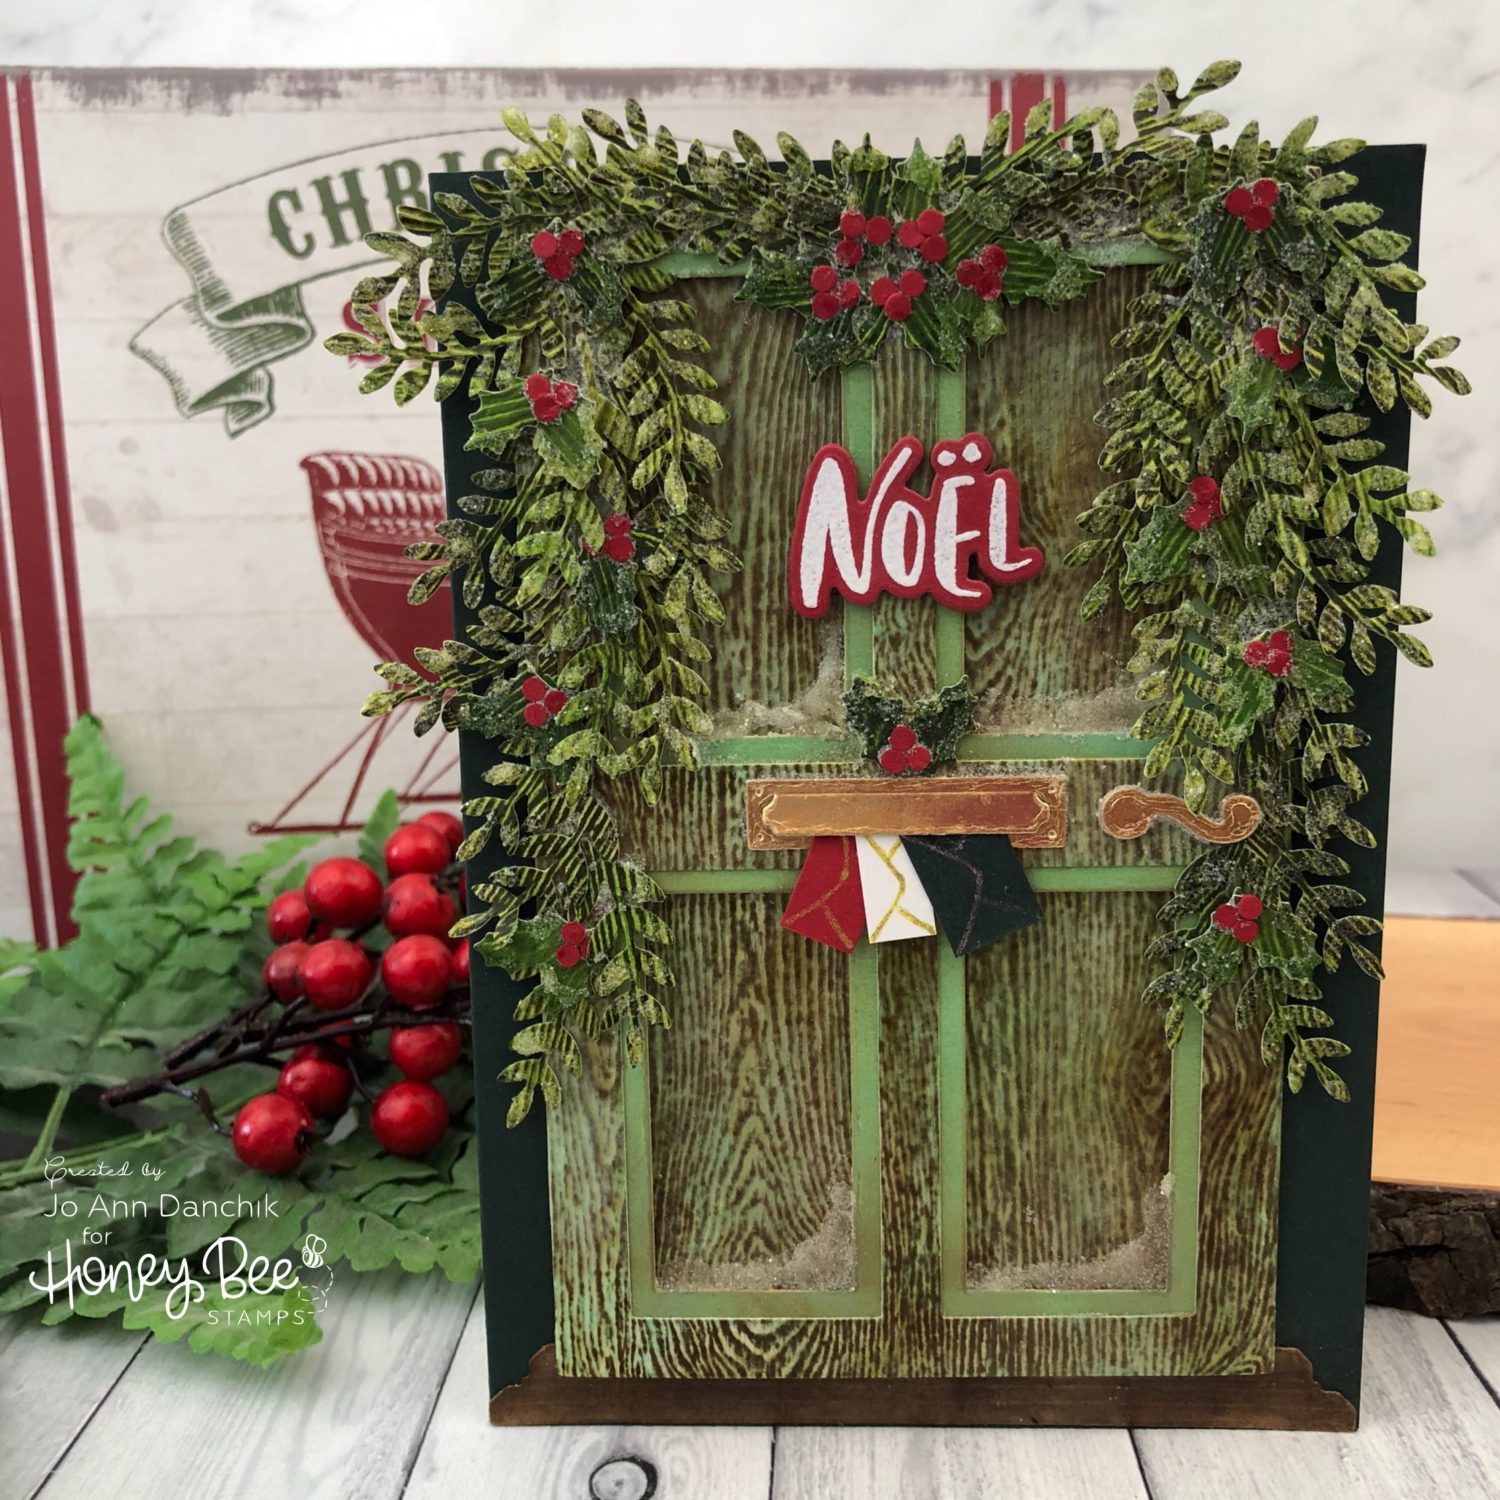
Bee Inspired New Release Week: Rustic Christmas Door
The Honey Bee Stamps Design Team has an exciting week of projects to share with you featuring the new DEERLY LOVED Release. Are you ready to Bee Inspired? You can find all the new stamp sets, dies, stencils, and sequins HERE.
____________________
(All the products used are listed below in compensated affiliate links. Thank you for your support!)
Today the team is featuring the Threshold Die Set. This set contains dies only that can be used to create a door. It also has dies to create greenery. There is a Welcome Home Stamp Set, and coordinating Welcome Home Die Set, that will allow the door to be used for a multitude of occasions such as moving, new home, announcing a birth or adoption, welcoming someone to the neighborhood, etc.
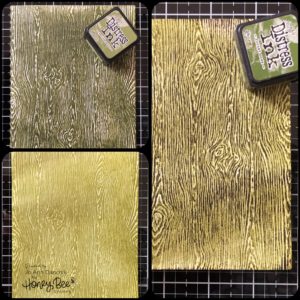
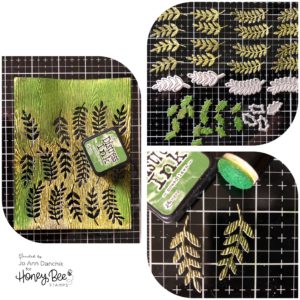
The shaped die is larger than an A2 card so I needed to use the 8.50” x 11” full size Tim Holtz Woodgrain Paper. I cut a piece large enough for the die and rubbed the surface with Cracked Pistachio (top left). It was sprayed with water to work the color into the grooves (top right). After drying it with a heat gun, I ran Vintage Photo over the top to give more definition to the wood grain (bottom).

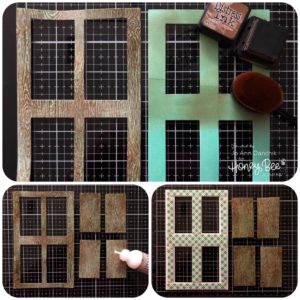
I used the die with the larger openings to cut the woodgrain. The die with the smaller openings was used to cut a piece of #80 Neenah cardstock. This piece was colored with Cracked Pistachio, using the new Picket Fence Blender Brushes. I found these brushes this summer at a craft show. They are crazy soft and dense and are fabulous for streak free blending. They work even better with Distress Oxides. I lightly added Vintage Photo on top to age the wood.
I added a thin layer of Distress Collage Medium over the surface of all the woodgrain frame and pieces. You can use a brush but my finger worked just fine. When it dries it gives the wood a slight sheen and seals the surface.
The Pistachio piece was glued to the woodgrain piece using Distress Collage Medium. Scotch foam tape was then added to the back. The four small panels were added on top of the foam.
I wanted some texture to the greenery so I treated another piece of woodgrain cardstock the same way as above. I ran Peeled Paint over the surface (top left) and sprayed it with water to work the color into the grooves (bottom left). After drying it with a heat gun, I ran Forest Moss over the top for definition (right).
The greenery dies were laid out with the grain of the wood. I wanted the holly to be a different shade so I ran Mowed Lawn over the leftover piece before running the holly dies through. The greenery looked a little too light so I added some Mowed Lawn over the top with a finger dauber.
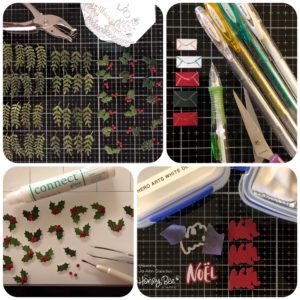
After I had everything cut I had the feeling that I was going to need more greenery so I repeated the above steps. The die for the berries was a bit too big for what I envisioned. More importantly, I needed too many and didn’t want to cut them one at a time. I grabbed my 1/8” hole punch and a scrap of red cardstock and punched away.
A small dab of Gina K Designs glue at the base was all that was needed to glue two small leaves together. The Jewel Picker was invaluable in picking up those minute berries!
I used scraps of red, green, and white paper to create letters. The backs were outlined to look like envelopes using the Signo Uni-Ball Sparkling Glitter Gel Pens.
To create the sentiment I stamped the Noel, from the Rejoice Stamp Set, onto a scrap of red cardstock using Versamark and Hero Arts Fine White Detail embossing powder. It was cut out using the coordinating Rejoice Die Set. Three more were cut and they were stacked and glued.
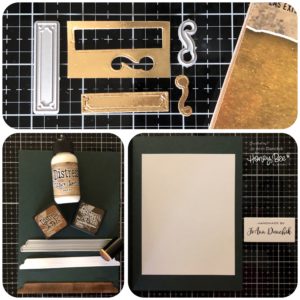
A mail slot and door handle were cut from gold Tim Holtz Kraft Metallic paper. The mail slot die actually cuts a slit for the letters!
There is also a die to cut the threshold or crown molding for the door frame. Vintage Photo and Ground Espresso were used to color it with a finger dauber. Collage glue was also added on top.
To build the card base, I cut 10” x 7” from Simon Says Stamp Midnight Green cardstock. The wood frame was added to the outside. A piece of white cardstock was added to the inside of the card for a place for a message. A small rectangle, with my name, was added to the back of the card.
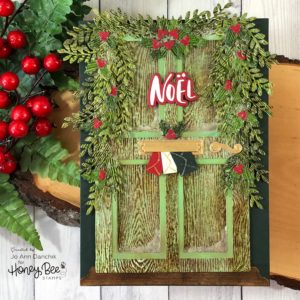
To add the greenery, a dab of glue was added at the base only of each frond. The ends were curled up. I started in the top corners and worked my way down. Holly sets were nestled in here and there.
To create glistening snow I dabbed Glossy Accents on the tips and edges of the leaves and holly and sprinkled Distress Clear Rock Candy Glitter over it. Glossy accents was also added to the corners of the door panels and covered with the glitter to give the impression of drifting snow.
The mail slot, door handle, letters, and sentiment were added to the front using a Gina K Designs glue pen. Everything was set aside to dry. Because of the overhanging greenery this card would most likely need to be hand delivered or included in a package.
On a side note…I have had my Tim Holtz Glass Mat for several months. It was perfect for all the inking and gluing. Everything came right off. My only complaint is that it reflects the light of my colorful hanging Tiffany lamp and I have to find creative ways to keep it out of the pictures. LOL!
If you missed yesterday’s sneak peek post, you can find it HERE.
As always, thank you for sharing a bit of your time with me today on another creative journey. Be sure to check back each day this week for more inspiration with the new release.
Joyfully, Jo Ann
Supplies used:
The products that I used are listed below in compensated affiliate links. You can click the icon of your choice, below the product picture, to go directly to your favorite shop. There is NO additional cost to you when using these links. Thank you for your support!