Creative Sundays With Jo Ann: Faux Letterboard Cards
I love the written word. As I child I used to read dictionaries and encyclopedias for fun. I was a bookworm AND a nerd! I still am. I love to read. I also love inspirational and fun quotes. I have many jotted down on scraps of paper…scattered all over the house! I use them in my journals, on cards, share them with family and friends, and hope to display them on a future letterboard. Why yes, I do have a letterboard already picked out and on my Amazon wishlist for future birthdays or holidays! LOL
____________________
(Products highlighted in teal are active links to the shop.)
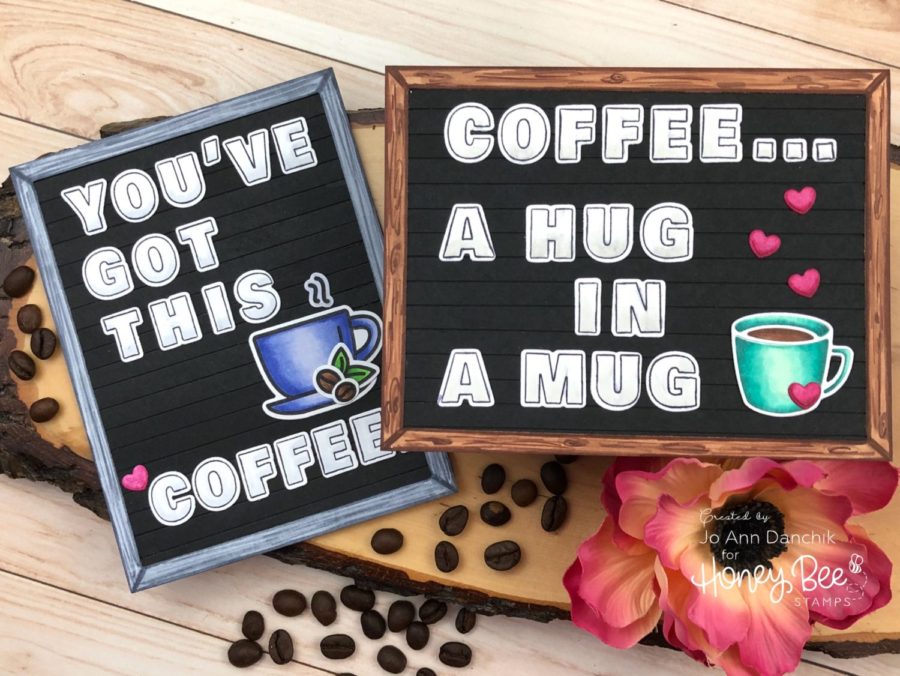
I wanted to find a way to replicate a letterboard for cards and for small framable signs. The Color Me Alpha Stamp Set and Color Me Alpha Die Set, along with small strips of black paper, work beautifully for short quotes.
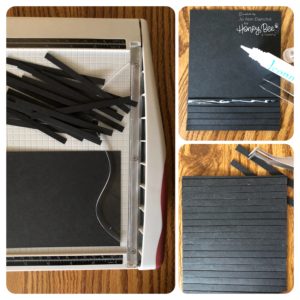
To start, I cut 1/4” strips from a 5.4” x 4.25” piece of black cardstock. I glued them to another piece of black cardstock, leaving a tiny gap between each strip. You will have two strips left over. I had run out of my Lawn Fawn Glue and had some Gina K Connect Glue that I wanted to try. I really couldn’t see any difference. I like them both equally. Since both can be hard to find in stock, pick up which ever one you can find. I buy 5-10 at a time, because I hate to run out.
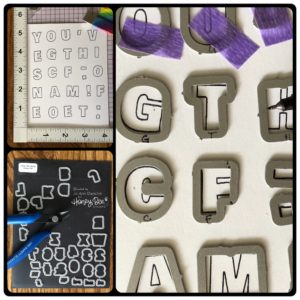
All the letters and images were stamped onto #80 Neenah Crest Cardstock using Simon Says Stamp Intense Black Ink, because it is Copic friendly. Everything was colored using Copic markers.
I stamped the letters that I needed, using the Color Me Alpha Stamp Set. I cut out the letters, using the coordinating Color Me Alpha Die Set, and Purple Tape.
As I was getting ready to run the dies through my electric die cutting machine the electricity went out. I was also getting ready to make a latte with my espresso machine. I chuckled at the irony of it all as I remembered my coffee quote…”You’ve got this!” I quickly switched to a manual die cutting machine and heated a pot of water on my gas stove to make tea instead. I know…first world problems!
Tip: I like to cut out all my dies and store them on magnetic sheets. Before I cut them out I mark the letter or number, on the bottom back of the die, with a thin tip Sharpie. It is much easier to identify the letters once they are separated!
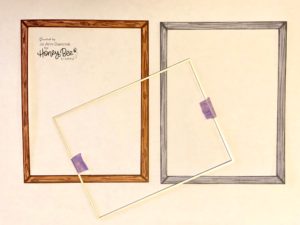
To create the frames, I cut two more pieces of 5.5 x 4.25 #80 Neenah cardstock, using the third largest die from the Hero Arts Nesting Infinity Rectangle Set.
Wood Frame: E23, E25, and E27
Metal Frame: C1, C3, C5, and C7
I thought that the boards needed a little something extra. I stamped the coffee cup and multiple hearts from Tea Time Stamp Set. They were cut using the coordinating Tea Time Die Set.
Cup: BG10, BG13, BG15, BG18
Coffee: E25, E27
Hearts: RV17
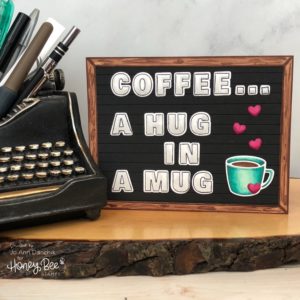
The mug, leaf, and coffee beans were stamped using the Coffee Break Stamp Set and cut using the coordinating Coffee Break Die Set.
Mug: B60, B63, B66
Leaf: YG05, YG07, YG09, YG99
Beans: E23, E25, E27
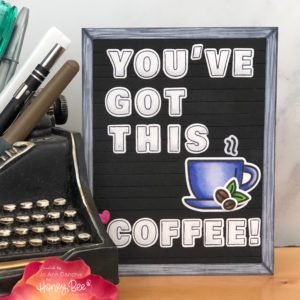
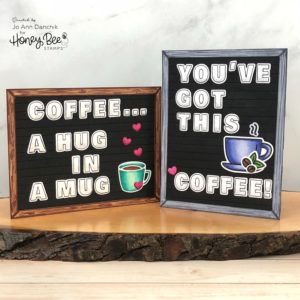
Both panels were glued to folded #110 Neenah Classic Cardstock cardbases, using a Kokuyo Tape runner. After everything was assembled the letters looked flat, so I added a light touch of grey shadows to them.
Card with wooden frame: W00, W0
Card with metal frame: C00, C0
I hope that this gives you some ideas for some inspirational cards for your friends and frameable art for your walls! Also, they are relatively flat and will be easy to send through the mail.
As always, thank you for sharing a bit of your time with me today on another creative journey.
Joyfully, Jo Ann
Supplies used:
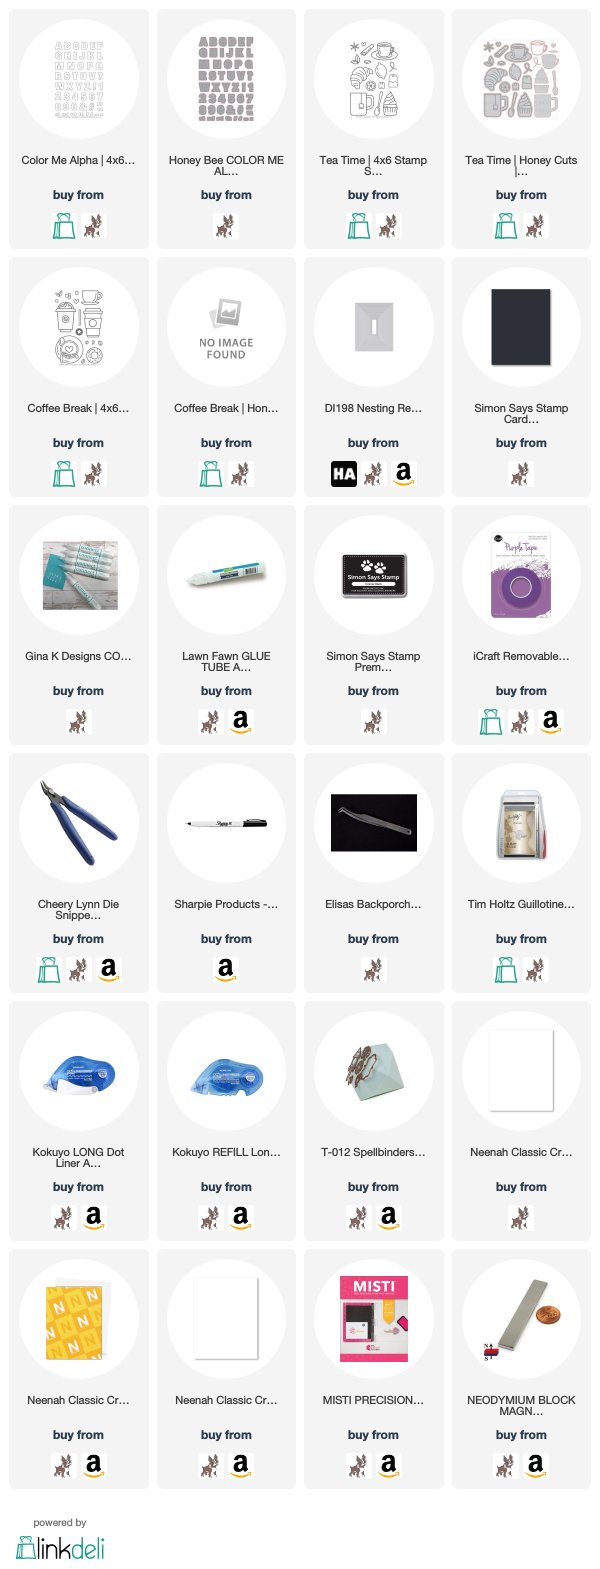
The products that I used are listed below in compensated affiliate links. You can click the icon of your choice, below the product picture, to go directly to your favorite shop. There is NO additional cost to you when using these links. Thank you for your support!

