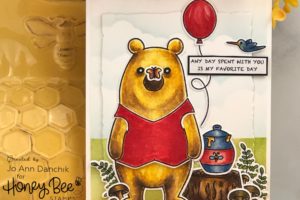
Honey Bee Sneak Peek Day Two: Happy Clucking Birthday
This is Day Two of the HAPPY BEEday Release Sneak Peeks for Honey Bee Stamps. Be sure to visit the Honey Bee Stamp Blog to see what the other DT members have created.

____________________
When I was five years old my parents lived in a rental home in a semi-rural neighborhood in New Jersey. There was an abandoned chicken coop in the backyard. My sister and I were told not to go near it…so of course we did…often! There was also a dairy farm across the road. We were told not to feed the cows the wild onions that grew just beyond their reach. Apparently, it makes their milk taste bad. So, of course we did that too…often! LOL
____________________
(Products highlighted in teal are active links to the shop.)
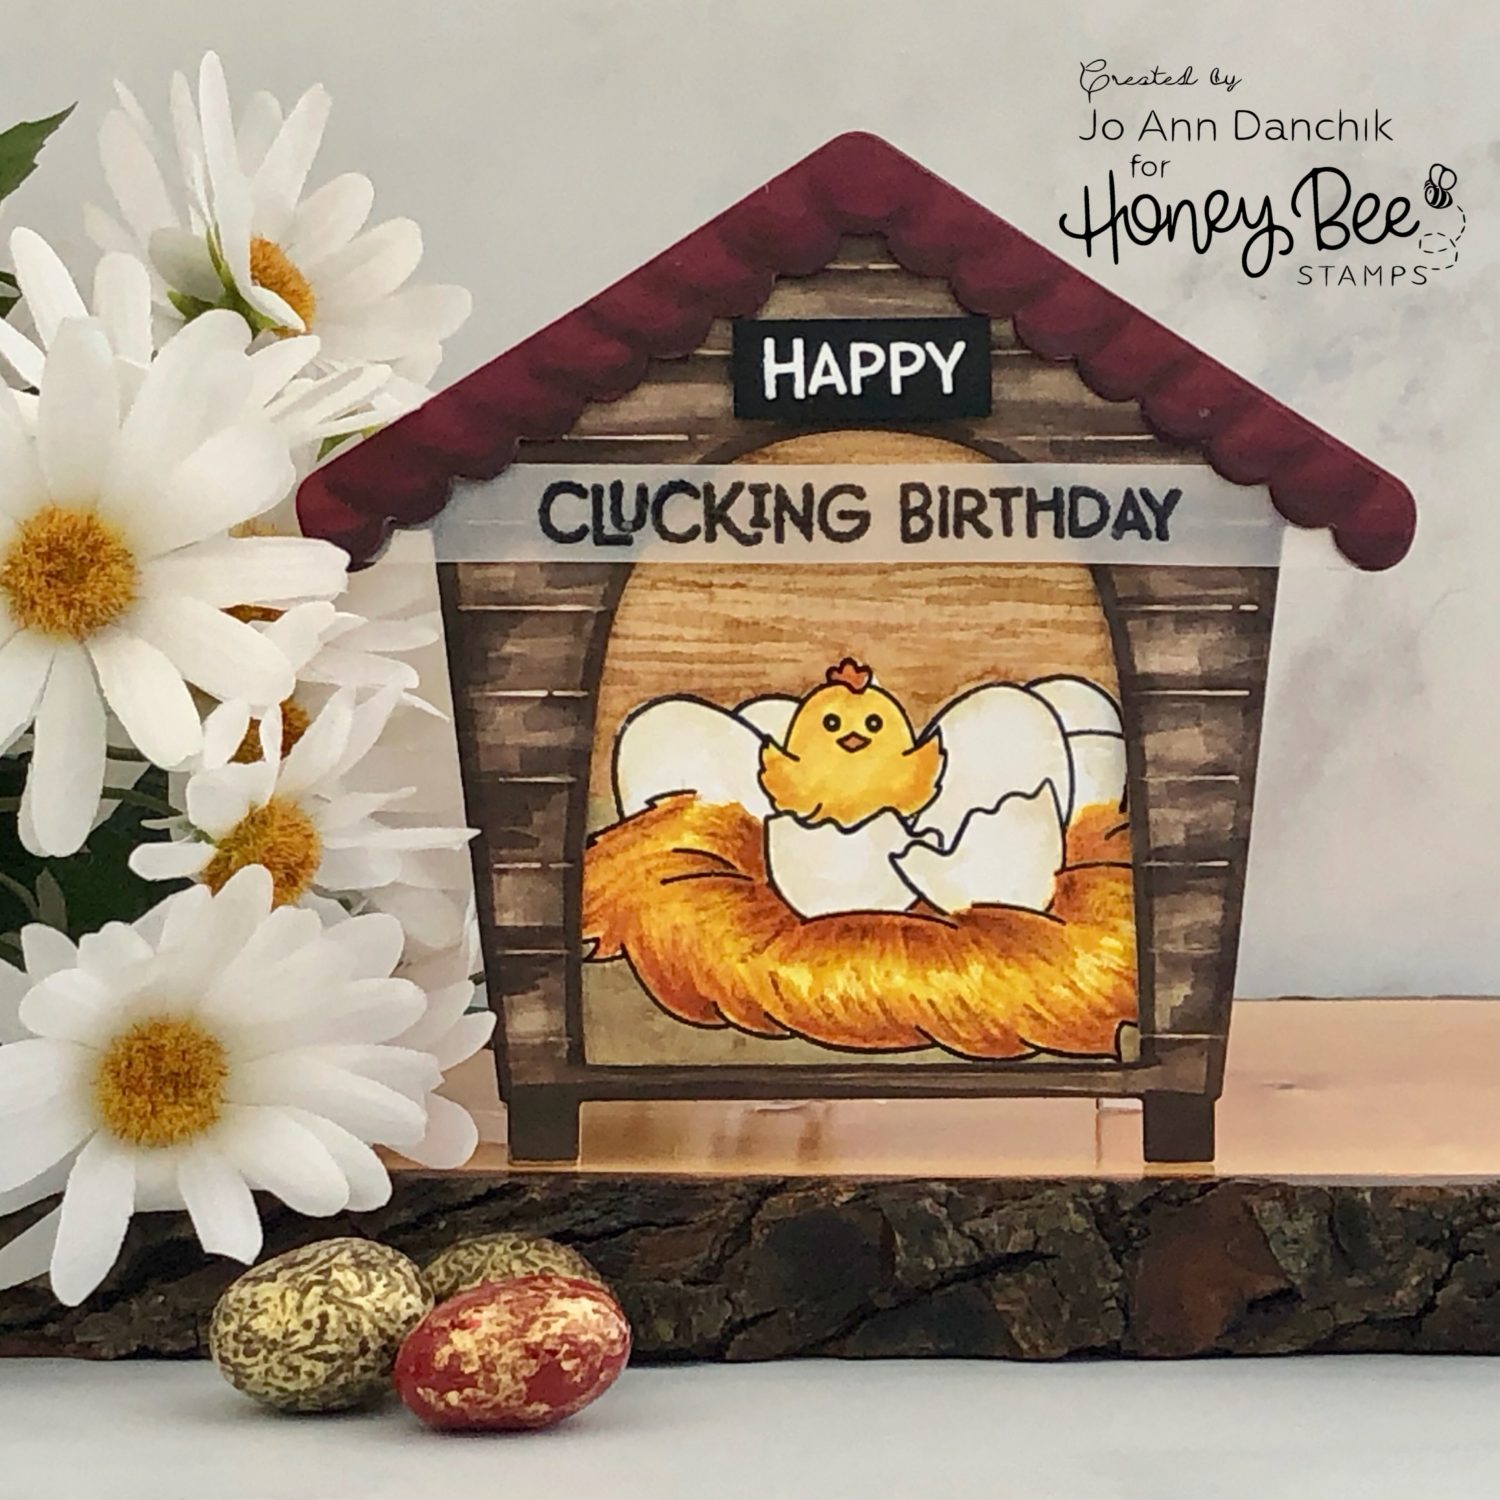
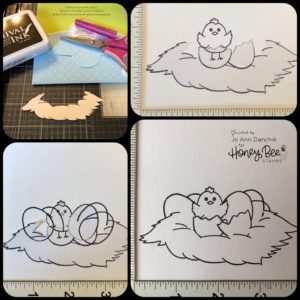
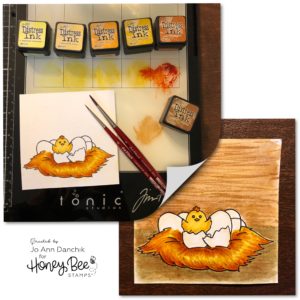
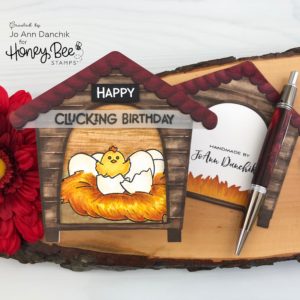
Today’s card started off with images from the adorable Spring Chicks Stamp Set. I stamped onto Tim Holtz watercolor cardstock, using Ranger Black Archival Ink. I stamped the mound of hay first, masked it with Inkadinkado Masking paper, and continued stamping and masking as I went. I made a mistake at the very end, with the eggs on the right, but was able to cover it with the chicken coop. Yeah…I did not want to start over!
I watercolored the scene using Distress Inks and #0 and #4 DaVinci Cosmotop Spin Watercolor Brushes.
Straw and Chick: Squeezed Lemonade, Scattered Straw, Wild Honey, Fossilized Amber, Rusty Hinge, Vintage Photo
(You do not need this many colors. I am not a watercolor expert, so I just played around until I got the results that I wanted!)
Eggs: Antique Linen
Floor: Old Paper, Vintage Photo
Wall: Vintage Photo, Brushed Corduroy
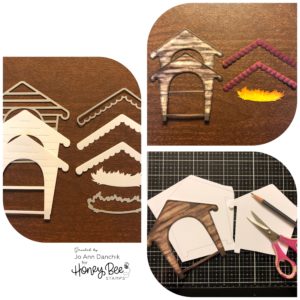
I wanted to make this into a shape card so I cut two of each piece from #110 Neenah Solar Crest cardstock using the Chicken Coop Die Set.
The pieces were colored with Copic Markers.
Coop: E43, E44, E47, E49
Roof Trim: R89, RV69, RV99
Straw: YR23, YR24, YR27 (The straw piece was used on the back of the card.)
I realized that I would need some solid pieces to back the front and the back of the coop so I traced around the panels onto some #80 Neenah and cut inside the line.
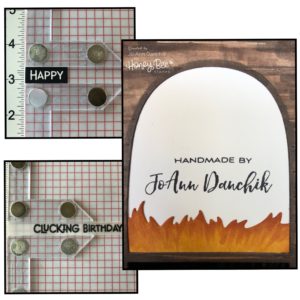
The sentiment is from the EGGcelent Sentiments Stamp Set. There are lots of fun, sassy sayings in this set. The Happy was stamped on black cardstock using Versamark Ink and Hero Arts White Embossing Powder. The rest of the sentiment was stamped on Vellum with VersaFine Clair Nocturne Pigment Ink and embossed with Hero Arts Clear Embossing Powder.
The straw was added to the back panel along with my signature stamp.
Hints:
-Be sure to use an anti static pouch before stamping on dark cardstock and vellum.
-Preheat your heat gun and move quickly to keep vellum from warping.
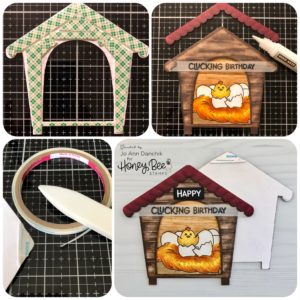
Scotch Foam Tape was added to the back of the coop. The chicken panel was added. The vellum sentiment was glued on the edges that would be hidden by the roof trim. I went back and die cut two more trims, layered them, and added it to the panel with a Hero Arts Glue Pen. A small piece of Scotch Foam Tape was also added to the Happy sentiment.
To make this into a shape card, I scored 1/4” from the top of the back panel. Because of the added thickness, and the roof trim, it makes a fairly thick fold, but it works. 1/4” Score Tape was used to adhere the front to the back.
I just love how adorable this set is and you will have lots of fun with the sassy sentiments!
Thanks for joining me today. Be sure to check back each day for more sneak peeks of the new release. I will also be part of the two day HAPPY BEEday Blog Hop on Friday and Saturday, April 19th and 20th, where you will be able to find additional inspiration.
Joyfully,
Jo Ann
Supplies used:
The products that I used are listed below in affiliate links. You can click the icon of your choice, below the product picture, to go directly to your favorite shop. There is NO additional cost to you when using these links. Thank you for your support!