• Home
  • About
  • Disclosure
  • FAQ
  • Contact Me
jadanchik.comjadanchik.com
  • Home
  • About
  • Disclosure
  • FAQ
  • Contact Me

Honey Bee Stamps: Spring Release Blog Hop

Honey Bee Stamps: Spring Release Blog Hop

Honey Bee Stamps: Spring Release Blog Hop

May 1, 2018 Posted by Jo Ann Danchik Backgrounds, Cards, Copics, Distress Inks, Friend, General, Hello, Ink Blending, Scene Building, Tools

Today I am part of the Honey Bee Stamp Blog Hop. You should have arrived here from the incredibly talented Jennifer McGuire.

The Honey Bee Stamps 2018 Spring Release is now available in the STORE. We are having a two day blog hop to celebrate the new release. Hop along with us both days for lots of inspiration and a chance to win prizes! 

____________________

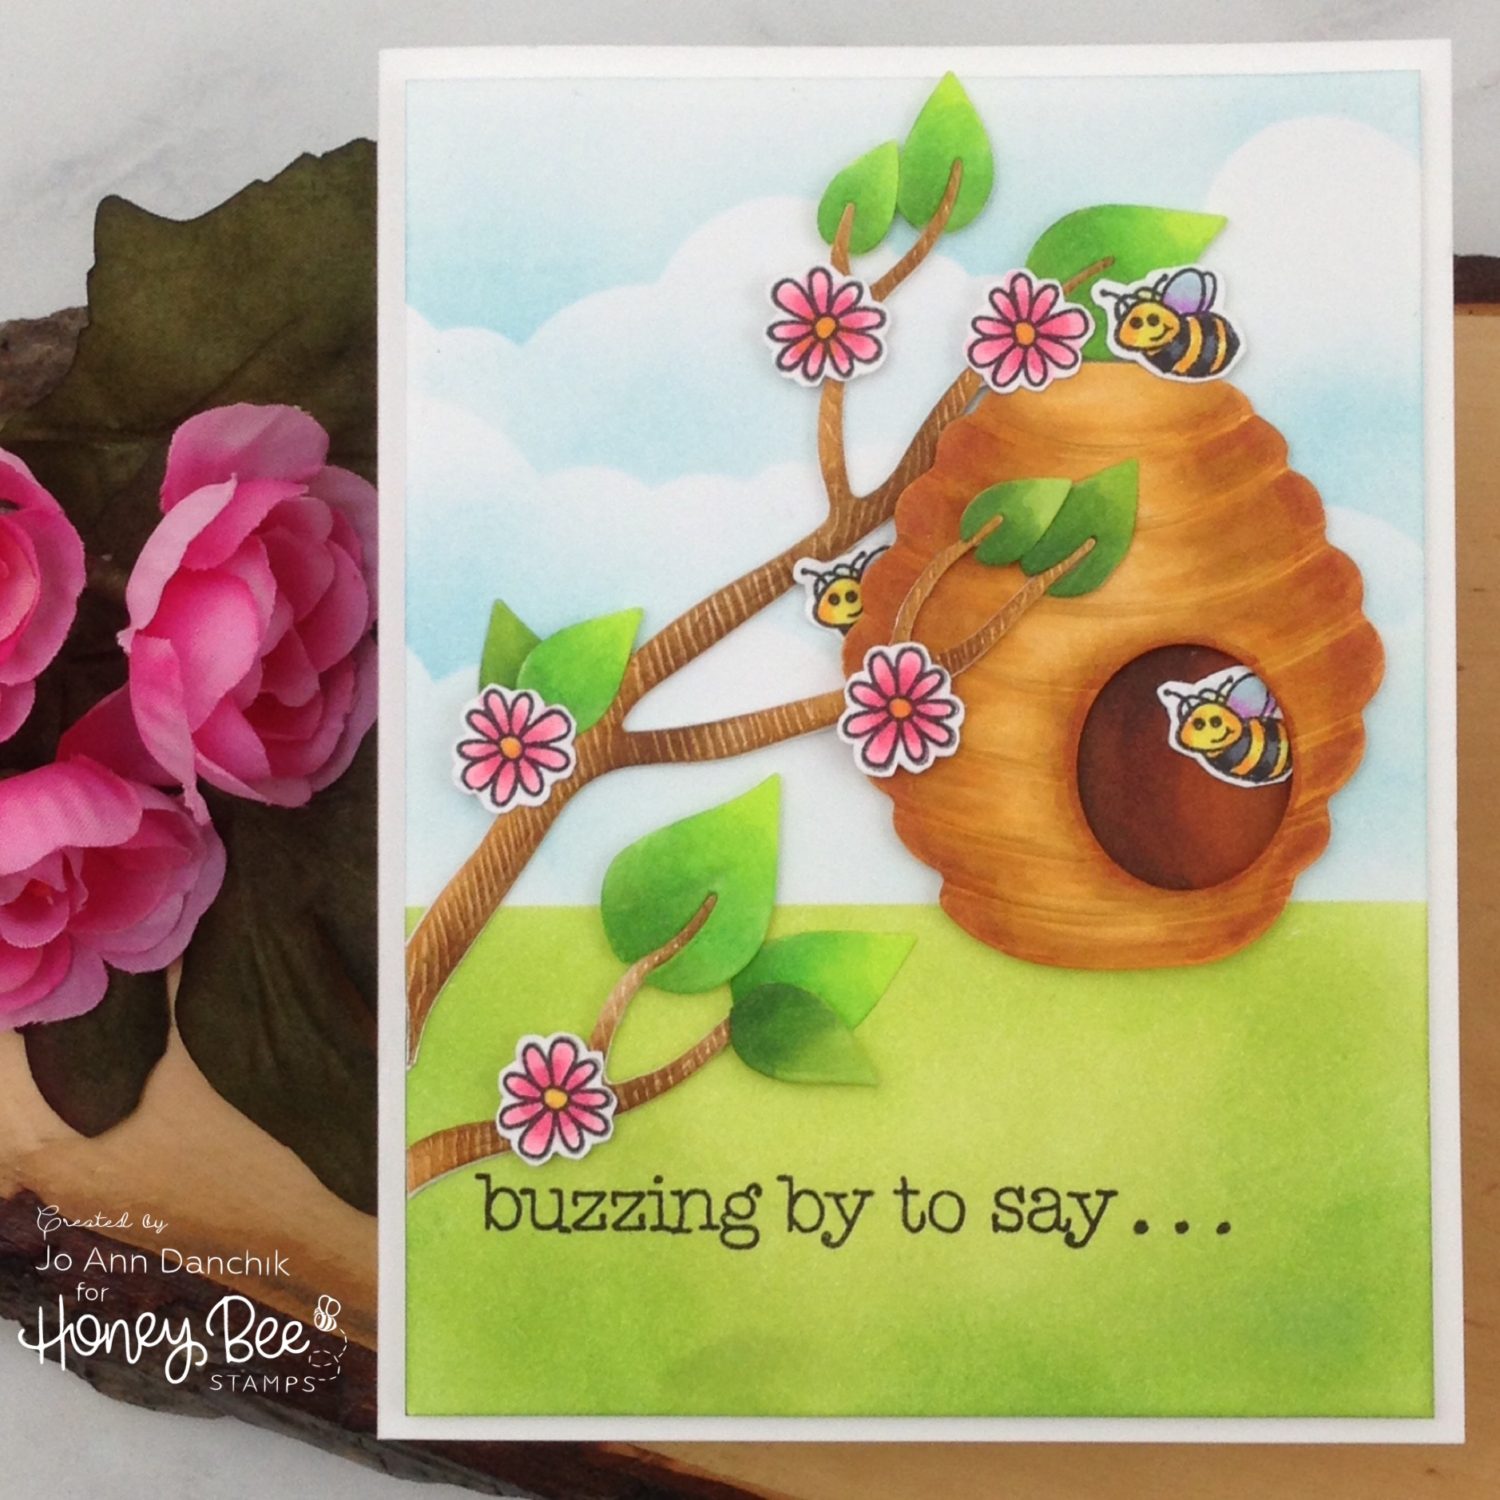
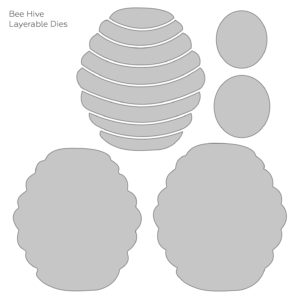
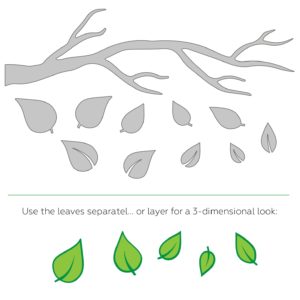
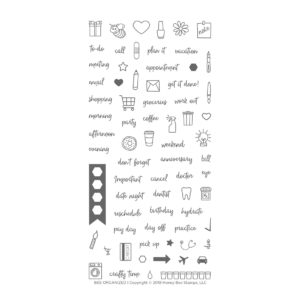
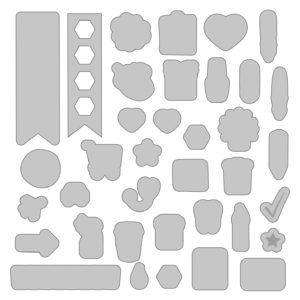
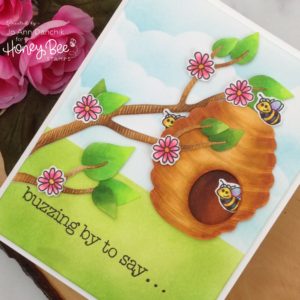
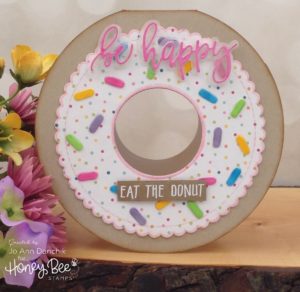
For today’s card I used these new sets from the release: the Bee Hive Die Set, the Branches and Leaves Die Set, and several small images from the Bee Organized Stamp Set and the coordinating Bee Organized Die Set.


(Compensated affiliate links are used with NO cost to you. Products highlighted in teal are active links. All the new release products, and the supplies used today, are also linked to multiple shops at the end of the post. Thank you for your support!)

____________________

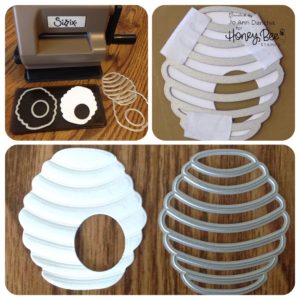
I started the card by die cutting the Bee Hive Die from #80 Neenah cardstock. I ran it back through using the round hive opening die. I taped the segmented die on top of the cut out. I wanted it to emboss, not cut, so I added a Spellbinder (tan) embossing mat under the paper and ran it through the machine on the Tab 1 setting. It embossed beautifully!

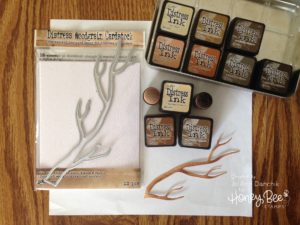
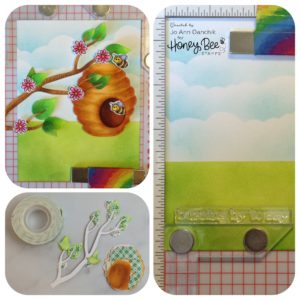
While I had the die cutting machine out I also cut the branch, from the Branches and Leaves Die Set, from Tim Holtz Distress Woodgrain Cardstock. I used sponge daubers to blend on Antique Linen, Vintage Photo, and Gathered Twig Distress Inks.

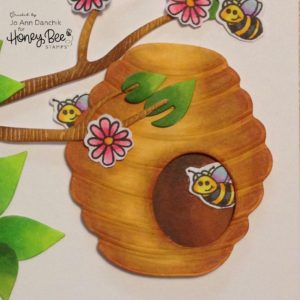
I colored the Bee Hive with Copic Markers. I used a scrap piece of paper to color what will be the inside of the hive. (Hive: YR 21, YR24, YR27)  (Inside Hive: YR27, E39, E59)

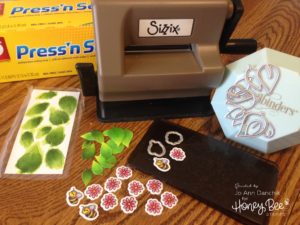
Next, I cut a plethora of leaves from the Branches and Leaves Die Set. I stamped multiple flowers and bees, from the Bee Organized Stamp Set, using Simon Says Stamps Intense Black Ink. I cut them out using the coordinating Bee Organized Die Set. The Sizzix Sidekick makes this so much easier than running them through a large machine.

I find it easier to color little pieces while they are still intact with the paper. A small piece of Press ‘n Seal on the back works like a charm. They were colored with Copics. (Bees B000 V04 Y13, Y38, C6, C10) (Flowers RV21, RV23, RV25, Y38)

Also, while we are talking about tools that make your life easier, I got up to answer the phone and dropped all those little leaf dies on the floor! I remembered that I had just gotten the Spellbinder Magnet in the mail. I used it to pick them up…it is seriously strong! It doesn’t leave my desktop now. It really is nice for keeping all those small dies corralled. No more spills! 

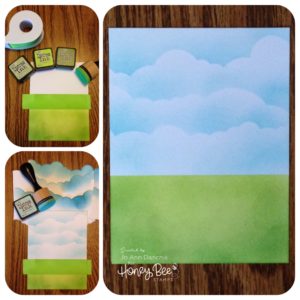
For the background I cut a piece of #80 Neenah to 4” x 5.25”. I used a Mini Ink Blending Tool to add Shabby Shutters, Twisted Citron, and Mowed Lawn Distress Inks for the grass. For the sky I cut some masks, using the Cloud Borders Die Set, and blended on Tumbled Glass Distress Ink. I have been using these masks for a long time! 

I used the Misti to temporarily arrange the pieces so that I could figure out the placement of my sentiment. The sentiment is from the Bee-You-Tiful Stamp Set. Another handy tool that I am using all the time is the Misti Creative Corner Set. It makes lining up the sentiment a breeze!

I added Scotch Foam Tape to the back of the hive body and attached the scrap piece to the foam. This gave the opening depth. The leaves were attached to the branch using Lawn Fawn Glue Pen. Foam Tape was also added behind the leaves.

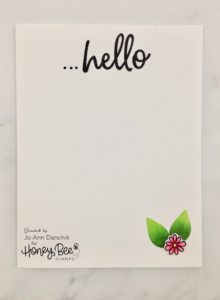
The sentiment from the Honey Bee/Simon Says Stamp exclusive, Remarkable Stamp Set, was stamped on the inside. I know that you can’t get it anymore but many of you do already own it. I added a leftover flower and two leaves in the bottom corner.

To finish, everything was glued to the card front using the Lawn Fawn Glue Pen. The panel was then taped to a #110 Neenah Cardstock card base using Scotch Foam Tape.

To see more of my tutorials from this new release you can click on each picture below!


Prizes!!!
What’s a hop without some prizes? Be sure to visit each blog and leave a comment to be entered to win! Honey Bee will be giving away (two) $50 gift cards to the Honey Bee Stamp store. They will also be giving away (four) Bee Organized Prize Packs. Winners will be announced on the Honey Bee Stamp Blog (here) on May 5th.

The next stop on the hop is my friend, the insanely talented Kathy Racoosin.

If you have come directly here and want to start at the beginning here is the Blog Hop lineup for Day One:

Honey Bee Stamps
Carly Minner
Jennifer McGuire
Jo Ann Danchik  (you are here)
Kathy Racoosin
Kristina Werner
Lisa Cisneros
Lydia Fielder
May Park
Vera Yates
Wanda Guess

Don’t forget to leave a comment below and on each blog to be eligible for the prizes.

Be sure to visit the Honey Bee Stamp blog tomorrow for Day Two (May 2nd) of the Blog Hop. Thanks for stopping by!

Joyfully, Jo Ann

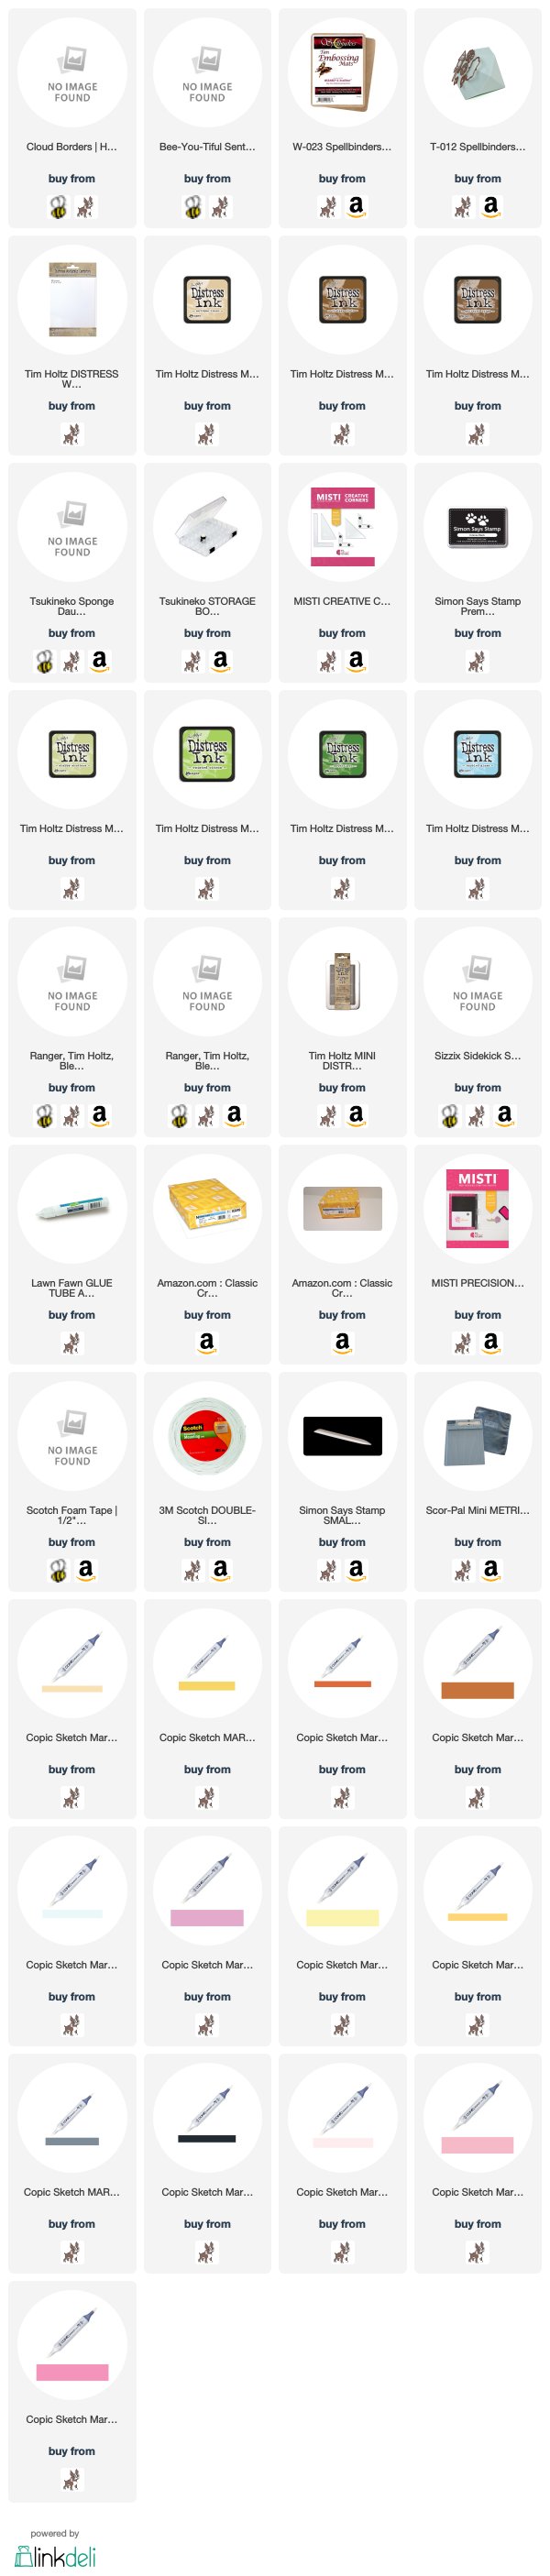
All the New Release Products are listed below in compensated affiliate links. There is NO additional cost to you when using these links. The other products used are located below this list. Thank you for your support!


Additional supplies used:
You can click the icon of your choice, below the product picture, to go directly to your favorite shop. There is NO additional cost to you when using these affiliate links. Thank you for your support!


SaveSave

SaveSave

SaveSave

SaveSave

SaveSave

SaveSave

SaveSave

SaveSave

SaveSave

SaveSave

SaveSave

SaveSave

SaveSave

SaveSave

SaveSave

SaveSave

SaveSave

SaveSave

SaveSave

SaveSave

SaveSave

SaveSave

SaveSave

SaveSave

SaveSave

SaveSave

SaveSave

SaveSaveSaveSave

SaveSave

SaveSave

SaveSave

SaveSave

SaveSave

SaveSave

SaveSave

SaveSave

SaveSave

SaveSave

SaveSave

SaveSave

SaveSave

SaveSave

SaveSave

SaveSave

SaveSave

SaveSave

SaveSave

SaveSave

SaveSaveSaveSaveSaveSave

SaveSave

SaveSave

4
Share

You also might be interested in

Trinity Stamps: Spring Fling Release Blog Hop

Trinity Stamps: Spring Fling Release Blog Hop

May 3, 2019

Today we are celebrating the new Trinity Stamps Spring Fling[...]

Bee Inspired New Release Week: Gift Tags Galore

Bee Inspired New Release Week: Gift Tags Galore

Oct 31, 2018

The Honey Bee Stamps Design Team has an exciting week[...]

Midweek Creations with Jo Ann: Monochromatic Bouquets

Midweek Creations with Jo Ann: Monochromatic Bouquets

Oct 17, 2018

I had decided that I wanted to stamp just the[...]

Hello......I'm Jo Ann

Christian, wife, and proud mother and grandma. I love to create art, cook, read a good book, take photos, and travel. -Enjoy life now...this is not a rehearsal!

....

While this blog is my personal journey I hope that you find something here that encourages you to unfurl your wings and be creative. Most everybody has a little childlike creativity in them just waiting to be set free. It doesn't have to be perfect... just create.

....

…………………………………………..

Enter your email address below to subscribe to this blog. You will receive notifications of new posts by email.


* indicates required


*Check your email to confirm subscription.

…………………………………………..

Categories

  • Action Card
  • Alcohol Inks
  • Altered Art
  • Backgrounds
  • Banners
  • Birthday
  • Bookmark
  • Cards
  • Chalk
  • Christmas
  • Colored Pencils
  • Congratulations
  • Copics
  • Distress Inks
  • Distress Oxide Inks
  • Easter
  • Embossing
  • Embossing Paste
  • Encouragement Cards
  • Fall
  • Father's Day
  • Foiling
  • Friend
  • General
  • Get Well
  • Gift Card Holder
  • Gift Tags
  • Graduation
  • Halloween
  • Hello
  • Holiday
  • Holiday Decor
  • Home Decor
  • Ink Blending
  • Interactive
  • Love
  • Markers
  • Masking
  • Miss You
  • Mother's Day
  • New Years
  • No Line Coloring
  • One Layer Cards
  • Ornaments
  • Patriotic
  • Placemats
  • Project
  • Scene Building
  • Shadow Box Cards
  • Shaker Cards
  • Shape Cards
  • Shared Thoughts
  • Shrinky Dinks
  • St. Patrick's Day
  • Stencils
  • Sympathy
  • Tags
  • Techniques
  • Texture Paste
  • Thank You
  • Tools
  • Uncategorized
  • Valentines
  • Wall Art
  • Watercolor
  • Wedding / Anniversary
  • Wreath Builder

Archives

  • June 2019
  • May 2019
  • April 2019
  • March 2019
  • February 2019
  • January 2019
  • December 2018
  • November 2018
  • October 2018
  • September 2018
  • August 2018
  • July 2018
  • June 2018
  • May 2018
  • April 2018
  • March 2018
  • February 2018
  • January 2018
  • December 2017

Recent Posts

  • Midweek Creations With Jo Ann: Floral Cross Background
  • Creative Sundays With Jo Ann: Goodbyes Are Not Forever
  • Midweek Creations With Jo Ann: Tropical Rainforest Shaker Card
  • National Honey Bee Day Blog Hop: You’re The Bee’s Knees
  • Creative Sundays With Jo Ann: Mandala Love

Tags

Angel Policy Stamp Set and Dies Backgrounds Bill The Bear Stamp Set and Dies Birthday Cardmaking Cards Christmas Cloud Border Die Set Colored Pencils Copics Design Team Die Cutting Dies Distress Inks Distress Oxide Inks Encouragement Feelin' Foxy Stamp Set and Dies Friend General Hand Drawing Heat Embossing Holiday Honey Bee Stamps Ink Blending Love Mae The Mouse Stamp Set and Dies Markers Masking Misti Tool New Release One Layer Cards Papercrafting Penny The Platypus Stamp Set and Dies Pinky The Pig Stamp and Die Set Projects Scene Building Snow Buddies Stamp Set and Dies Stamping Stamps Techniques Tools Trinity Stamps Tutorial Valentines Watercolor

Instagram Feed

jadanchik

A study in two different mediums… Tim Holtz WC D A study in two different mediums…
Tim Holtz WC Distress Pencils -v- Windsor & Newton Cotman WC Paints. 👩‍🎨🎨
—————
1. On the right is my original painting using W & N paints. I mixed equal parts Intense Blue and Cadmium Red Pale Hue to make black. I added additional water and thinned down washes to the bird to make the blooms and drips. As the paint thins out it creates lovely bluish tints.
2. On the left I used Tim’s WC Pencils. Distress Black Soot Ink has the unique property of maintaining its true black color as it’s thinned with water. The pencils do as well. Hmmm 🤔 To remedy this I quickly made a thin wash with Prize Ribbon while the painting was still wet. I alternated adding thinned blobs of the black and blue wash until I got the desired results.
—————
The more I study it…the more I prefer the raven on the left! Do you have a favorite?
—————
@tim_holtz @ranger_ink #timholtz #distress #distressinks #distresspencils
When you still have your new pencils out…but hav When you still have your new pencils out…but have no idea what to do with yourself. Cleaning your mess is not the answer. 😜 Then out of the corner of your eye you see Tim’s new “Unraveled” stamp set from Stamper’s Anonymous and some leftover scraps of watercolor paper. You just start to paint. Not sure what it will become when I fussy cut it. Mum(my)’s the word! 🤫
—————
(Swipe left for process pics)
1. Stamped with Antique Linen Distress ink for no line painting.
2. Antique Linen says it all. It’s in the name! But it was too dark so I made a wash and added some Picket Fence to lighten it. The brown is a mix of Walnut Stain and Black Soot.
—————
@tim_holtz @stampersanonymous @ranger_ink #timholtz #stampersanonymous #distress #distressinks #distresspencils
Still testing out the new Tim Holtz Distress Penci Still testing out the new Tim Holtz Distress Pencils. And how much fun is Tim’s new “The Scarecrow” stamp set from Stamper’s Anonymous? 🧡
—————
(Swipe right for process pics)
1. I stamped the scene using Antique Linen Distress Ink for no line painting with the watercolor pencils.
2. I realized that I put the sun on the right but the shadows on the scarecrow are also on the right. 🤔 Simple fix. I wet the shadow lines and lifted them with a paper towel. The crow and the plaid shirt are my favorite parts!!
3. I wanted to create some color blends so I made some heavily pigmented washes.
4. I wasn’t sure how to add a background at this point without a lot of masking. I carefully flooded the paper with water, avoiding the painted areas, and floated in several different light color washes.
—————
@tim_holtz @stampersanonymous @ranger_ink #timholtz #stampersanonymous #distressink #distress #distresspencils
I know…I know…no posts for 2+ years and now he I know…I know…no posts for 2+ years and now here I am posting again! 😜 I would have made this a reel, but after an hour of trying to figure it out I gave up. 🫤
—————
After painting the cat, crow, and bats yesterday I immediately thought of Tim Holtz’s new “Gothic Tapestry” skull from Stamper’s Anonymous. And I wanted to play with my new Distress Pencils some more…of course I did!
—————
I stamped a partial picture using Hickory Smoke Oxide ink. The watercolor paper (140lb cold press) was very textured so the impression is sketchy at best, but I didn’t need a lot of details.
—————
I love it! (Hubby thinks that it looks like Chewbacca!! 😂) 

We are going to need open stock on the black pencil!! @ranger_ink @tim_holtz @stampersanonymous #timholtz #stampersanonymous #distress #distresspencils #watercolopencils
Part Two I tested several of my favorite watercolo Part Two
I tested several of my favorite watercolor pencil methods still using the Windsor & Newton professional cold press 140 lb watercolor paper. High quality paper is oftentimes more important than the quality of paint in getting good results.
1. The first swatch is pencil scribbled directly onto the paper and activated with a water brush. The Seedless Preserves is highly pigmented but a little harder to break down and dissolve. Darker reds and purples sometimes behave this way.
2. The second swatch is dipping the tip of the pencil in the water and smoothing with a wet brush. This delivers a large pigment load. You can also run a wet brush over the tip of the pencil  and then paint. These offer very smooth results.
3. The third swatch is a wash. I like to create a controlled wash. Yes…you can do this easily with pencils. Add a few drops of water to a porcelain well. Run your water brush over the tip of the pencil and swirl it into the water. Repeat multiple times until you get the paint to water ratio that you want. With a wash you can add many layers to your painting.
4. The top picture shows how well the colors lift. This is useful info for adding highlights and shading or if you accidentally drop color in an unwanted area. Being Distress Inks, they don’t appear to react quite the same to water droplets as regular Distress Inks. They do lift when dry, but some colors stain more than others.
(continued in comments)
timholtz @ranger_ink #timholtz #distress #distresspencils #watercolorpencils
Part One I have been watching for the UPS driver a Part One
I have been watching for the UPS driver all week. When my package of Distress Pencils arrived yesterday afternoon I nearly snatched it from their hands! 😂
I work a lot with different watercolor paints, pencils, and crayons so I was eager to play with them. I used Windsor & Newton professional cold press 140 lb watercolor paper to test them. It’s bumpy so you get a lot of white space when you scribble on the pigment.
1. As I tend to layer colors I immediately put them into color families. I know that you like to dig for them Tim but I need them in color order and don’t have your patience. You are a “hunter” and I am a “gatherer.” 😜
2. I swatched them out…not only to have a chart but to check on several properties. It shows me how easily the different colors dissolve on the paper but also how they “water down” into a wash near the bottom of the swatch. The black line shows their transparency. Most colors are highly pigmented, yet transparent, and easy to dissolve.
So far I am loving them!!! (More in next post.)
@tim_holtz @ranger_ink  #timholtz #distress #distresspencils #watercolorpencils
I have been doing a lot of watercoloring this summ I have been doing a lot of watercoloring this summer and thought that I might start posting again. (I haven’t shared my art work socially in over 2 years.) I painted these three Halloween Decoration Cards this morning using Windsor & Newton paints. They are from an older Michael’s class (free) taught by Mandy Peltier. They were a hoot to paint!
@mandypeltierartist @michaelsstores @winsorandnewton #winsorandnewton #makeitwithmichaels #michaelsclasses
Sometimes it is hard to step back, reevaluate, and Sometimes it is hard to step back, reevaluate, and admit that you need to see things differently!! These are powerful phrases that I intend to learn and to use gracefully.
—————
Thanks my friend for allowing me to share your wise words! ❤️@turnertr03
I am learning. I am listening. #blackouttuesday #a I am learning. I am listening.
#blackouttuesday #amplifymelanatedvoices
Load More... Follow on Instagram

Copyright Statement:

All content, including text, photos, and projects are the property of  Jo Ann Danchik. I encourage you to use this blog as inspiration for your personal projects. If you use any parts of this blog on another blog, website, or in any other public forum, please link back to this blog at jadanchik.com rather than copy and paste any of the information.


© [2017] · Jo Ann Danchik · All Rights Reserved.

Prev Next