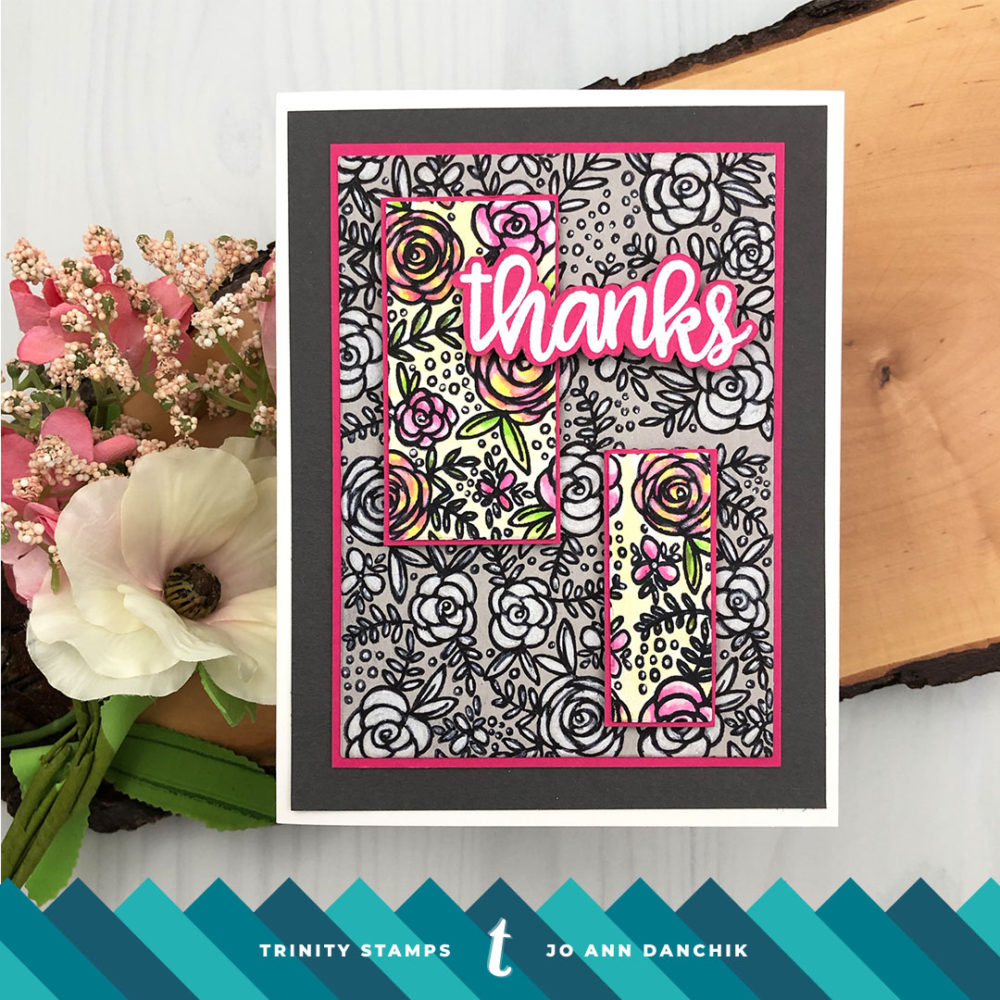
Midweek Creations With Jo Ann: Floral Cross Background
Hello my creative friends! I hope that your week is going well. Today will be my last day as a Design Team member for Trinity Stamps. I have loved being able to share my Trinity creations here with you and being part of each exciting new release as this company continues to grow. You will still be able to find me creating here on my blog, on instagram, and here and there. Grab a cuppa and let’s get started on today’s project!
____________________
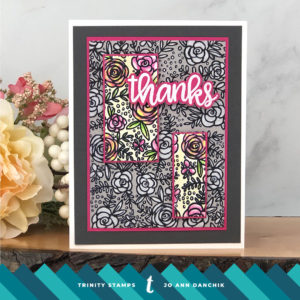
Today’s card starts with the Floral Cross Stamp Set. The stamp itself is full of beautiful blooms and foliage so I thought that I would turn it into a full background.
I wanted to create some inlay pieces on a grey background so I used my MISTI to stamp multiple images. I stamped with watercolor friendly Ranger Black Archival Ink onto Tim Holtz watercolor cardstock and Hero Arts Pebble (light grey) cardstock.
In the following pictures you can see where I set the stamp up in various positions, using copy paper to test for placement. When I was happy with the results I stamped the panels and then moved to another position. Using this method, all the card panels are identical.
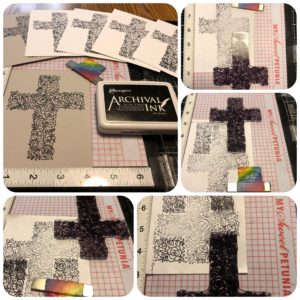
I cut a large rectangle from the grey panel using a Hero Arts Infinity Rectangle Die. (left pic)
To get identical placement, I lined up a stamped watercolor panel behind the opening of the leftover grey piece. I then placed two smaller rectangle dies from the same set and ran them through my machine. (top right pic)
I repeated this process with another watercolor panel to cut the cross piece. (bottom right pic)
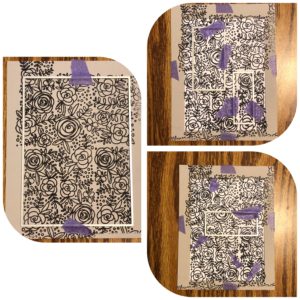
The panels are cut precisely to fit criss cross on top of each other and will now line up perfectly on top of the grey panel as well.
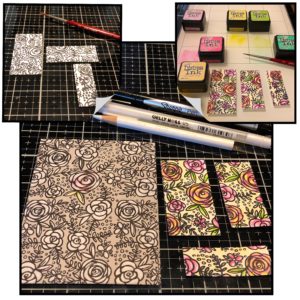
The three panels were watercolored using Distress Inks and a #2 DaVinci Cosmotop Spin brush.
I felt that the grey panel needed a little something more so I colored in the images with a White Prismacolor Pencil. You can see how short my pencil is. I use white pencils a lot. Also, I like to sharpen my pencils frequenty, so I tend to buy them in bulk.
I went back over the images with a fine point black Sharpie to clean up the lines and used a White Gelly Roll pen to color in the dots.
At one point I played around with adding color to the images…thus the single colored flower! LOL I tested it where a panel would cover it.
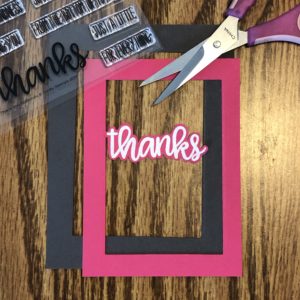
The sentiment is from the Thank You Senti-Mini Stamp Set. It was stamped with Versamark Ink, onto Hero Arts Azalea cardstock, and heat embossed with Hero Arts Fine White Detail Powder. There is a coordinating Thank You Senti-Mini Die Set, but I don’t have it, so I fussy cut it.
I cut two additional pieces of cardstock using the HA Azalea and Simon Says Stamp Slate Gray cardstocks. They were attached to a #110 Neenah Solar Crest folded cardstock base using a Kokuyo Tape Runner.
Tip:
I usually cut the middles out using the same HA Rectangle Die Set. The middles aren’t seen and it seems so wasteful. These small scraps are perfect for sentiment strips!
I mounted the watercolored panels onto more HA Azalea paper, leaving a thin border. After playing around with the strips I decided to leave the horizontal piece off. It would have worked better with a much smaller sentiment. The strips were backed with dimensional foam tape and lined up on the panel.
The sentiment had a single layer of foam tape added to the back. An additional layer was added where the sentiment extends past the raised panel.
Tip:
I added Hero Arts Precision Glue on top of the foam tape on the panels and the sentiment. This allowed me a little wiggle room to slide them around for perfect alignment.
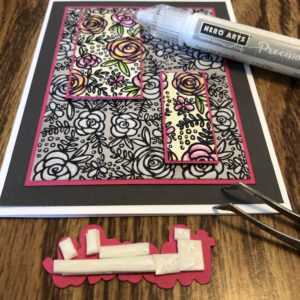
I was able to cut additional pieces from the leftover panels using various rectangle, square, and circle dies. Along with the additional grey panel, I have enough pieces to create other cards as well using plain white backgrounds.
As always, thank you for sharing a bit of your time with me today on another creative journey.
Joyfully,
Jo Ann
Supplies used:
The products that I used are listed below in compensated affiliate links. You can click the icon of your choice, below the product picture, to go directly to your favorite shop. There is NO additional cost to you when using these links. Thank you for your support!