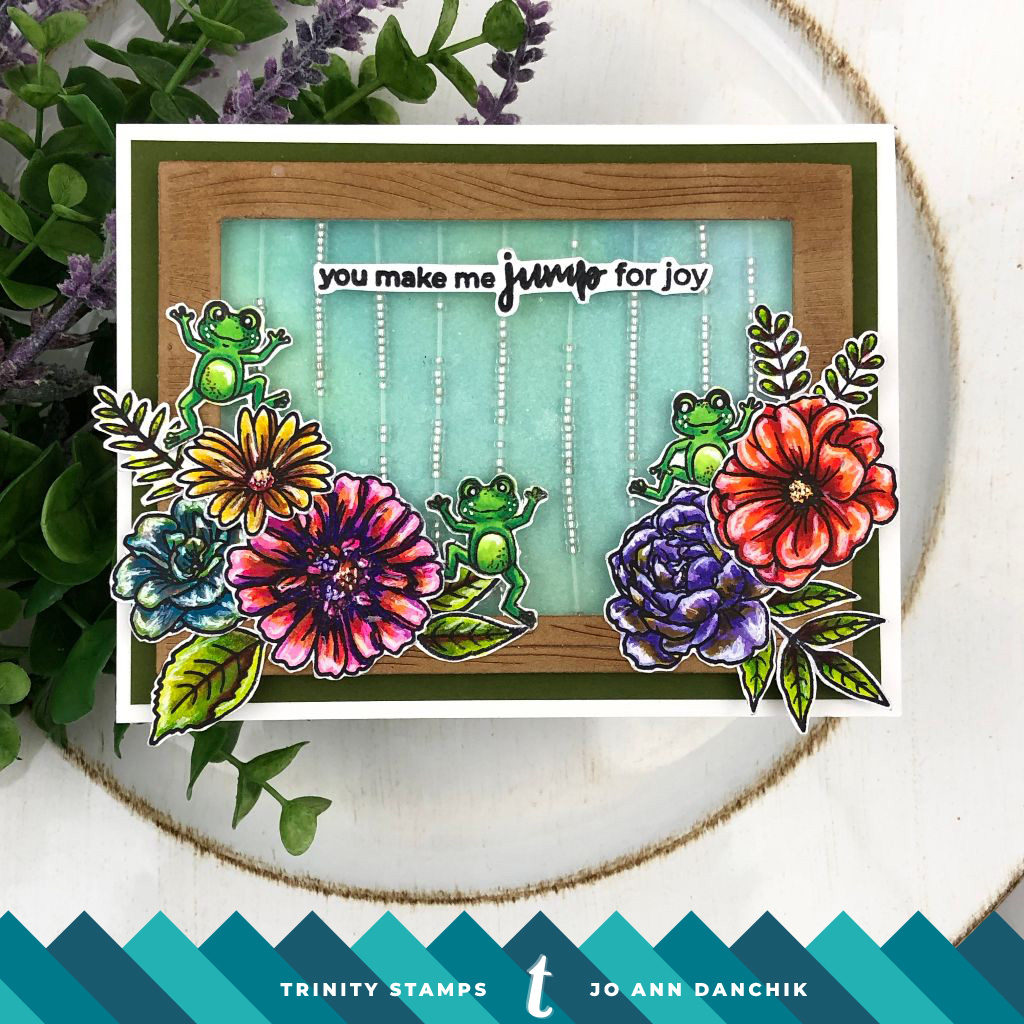
Midweek Creations With Jo Ann: Tropical Rainforest Shaker Card
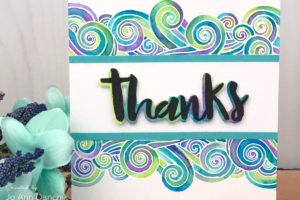
Did you know that there is a National Frog Jumping Day? There is…but it was on May 13th. I have lots of useless bits of information like this floating around in my head that I am happy to share with y’all! LOL
____________________
(Products highlighted in teal are active links to the shop.)
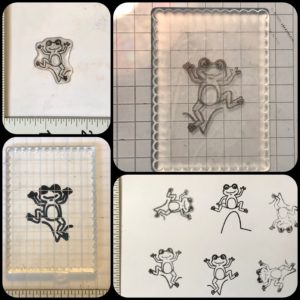
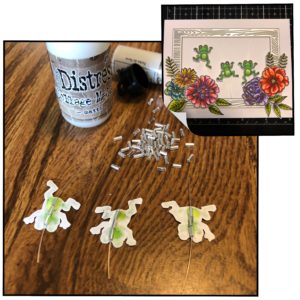
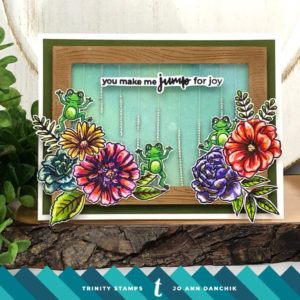
I can’t seem to get enough of this adorable Puddle Jumper Stamp Set. Everything about it just makes me smile…especially these adorable frogs. It comes with two different frogs. I wanted a mirror image of one of the frogs so I pulled out my MISTI and some Paper Smooches Mirror Block Stamps. They are simply solid blank stamps.
To start, place a piece of acetate in the stamping tool with the stamp on top, facing up. (upper left pic) Place a mirror stamp on top and close the lid. Open the lid and ink the frog stamp. I used Copic friendly Picket Fence Studios Black Hybrid Ink.
Close the lid. The ink will have transferred to the blank mirror stamp. (upper right pic)
Immediately, before the ink dries, remove the stamp on the acetate and add a piece of #80 Neenah cardstock. Close the lid to transfer the image to the paper. (lower left pic) You can repeat this process several times to get a darker image.
I had several failed attempts. The regular frog stamps are the two frogs in the middle. The image on the bottom left was good enough to use. (lower right pic) I was able to touch it up with a .01 copic multiliner, after I was done coloring with Copic markers, and it fits right in with the other two. If you don’t understand these instructions there are many video tutorials available on YouTube.
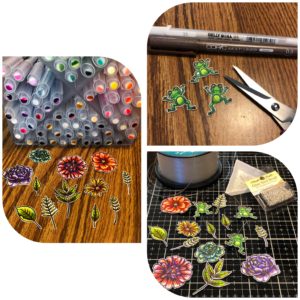
I stamped a bunch of flowers and leaves, from the Spring Fling Floral Stamp Set, also using the Hybrid Ink, onto smooth white Bristol Cardstock. They were watercolored with Zig Clean Color Real Brush markers. There is a coordinating Spring Fling Floral Die Set, but I don’t have it, so I fussy cut the images with scissors.
I added brown dots to the frogs using a Brown 0.3 Copic Multiliner. The eyes were enhanced with black and white Gelly Roll Pens. And of course, freckles were added. This set also has a coordinating Puddle Jumper Die Set, but I don’t have that one either, so I fussy cut those images as well.
I had the idea that I wanted the frogs to slide up and down in the background. I glued bugle beads to the back of each frog. When they were dry I slid clear fishing line through them. While they slid on the line, they didn’t really move freely enough once I had them in the shadow box. They might have slid better if I had thinner line, but I didn’t, so I pulled the beads off of the back. I eventually glued the frogs to the front of the card.
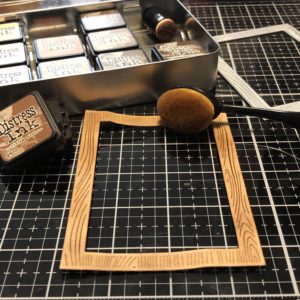
The wood frame was cut using the Hero Arts Infinity Wood Frame Dies. I cut the frame from Neenah Desert cardstock, using the second largest frame. I went over the top with Picket Fence Life Changing Brushes and Vintage Photo Distress Ink.
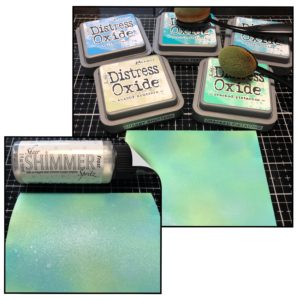
For the back of the shadow box, I blended multiple Distress Oxide Inks onto #80 Neenah cardstock using the brushes. I sprayed the surface with Sheer Frosted Shimmer Spritz.
I added a piece of acetate to the frame and then glued the images to the front using a Hero Arts Glue Pen.
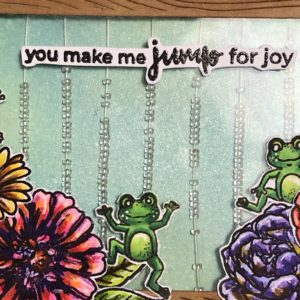
I laid a strip of Scotch Foam Tape on the top and bottom edges of the wood frame. I strung seed beads onto the fishing line and added them to the back. When the frogs didn’t work, I added additional lines of beads. I wanted it to look like a tropical forest rainfall.
Another layer of foam tape was added. I used an anti static powder tool along the inside edges of the tape to keep the beads from sticking to the sides.
To keep the beads from disappearing behind the floral grouping, I sandwiched Scotch Foam Tape behind and on top of the line, as a stopper.

The backing was added to the frame. The sentiment is also from the Puddle Jumper Stamp Set. It was stamped with VersaFine Claire Nocturne Ink and heat embossed using Hero Arts Clear Embossing Powder. It was added to the front with dimensional tape.
The entire panel was added to a piece of Hero Arts Palm cardstock, and then onto a #110 Neenah Solar Crest folded cardbase, using a Kokuyo Tape Runner.
As always, thank you for sharing a bit of your time with me today on another creative journey.
Joyfully,
Jo Ann
Supplies used:
The products that I used are listed below in compensated affiliate links. You can click the icon of your choice, below the product picture, to go directly to your favorite shop. There is NO additional cost to you when using these links. Thank you for your support!