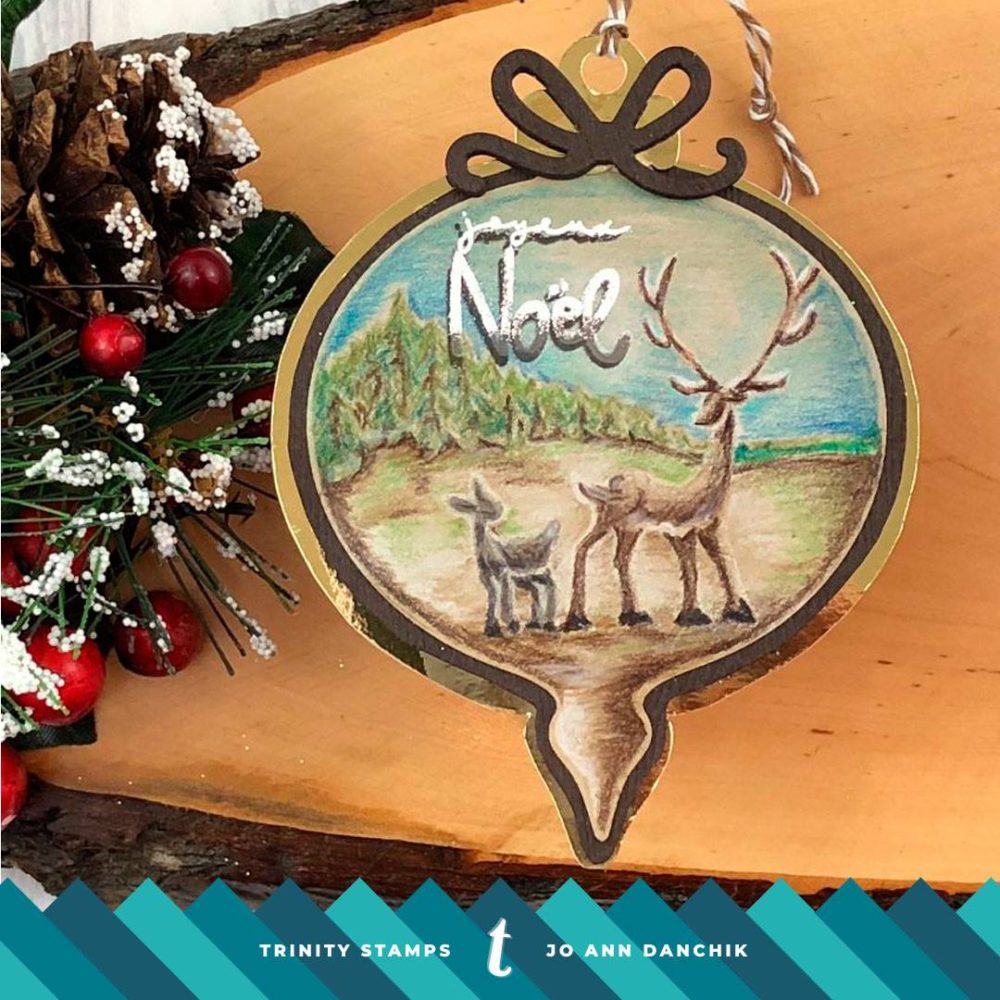
Midweek Creations With Jo Ann: Woodland Deer Ornament
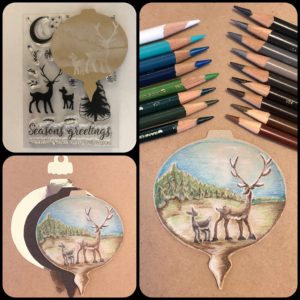
I love the Stag, with his magnificent antlers, and the sweet baby Fawn, from the new Trinity Stamps Season Greetings Silhouette Stamp Set. It stamps a solid silhouette image, but I wanted to be able to use the stamp and color the image in separately. I will show you how to make this work in the tutorial. The end results look a bit like no line coloring. So grab a cuppa and let’s get started.
____________________
(Products highlighted in teal are active links to the shop.)
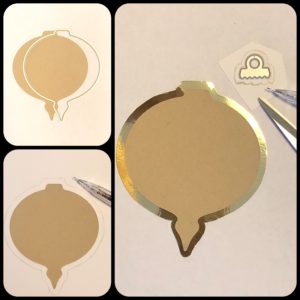
I thought that it would be fun to deviate from the traditional card shape and make an ornament, so I cut the base, using the Hero Arts Infinity Ornament Die, from Kraft cardstock. I placed the cutout onto the back of a piece of mirror gold cardstock and drew a slightly larger ornament for an additional layer. The ornament topper was now too small, so I drew a larger border around it as well. Both were fussy cut.
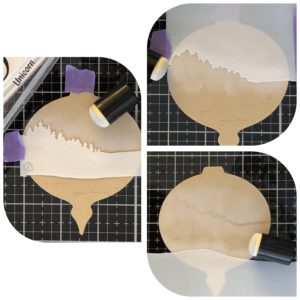
I penciled in a light line for where I wanted the deer to stand. I needed some sort of background so I pulled out the new Winter Wonder Background Stencil Set, from Honey Bee Stamps. I used one edge to create a tree line horizon by lightly dusting a layer of Hero Arts Unicorn pigment ink with a sponge dauber. I used the top layer of the stencil set and repeated the process, making sure to leave a small border between the two. A third stencil was used to create some groundwork for the deer to stand on.
I stamped the two deer, again using the Unicorn pigment ink, and dried everything throughly with a heat gun.
I love the look of colored pencil on Kraft cardstock so I pulled out my Prismacolor colored pencils and colored in the deer. The white pigment ink allows me to color over it easily and keep the colors light and bright on the Kraft.
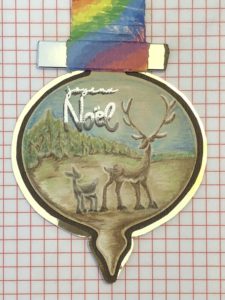
I created some trees and shrubs along the skyline and lightly colored in the sky. The ground was next. I had intended to create a snowy scene, but was happy with the greens and browns, so I stopped. Also, I was going to smooth out the coloring, but I really liked the streaky pencil work. It gives the piece a rustic, woodsy look.
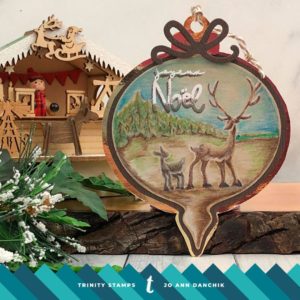
As I was putting the card together I decided to add another layer. I traced a slightly larger ornament onto Woodgrain Bark cardstock, cut it out, and assembled all the layers.
*I used Altenew Gold Foil Cardstock and Woodgrain Bark Cardstock for my layers, but have no way to link them for you. You can buy them separately or in the Specialty Paper Sampler that they carry.
The sentiment is from the Joyeux Noel Stamp Set. I stamped it with Ranger Archival Potting Soil ink. I used my MISTI because I didn’t want to mess it up at this point! LOL
It still needed something extra, so I moved the panel slightly higher and to the left, and stamped it again with Versamark ink. Be sure to dry the brown ink and use an anti static powder tool first. After stamping with Versamark, I added Hero Arts White Embossing Powder. I used a dry paintbrush to remove some of the powder from the bottom part of the Noel and heat embossed.
I cut the bow, from the Hero Arts Infinity Ornament Die Set, four times. I stacked and glued them together using Gina K Designs Connect glue.
I love the rustic look of this ornament. You could easily add another piece to the back and create a shaped card but I plan to hang this from the wreath roping on my mantle. It would also make a fabulous gift tag.
As always, thanks for joining me today.
Joyfully, Jo Ann
Supplies used: The products that I used are listed below in compensated affiliate links. You can click the icon of your choice, below the product picture, to go directly to your favorite shop. There is NO additional cost to you when using these links. Thank you for your support!