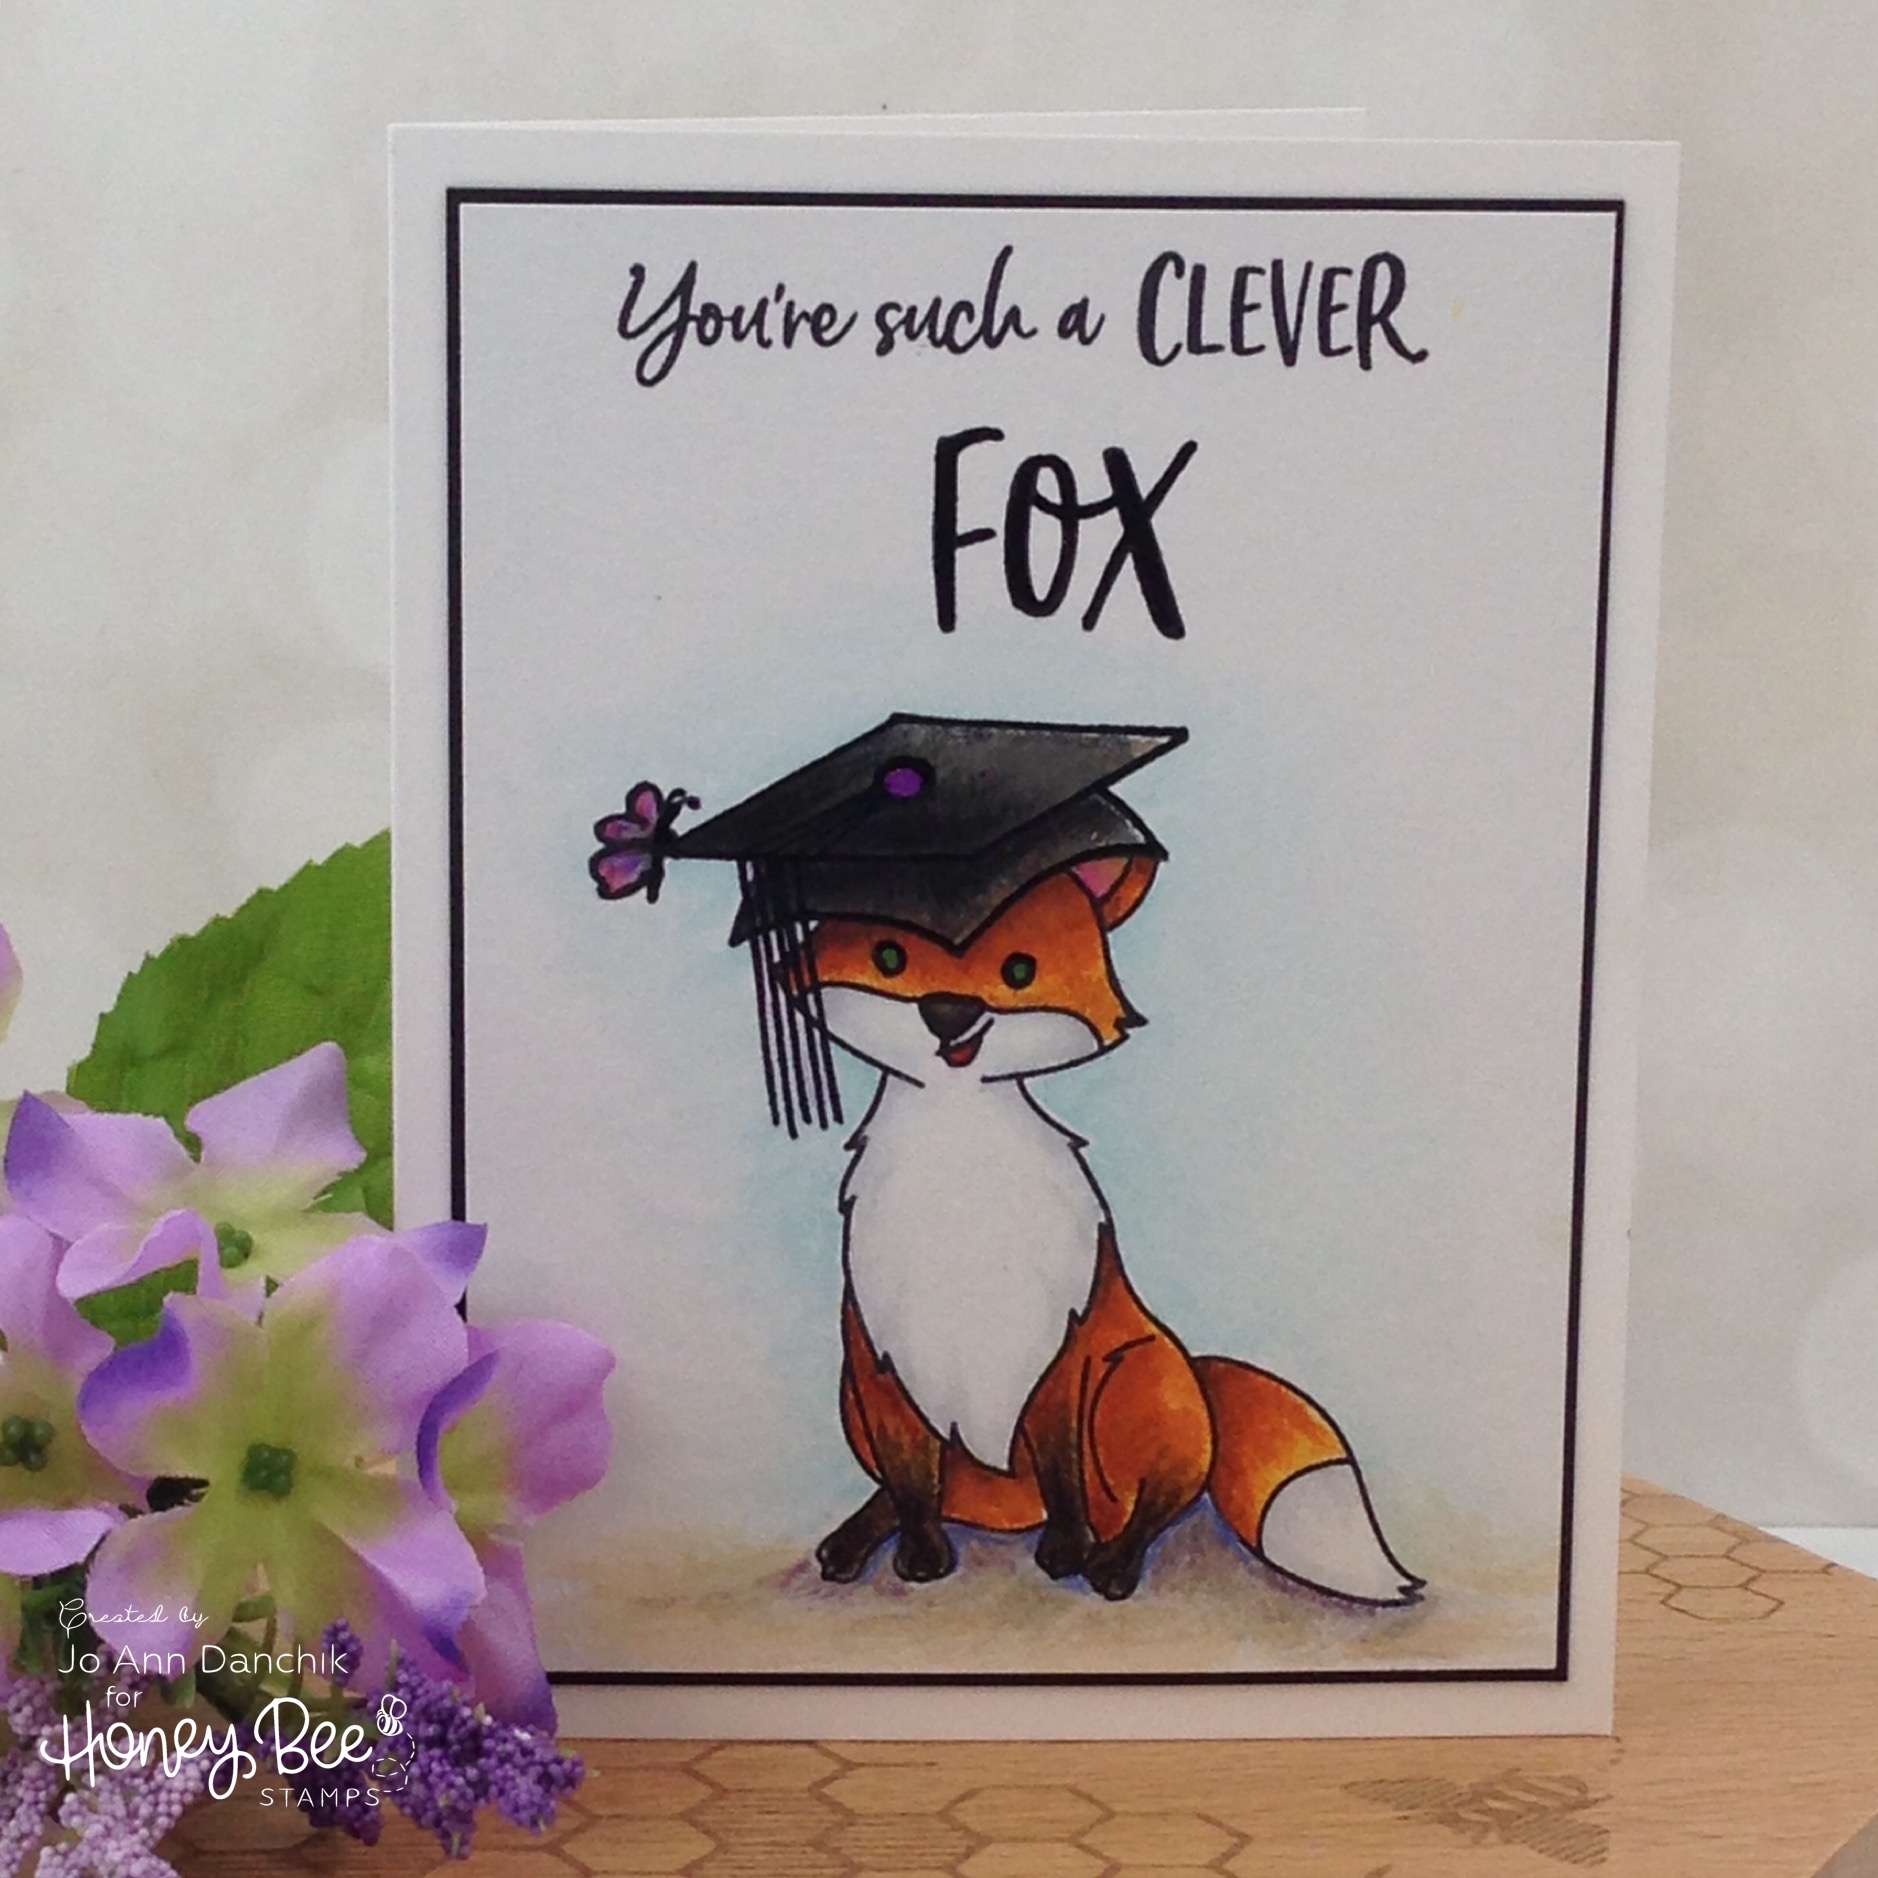
Sneak Peek Day Four: You’re Such A Clever Fox
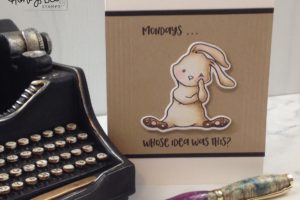
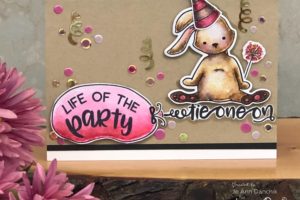
It’s Release Week at Honey Bee Stamps. This is Day Four of the Cheerful Love Sneak Peeks. Today we are featuring the Feelin’ Foxy and Foxy Sentiments stamp sets. This sweet set of foxes, paired with the fun and sassy sentiments, were so much fun to work with.

(Compensated affiliate links are used with NO cost to you. Products highlighted in teal are active links. All the supplies used are also linked to multiple shops at the end of the post. Thank you for your support!)
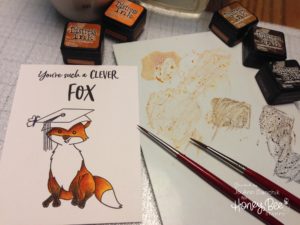
I wanted to make another graduation card so I also chose the graduation cap from the Penny The Platypus stamp set. I put a piece of Tim Holtz Watercolor cardstock into my MISTI. You don’t need a stamping tool to do this but it sure makes it easier, especially working on bumpy watercolor paper where you don’t always get a great first impression.
I laid all the stamps out to make sure that everything would fit onto my card front. It is important to remember that the image that you want in the front needs to be stamped first. (see left pic below) I closed the door and the cap and sentiments stuck to the lid of the MISTI.
Ink only the cap with Ranger Black Archival ink and stamp it onto the paper. Stamp the image again onto Masking Paper from Inkadinkado, cut it out, and place it over the cap. Line the fox up on top of the cap. The ears were sticking out over the cap so I masked a few more areas off with small pieces of Post-It tape. (see top right pic below)
Ink and stamp the fox. (see bottom right pic below)

Remove all the masks and ink and stamp the sentiment. Because you never took it off of the MISTI, it should still be lined up properly.

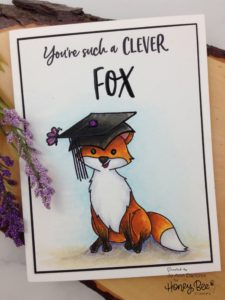
I watercolored the fox using various shades of Distress Inks. I just love his little brown paws!
To give some shading to the white fur areas, I added Weathered Wood Distress Ink around the edges. Keep a light hand and fade the edges out with plenty of water.

The graduation cap was painted using a variety of greys and black and the butterfly with shades of purple. The top of the tassel and the eyes were dotted with Wendy Vecchi’s Enamel Accents; Cactus Flower for the cap and Leaf Green for the eyes.
The background was watercolored with Tumbled Glass Distress Ink. I outlined the cap, nose, and eyes with a black Sakura Glaze Gelly Roll pen and I went back over all the other lines with a Sakura Pigma Micron .03 pen. Look at that sweet face!!

For the ground I used Antique Linen Distress Ink. The cast shadows were darkened with Prismacolor Colored Pencils. The panel was mounted on black cardstock, and then onto a #110 Neenah Classic Crest cardstock base, using a a Kokuyo Dot Tape Liner. This simple one layer card will be easy to send through the mail.
Be sure to check back tomorrow. I will be part of the new release Cheerful Love Blog Hop. You will be able to find more inspiration and all the new products here, at 7:00 am CST on Friday, February 23rd. The links below are active for the products used.
Joyfully, Jo Ann
Supplies used:
The products I used are listed below in compensated affiliate links. You can click the icon of your choice, below the product picture, to go directly to your favorite shop. There is NO additional cost to you when using these links. Thank you for your support! All products used were personally purchased by me, except for the release from Honey Bee Stamps. This post was NOT paid for.